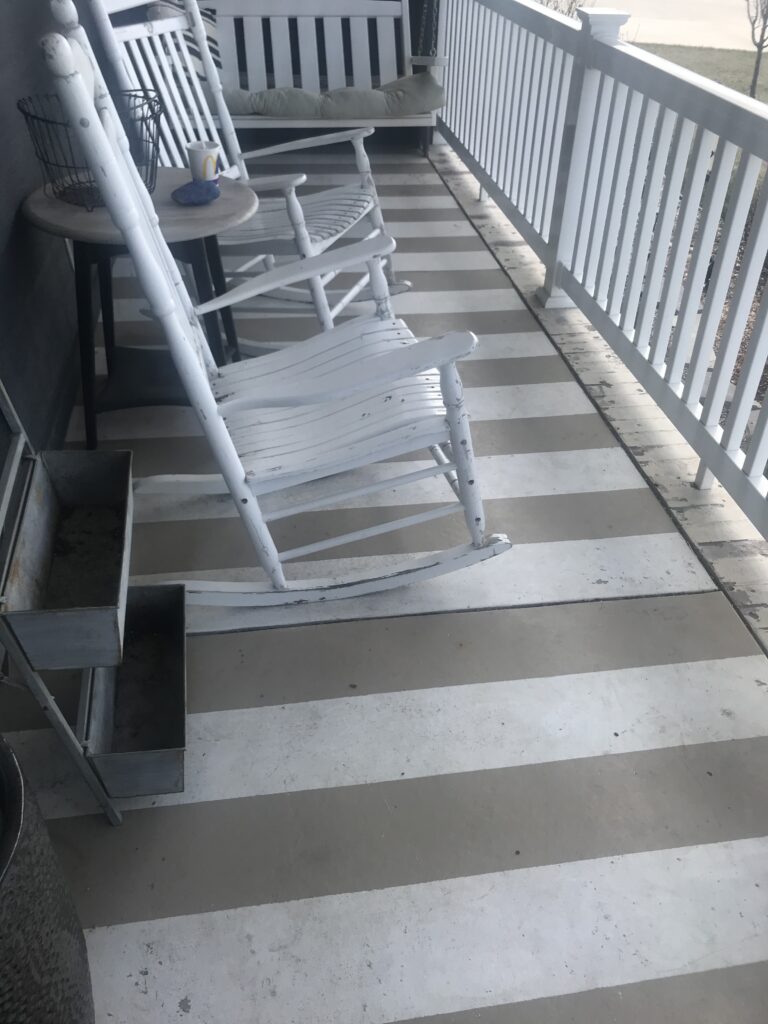
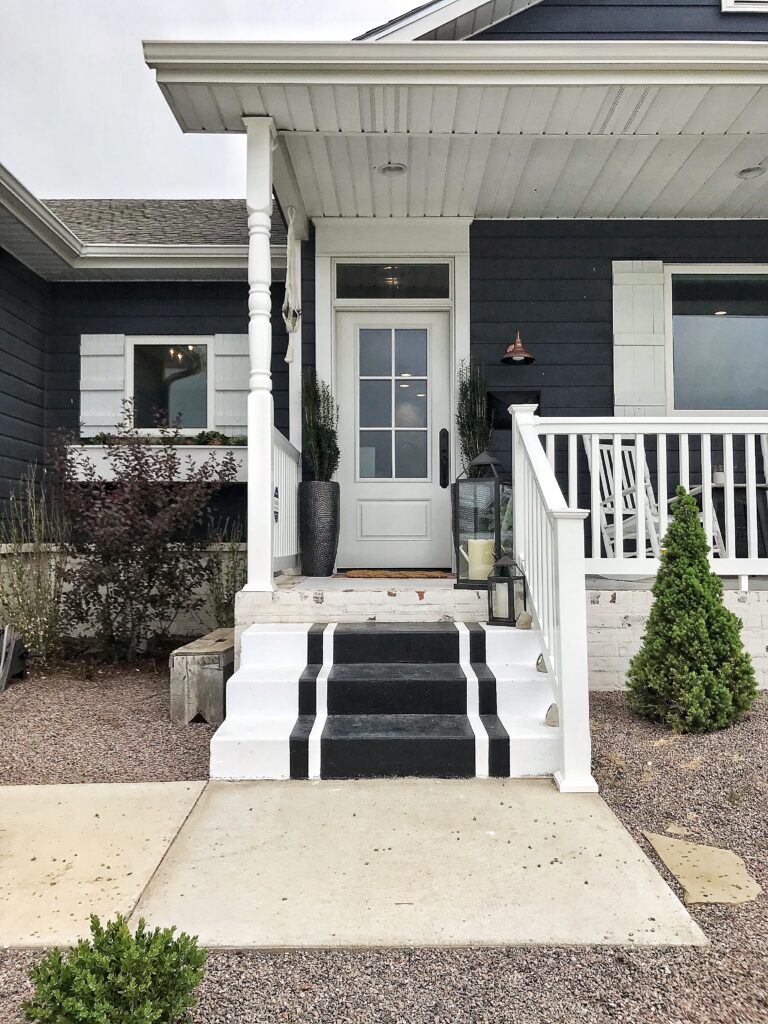
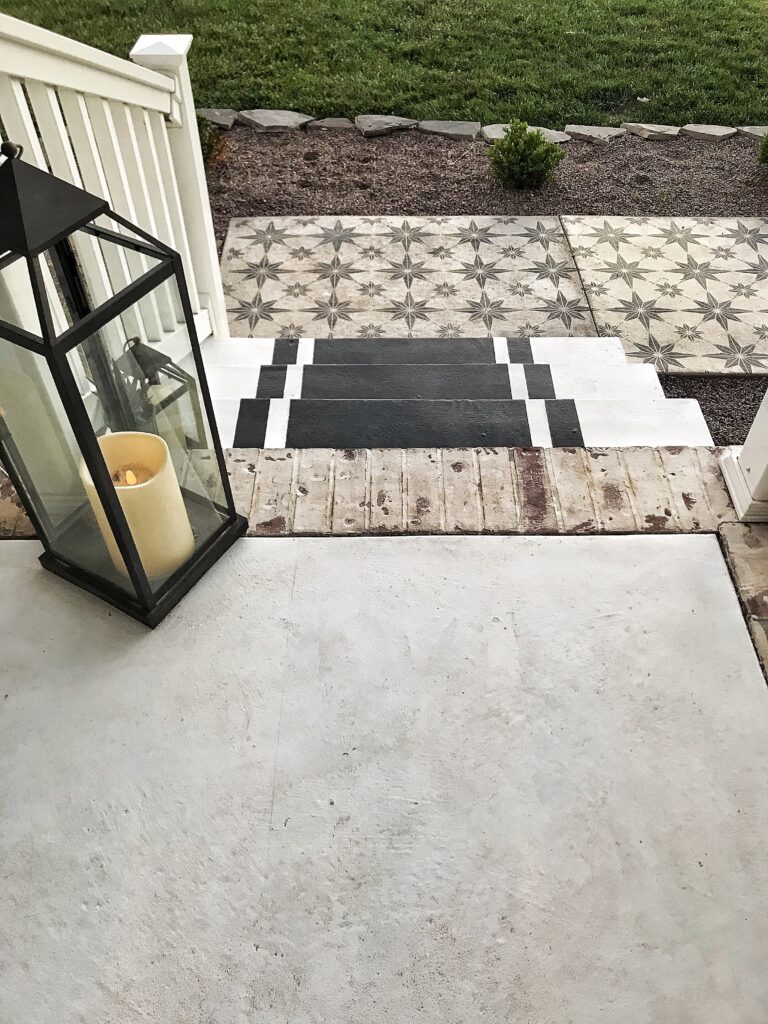
The last few months Matt and I have been working on the curb appeal of the front of our home. I painted our porch and gave it a mini spring makeover. New rugs and some plants made a big impact. Never underestimate small details; they can make a big difference. And this last weekend I stenciled a pattern onto our sidewalk of the front of our home. I LOVE how the stenciled sidewalk turned out!!! I was honestly a little nervous to do it. I’ve never stenciled anything before and you don’t see too many stenciled sidewalks around. But I decided to just go for it and hope for the best…. kind of been my mantra lately!
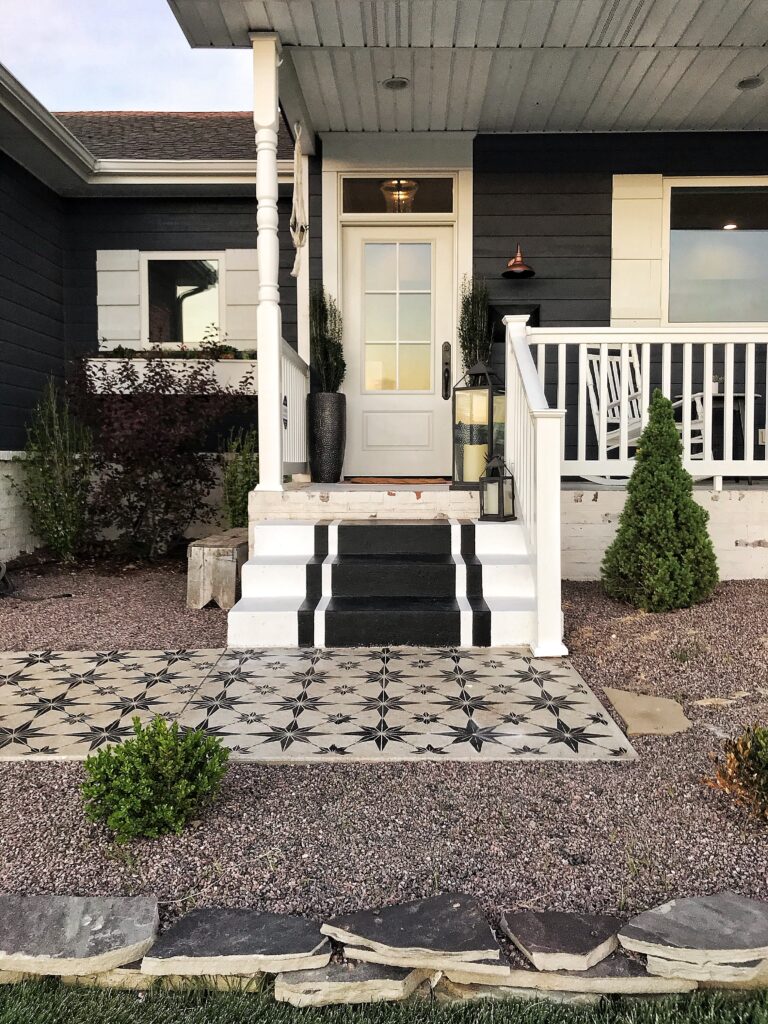
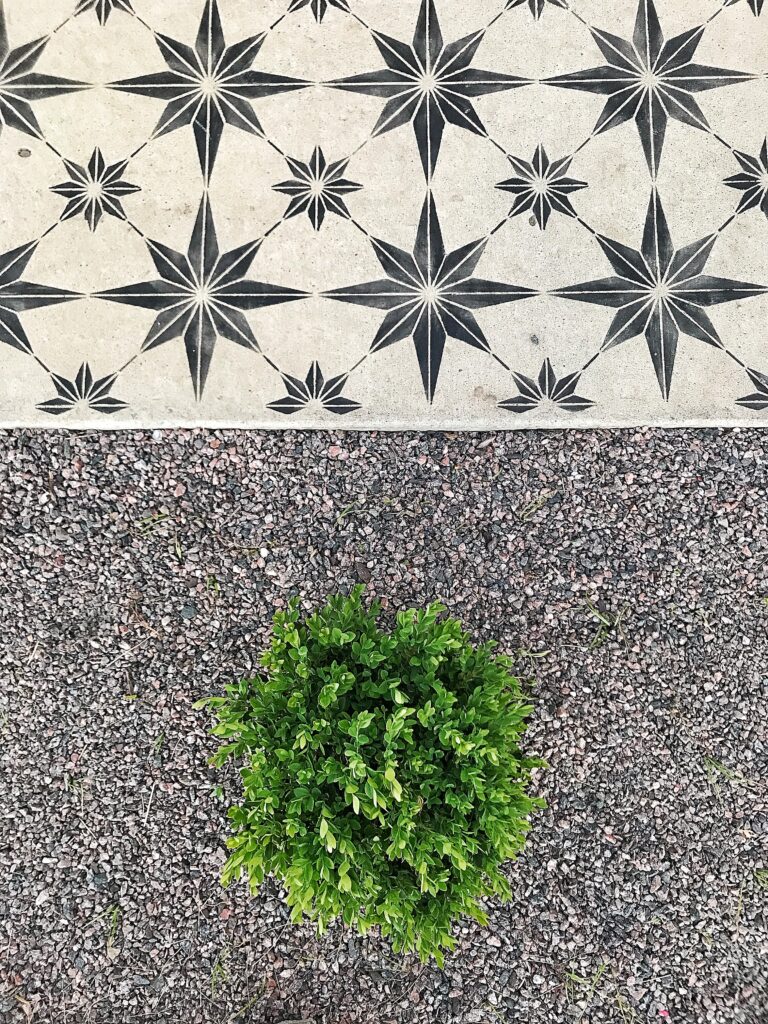
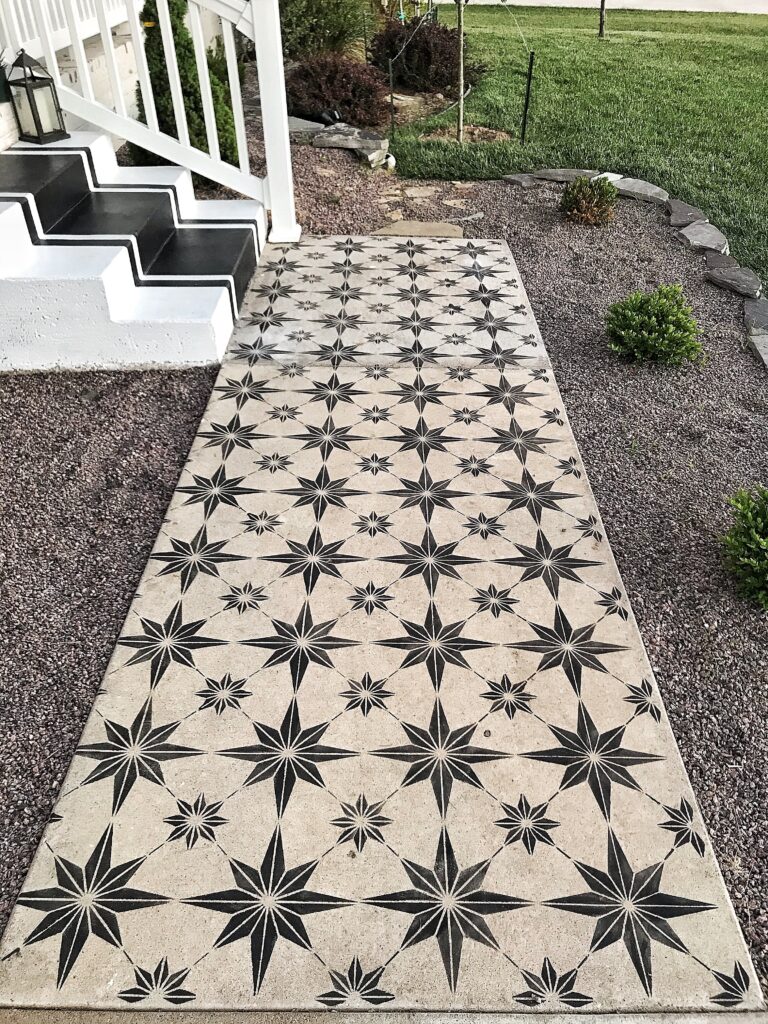
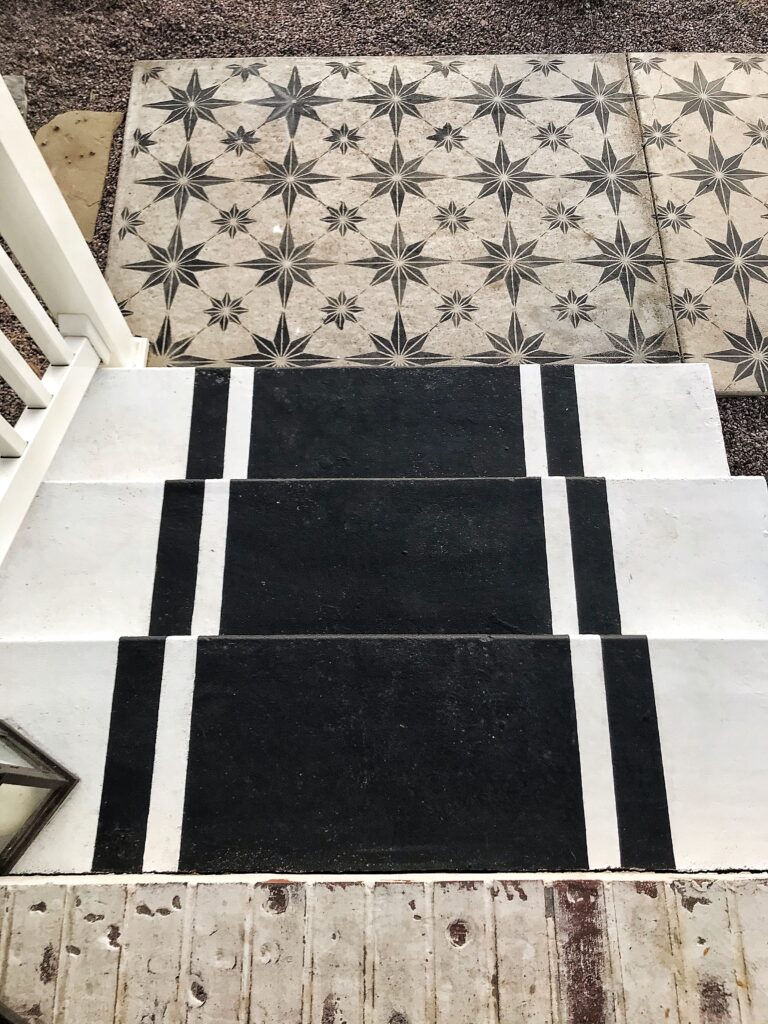
Isn’t it so cool?!?! I’ve always loved the look of stamped concrete but that was not in our budget. This cost us $20 for the stencil, I already had the primer and paint on hand leftover from our porch makeover. I purchased this star tile stencil from royaldesignstudio.com to create this pattern. Shipping was SO fast! I was super excited to receive it earlier than expected.

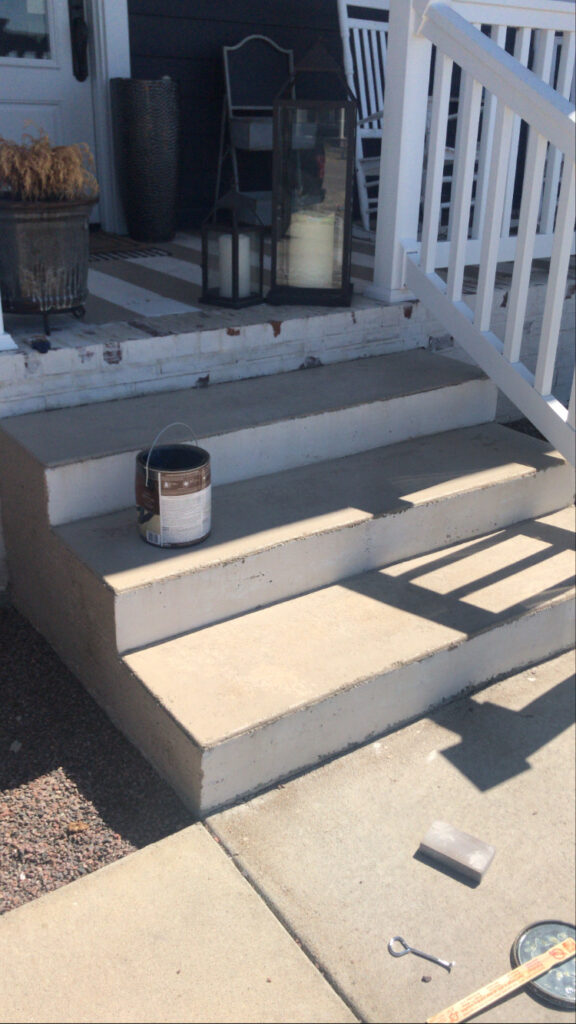
First step was priming our sidewalk. I used the BEHR Concrete & Masonry Bonding Primer. I used a paintbrush to apply it and let it dry over night.
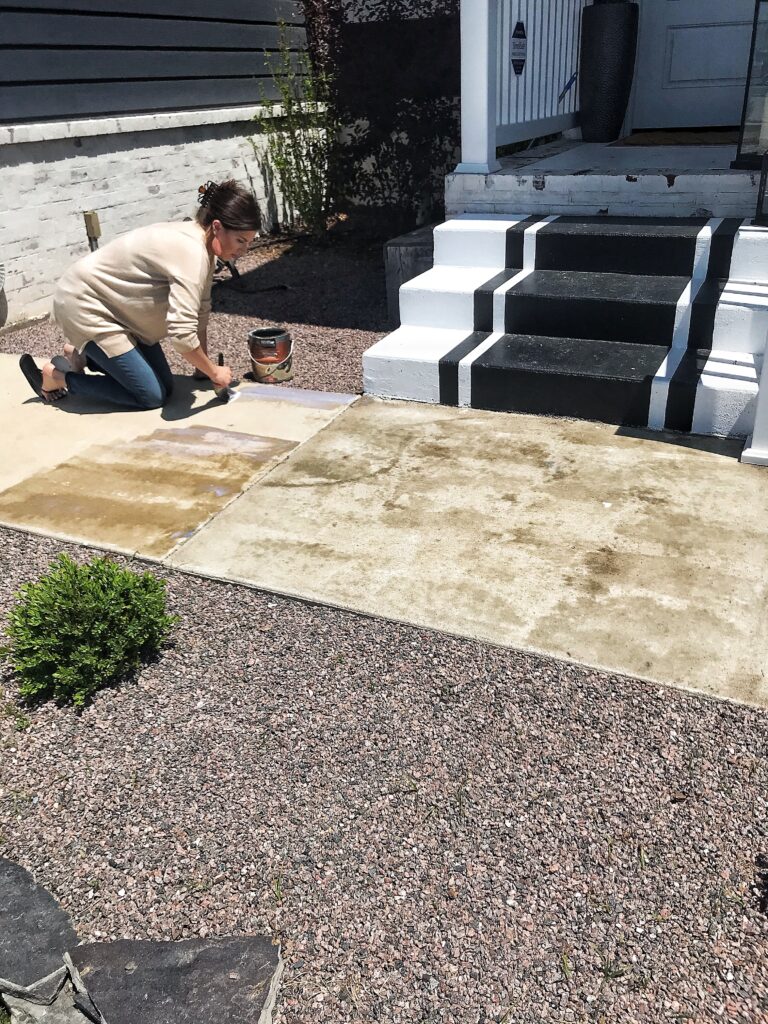
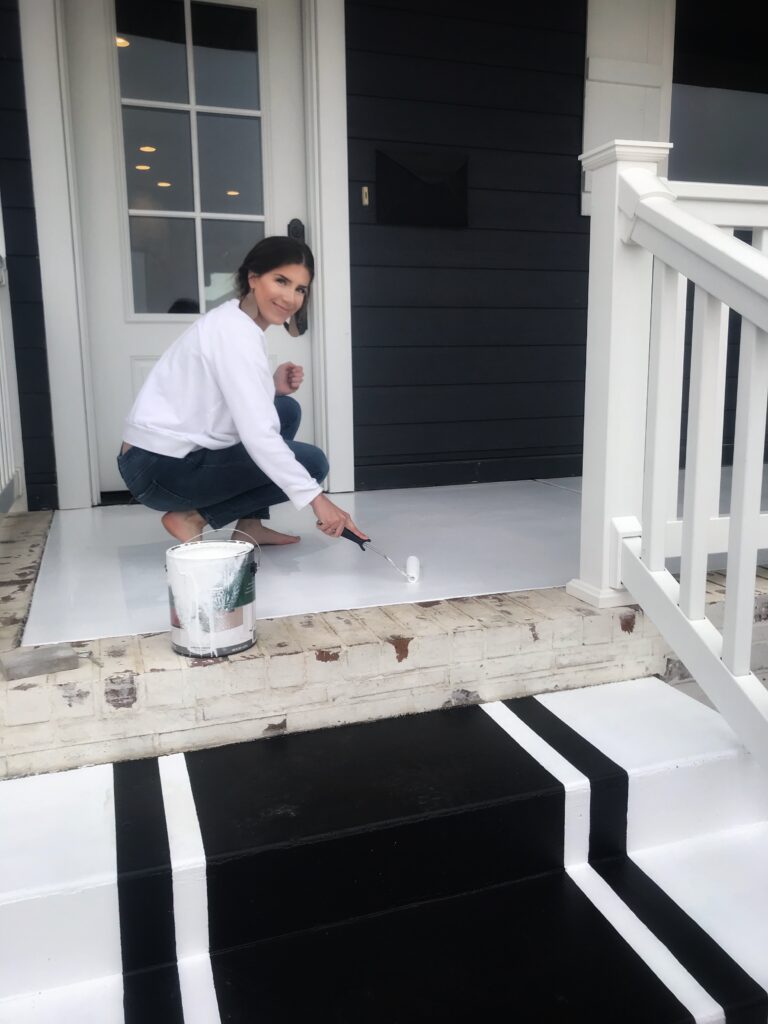
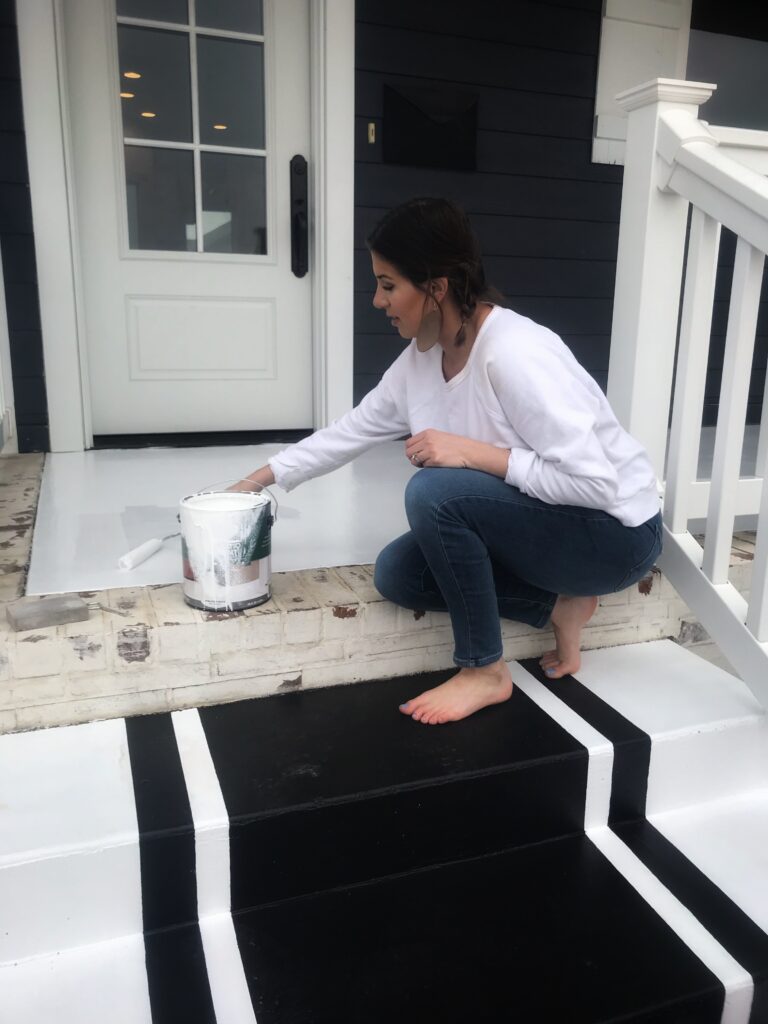
I used the BEHR Porch & Patio Floor paint .
I started out by using a roller when doing the stencil because that’s what I’ve seen others do on Instagram; but after doing a couple I quickly reached for a stenciling brush that I picked up for a couple dollars at Hobby Lobby. I preferred the brush WAY more than the roller. I felt like I had better control and didn’t get any runs with it like I did with the roller.
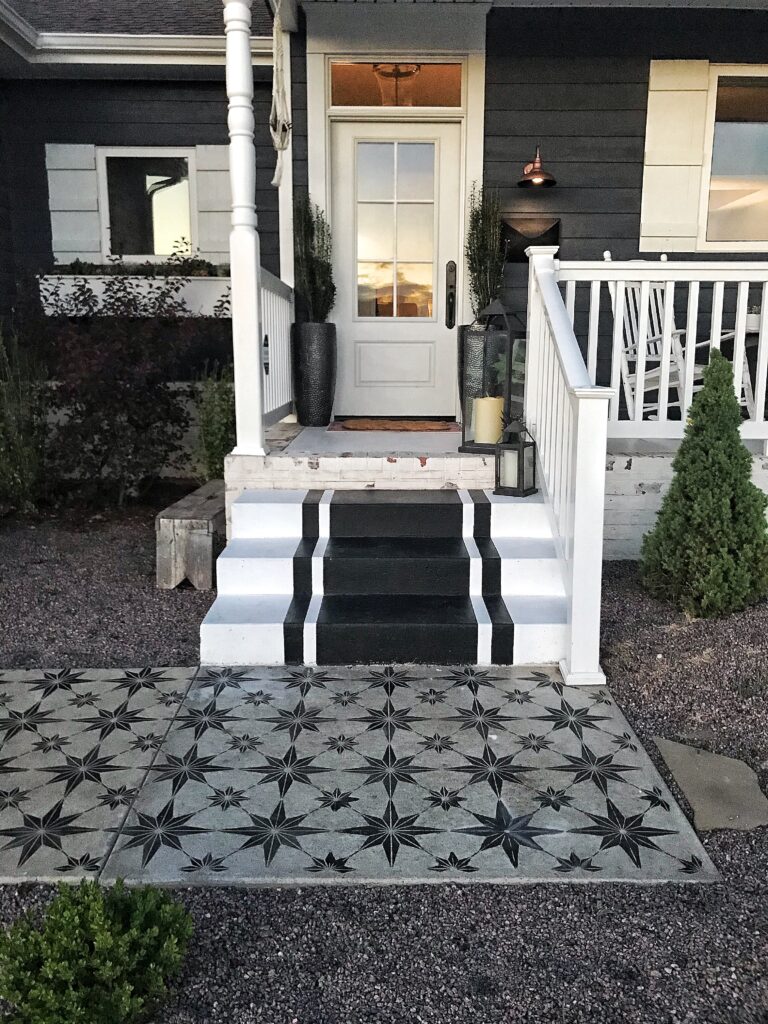
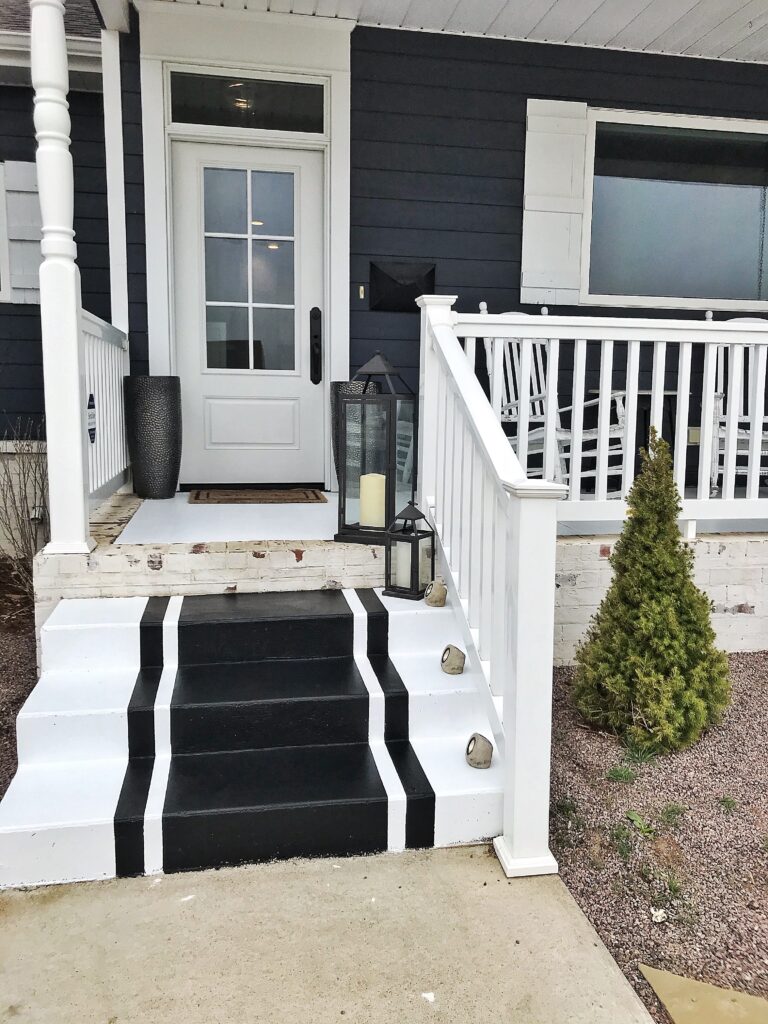
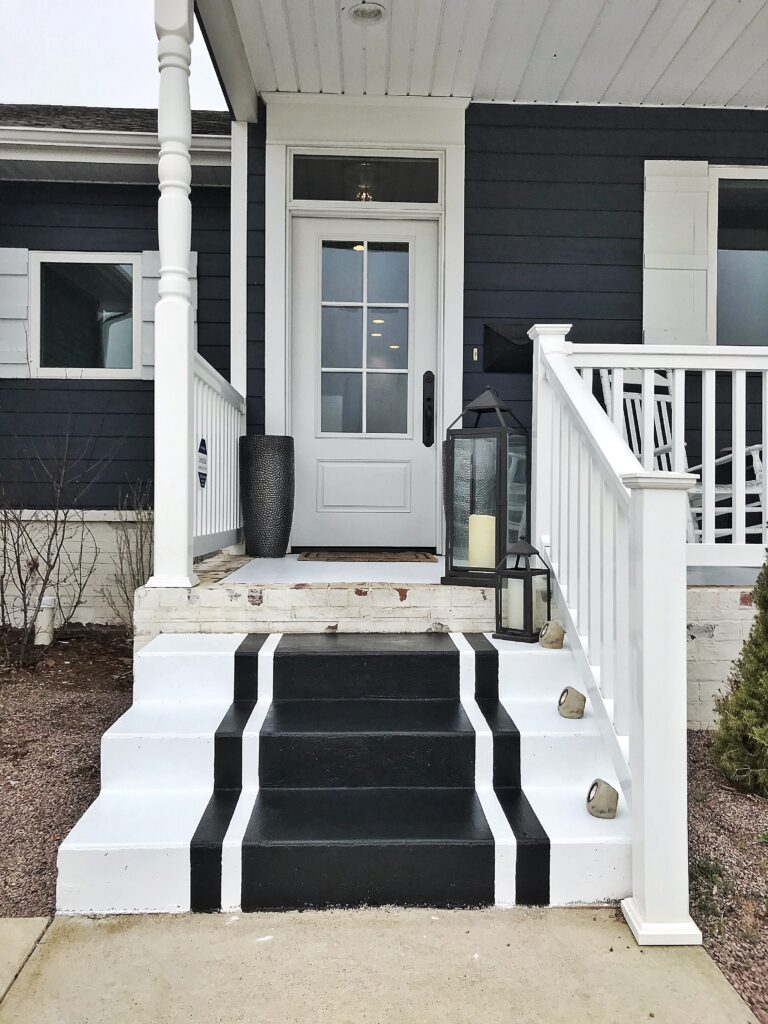
The black design ties into our black striped porch steps and other decor on the porch.
I only had four more spots to go when I accidentally put my stencil on wrong. Nothing can ever go perfect, right?! That would be way too easy. Luckily I had some paint thinner on hand and a wire bristle brush. I let the paint thinner soak for a minute or two on the paint and used the brush to scrape it off. Worked like a charm. Crisis averted.
I know next Spring I will have to more than likely touch some of this up but I’m fine with that. The snow in the winter can cause some of the paint to peel off; especially if it’s sitting there for an extended period of time.
Thanks so much for stopping by!