Hello friends! I hope you have had a great September so far! Can you believe we are about halfway done with this month?! While our …
Hello friends! I hope you have had a great September so far! Can you believe we are about halfway done with this month?! While our …
It feels so good to be typing this post out tonight! I can’t wait to share with you all my spring front porch! A little …
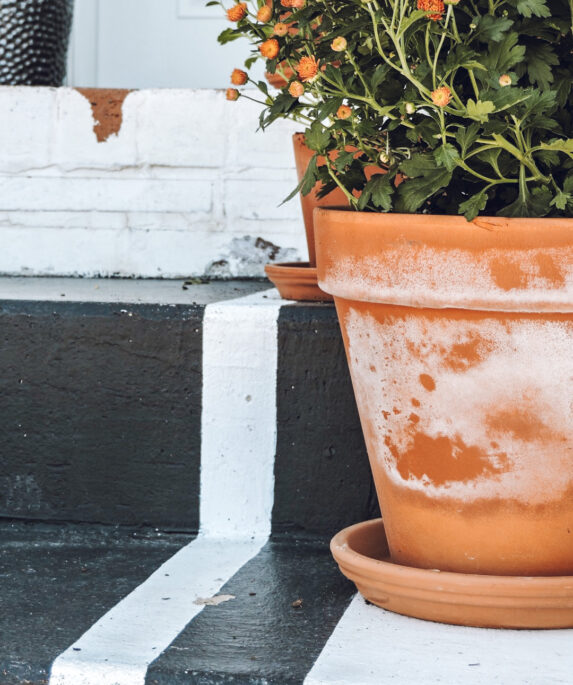
For many years now, I have tried to keep plants alive in these pots on my front porch, with no success. Summers here get quite …

Fall is in the air and I’ve been loving the cooler mornings and evenings. Our family has actually been able to enjoy our front porch …

Hi! Happy Monday! I might be in the minority on this but I have always liked Mondays. It seems to be one of my most …

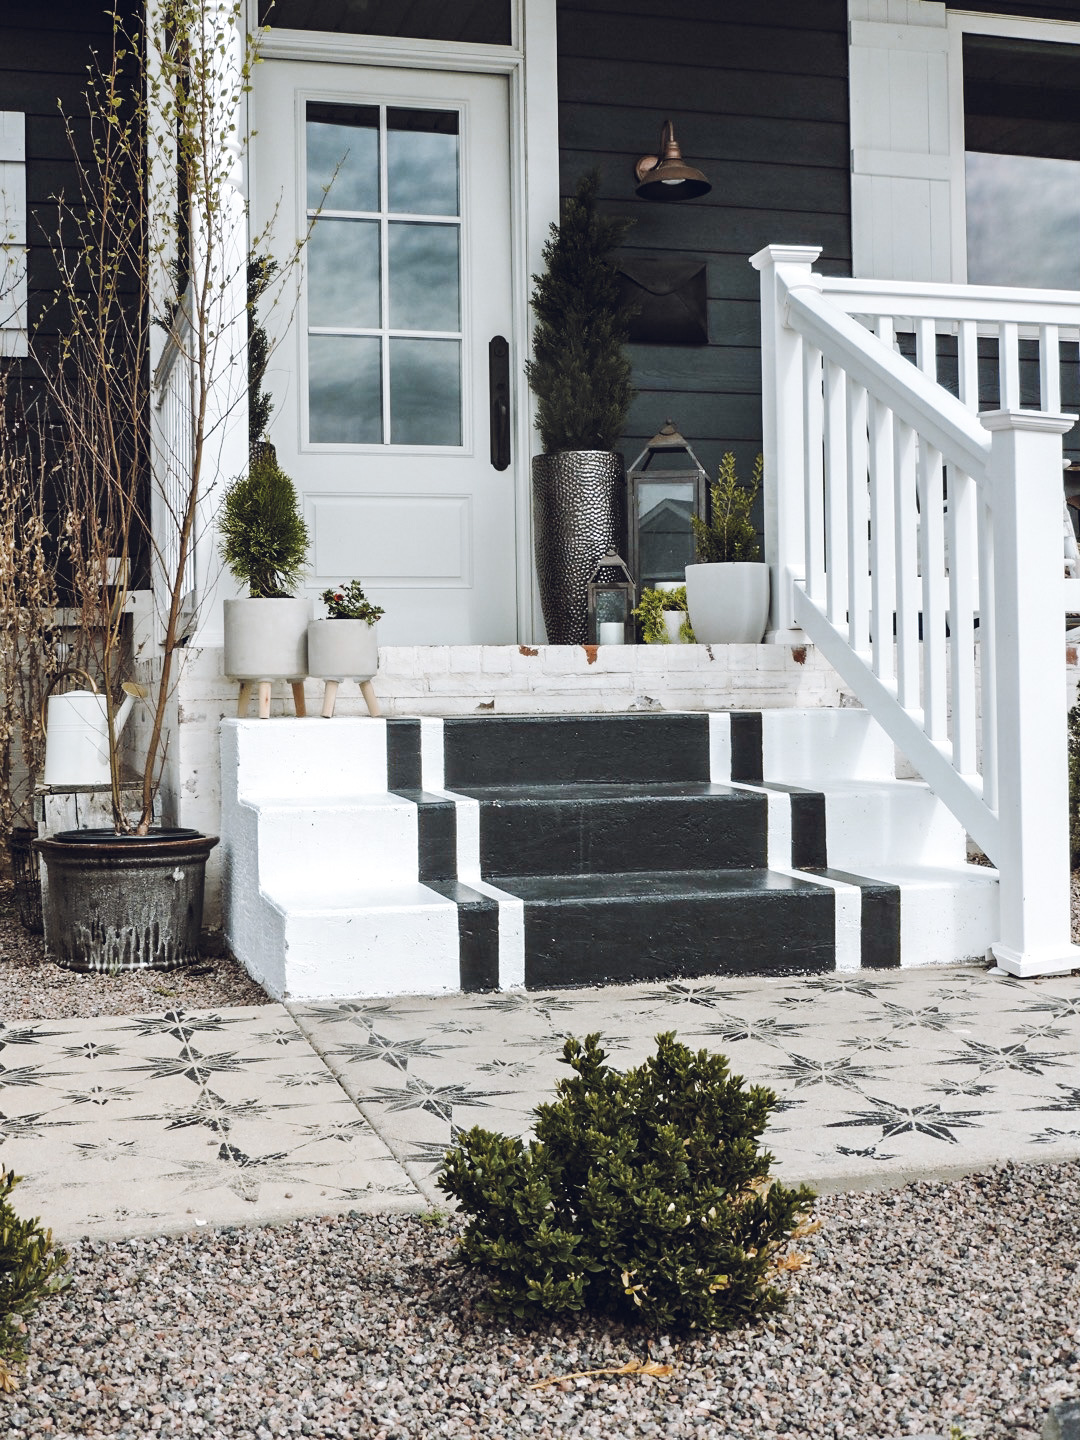
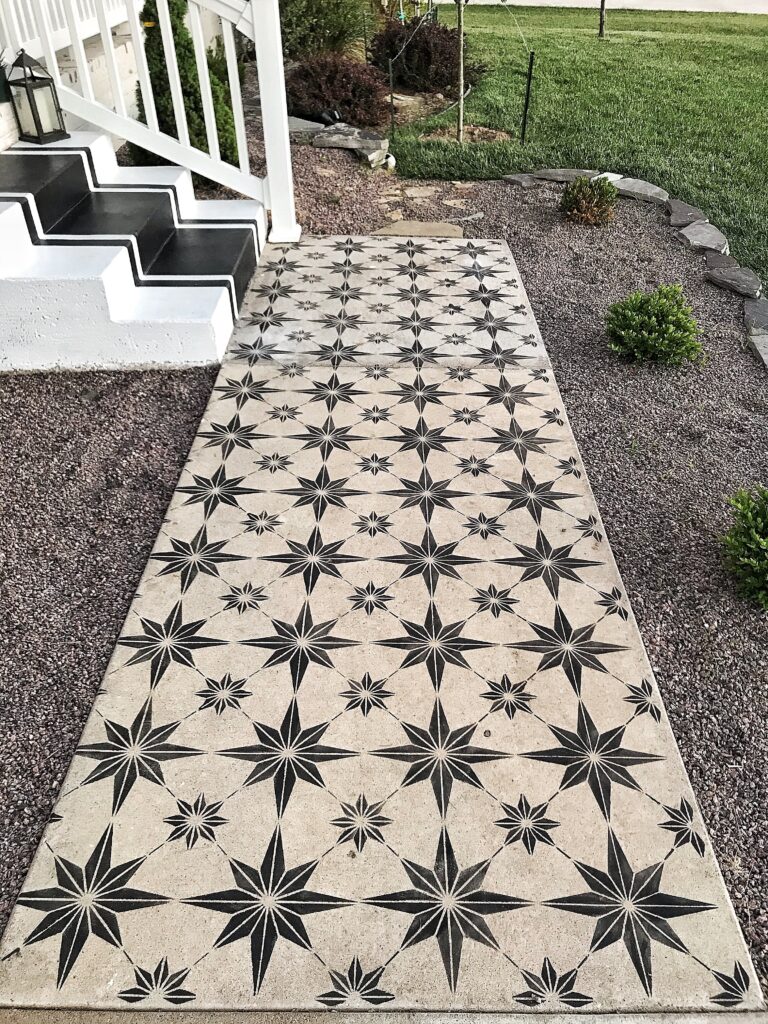
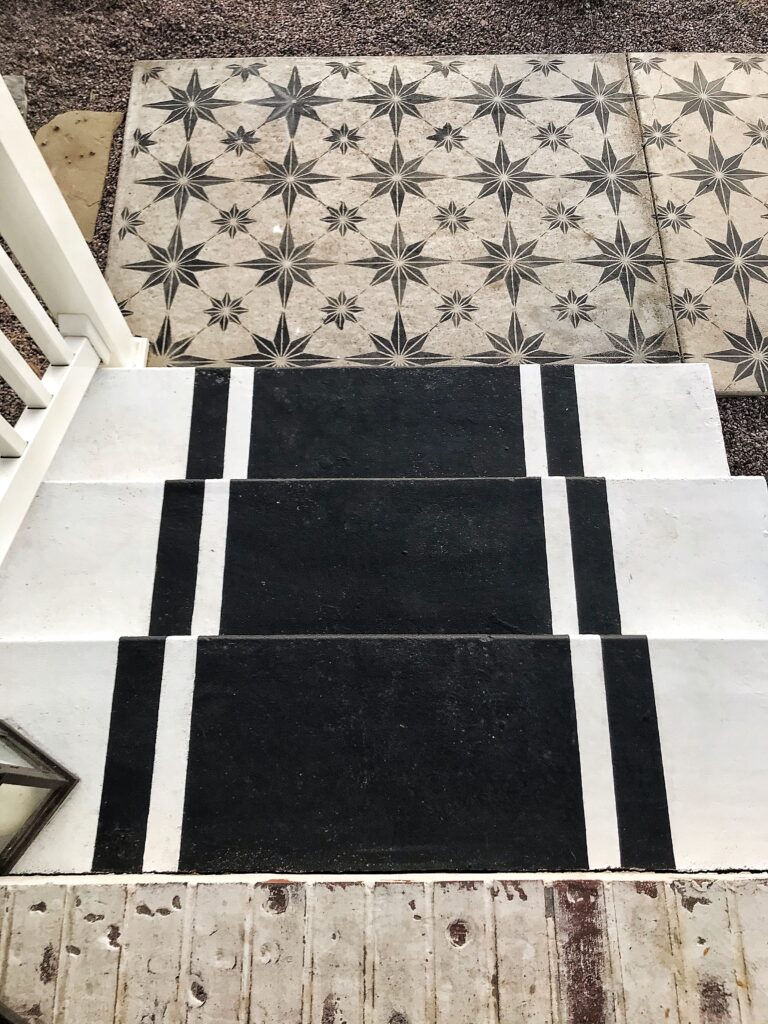
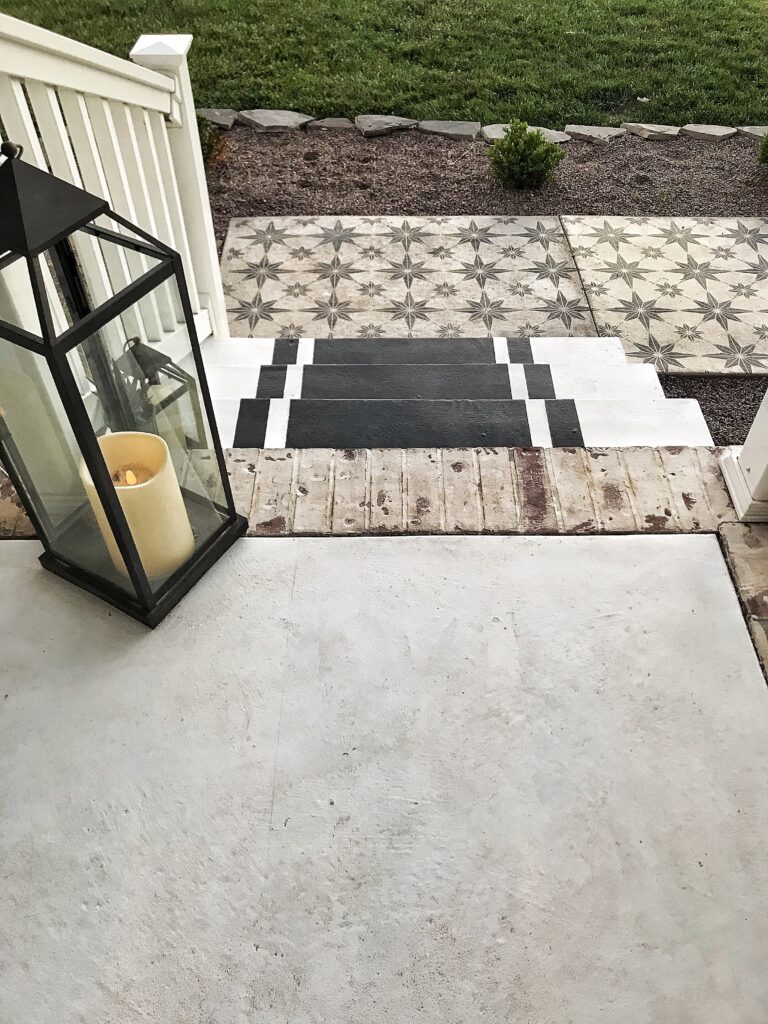
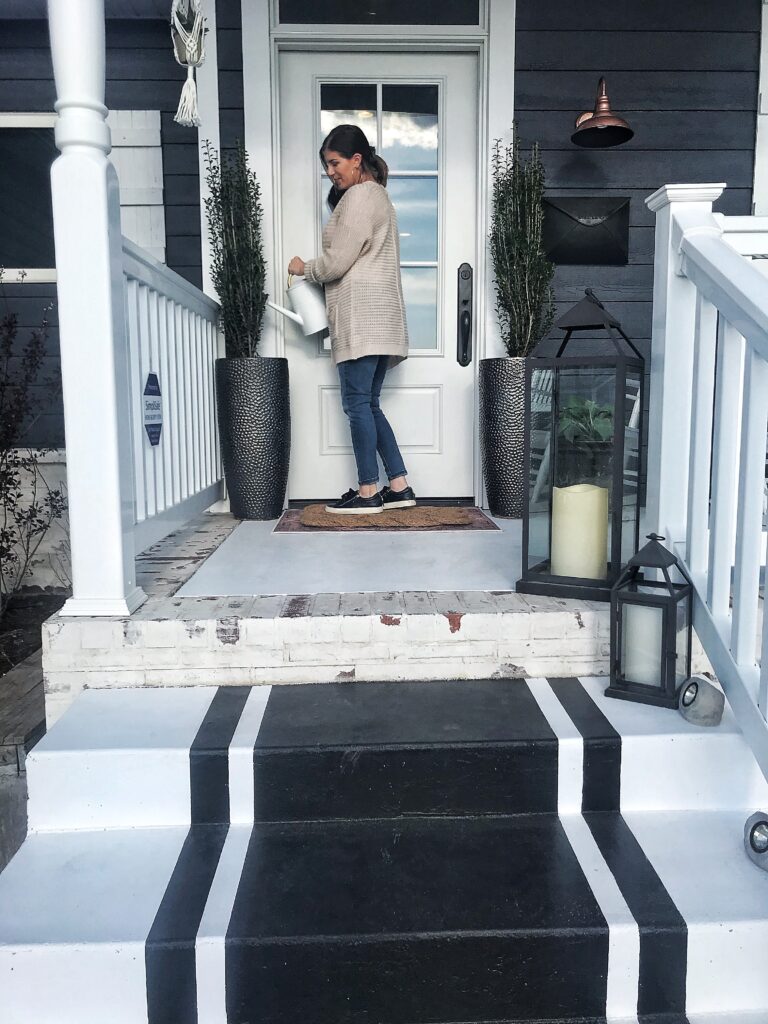
The last few months Matt and I have been working on the curb appeal of the front of our home. I painted our porch and gave it a mini spring makeover. New rugs and some plants made a big impact. Never underestimate small details; they can make a big difference. And this last weekend I stenciled a pattern onto our sidewalk of the front of our home. I LOVE how the stenciled sidewalk turned out!!! I was honestly a little nervous to do it. I’ve never stenciled anything before and you don’t see too many stenciled sidewalks around. But I decided to just go for it and hope for the best…. kind of been my mantra lately!
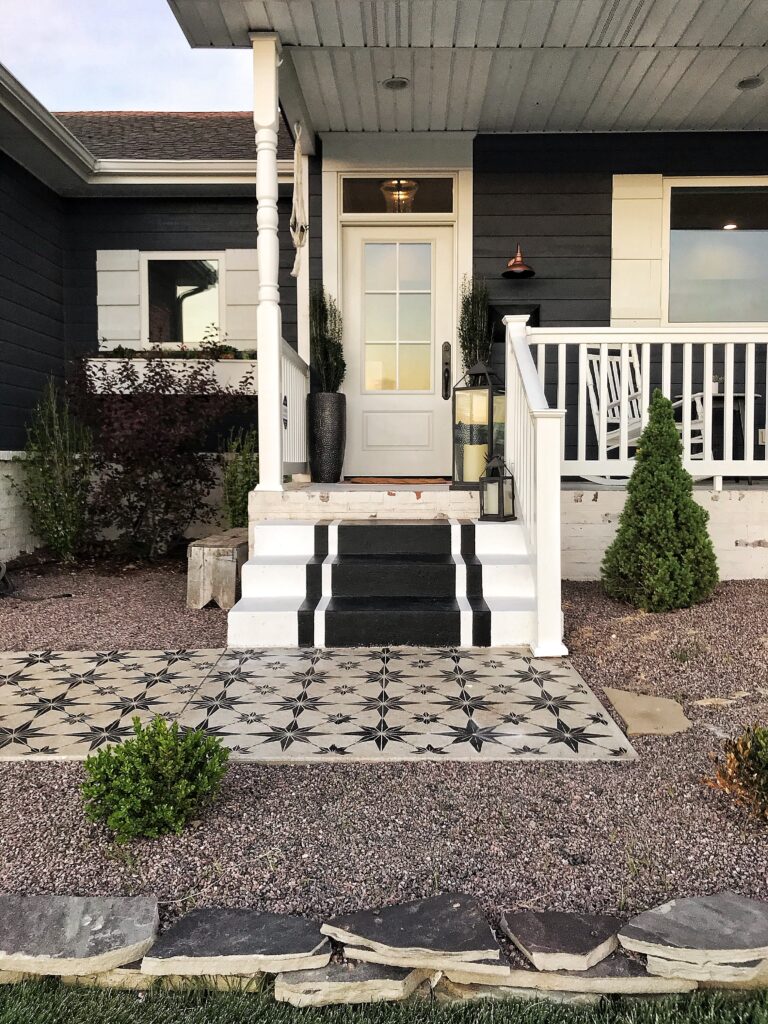
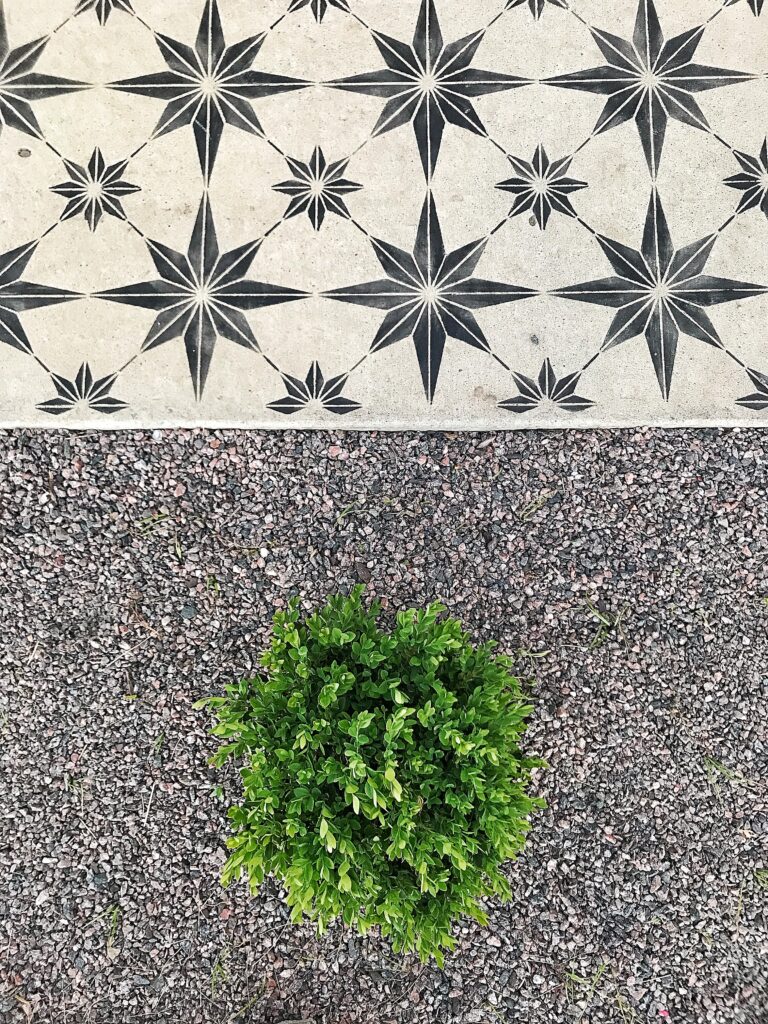
Isn’t it so cool?!?! I’ve always loved the look of stamped concrete but that was not in our budget. This cost us $20 for the stencil, I already had the primer and paint on hand leftover from our porch makeover. I purchased this star tile stencil from royaldesignstudio.com to create this pattern. Shipping was SO fast! I was super excited to receive it earlier than expected.

First step was priming our sidewalk. I used the BEHR Concrete & Masonry Bonding Primer. I used a paintbrush to apply it and let it dry over night.
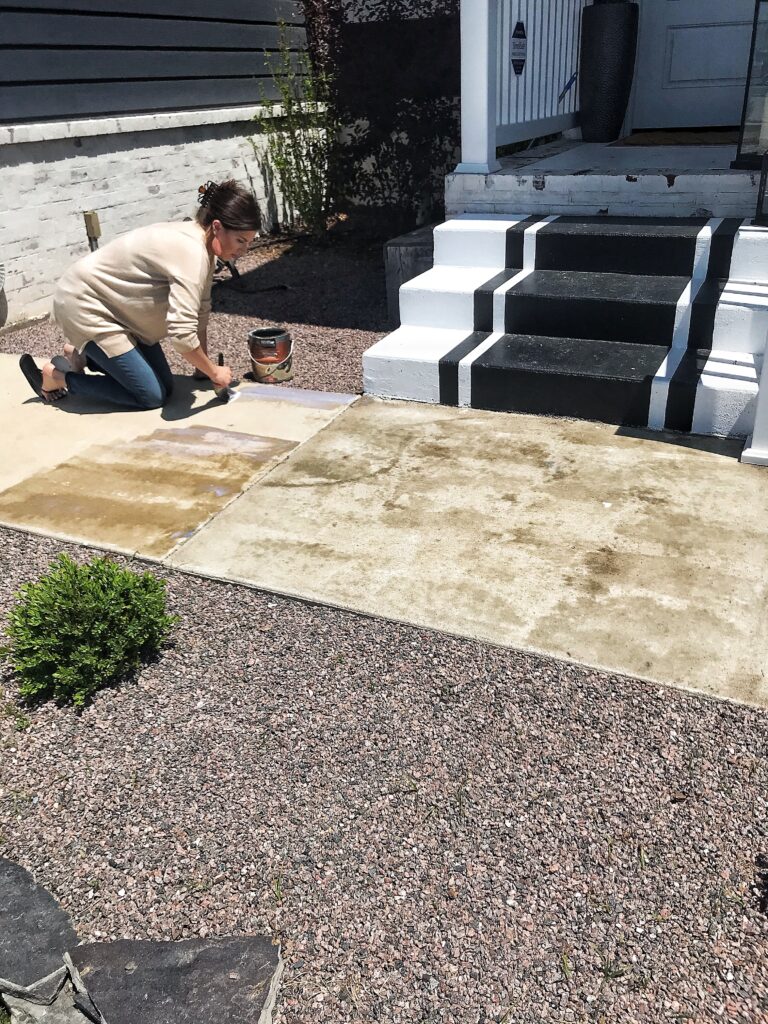
I used the BEHR Porch & Patio Floor paint .
I started out by using a roller when doing the stencil because that’s what I’ve seen others do on Instagram; but after doing a couple I quickly reached for a stenciling brush that I picked up for a couple dollars at Hobby Lobby. I preferred the brush WAY more than the roller. I felt like I had better control and didn’t get any runs with it like I did with the roller.
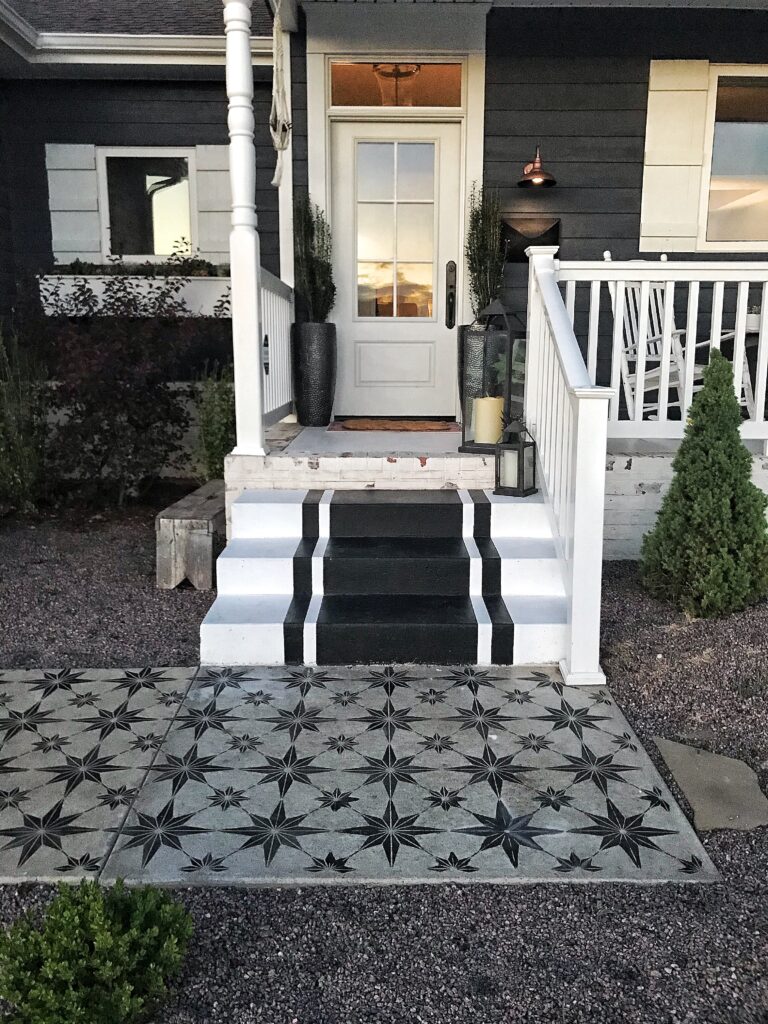
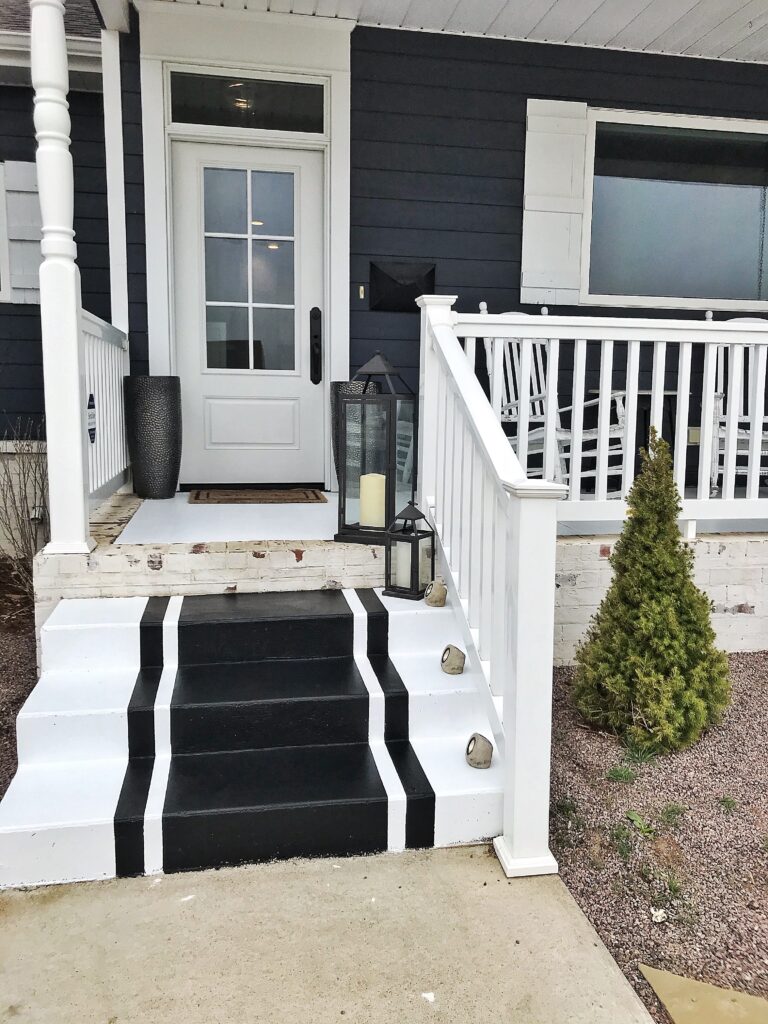
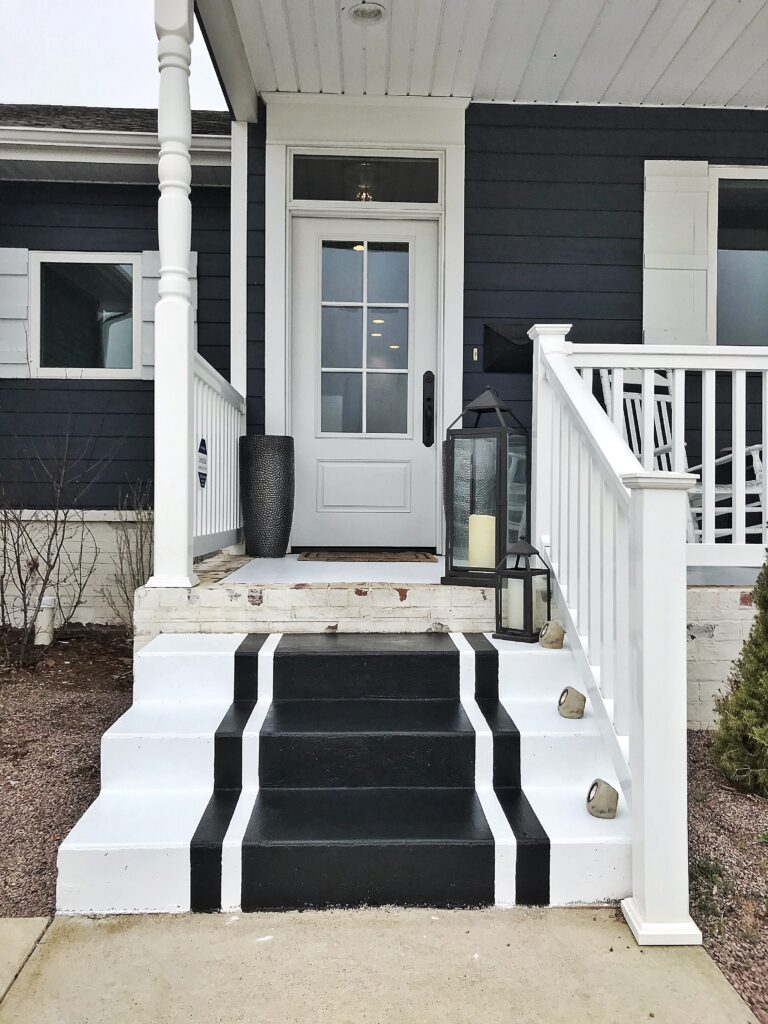
The black design ties into our black striped porch steps and other decor on the porch.
I only had four more spots to go when I accidentally put my stencil on wrong. Nothing can ever go perfect, right?! That would be way too easy. Luckily I had some paint thinner on hand and a wire bristle brush. I let the paint thinner soak for a minute or two on the paint and used the brush to scrape it off. Worked like a charm. Crisis averted.
I know next Spring I will have to more than likely touch some of this up but I’m fine with that. The snow in the winter can cause some of the paint to peel off; especially if it’s sitting there for an extended period of time.
Thanks so much for stopping by!
I am so excited to share with you all our Spring front porch reveal! Get ready for lots of pictures! I’ve been patiently waiting for warmer weather to arrive so I could go out and buy plants for our porch. This weekend was beautiful here and I think the higher temps are finally here to stay! Hopefully. Fingers crossed. You really never know with Kansas weather.
A blank slate.
After! Isn’t Spring an exciting time?! I always get excited to plan and decorate our porch with plants and accessories. This year is my most favorite I’ve ever done.

Last weekend I touched up our shutters and siding with paint. You can see on our siding here that the new paint sticks out. Eventually, as it gets dirty, it will blend in with the old paint. Just thought I’d explain in case you’re wondering what those dark spots are all over our siding!
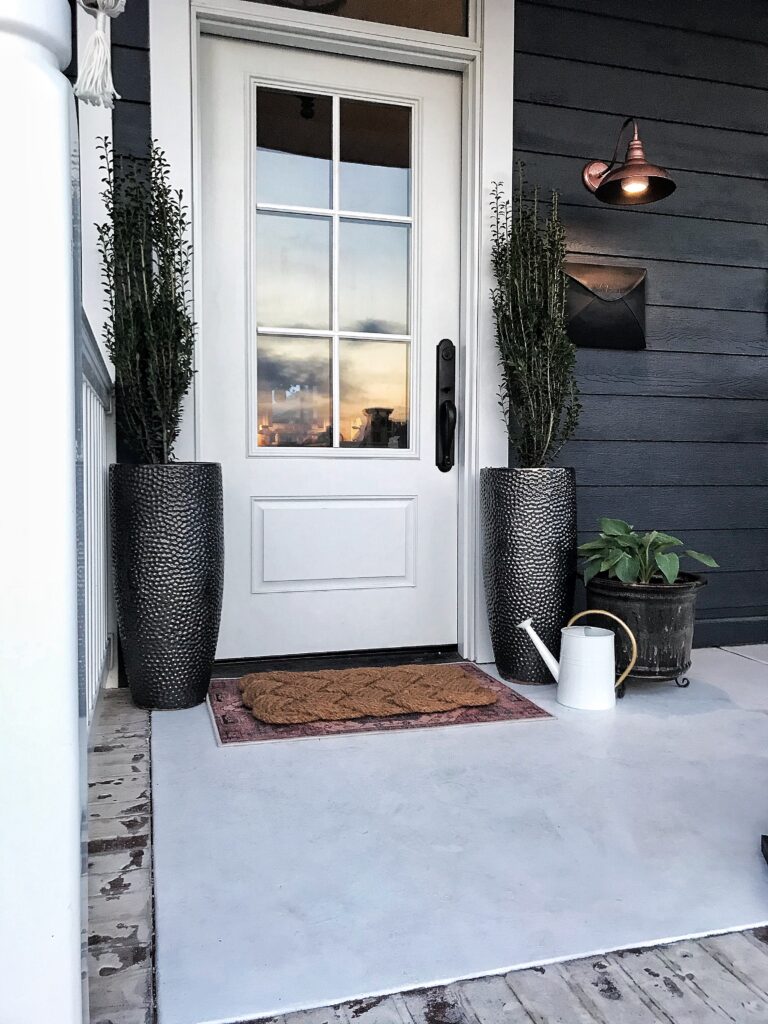
I wanted to incorporate some pink into our front porch and did that by adding this awesome pink rug. You can see there is some navy in the rug too which helps it tie into our navy siding. It is screen printed and thin so works great here. I found it at Rugs USA for a great price and you can purchase it HERE.

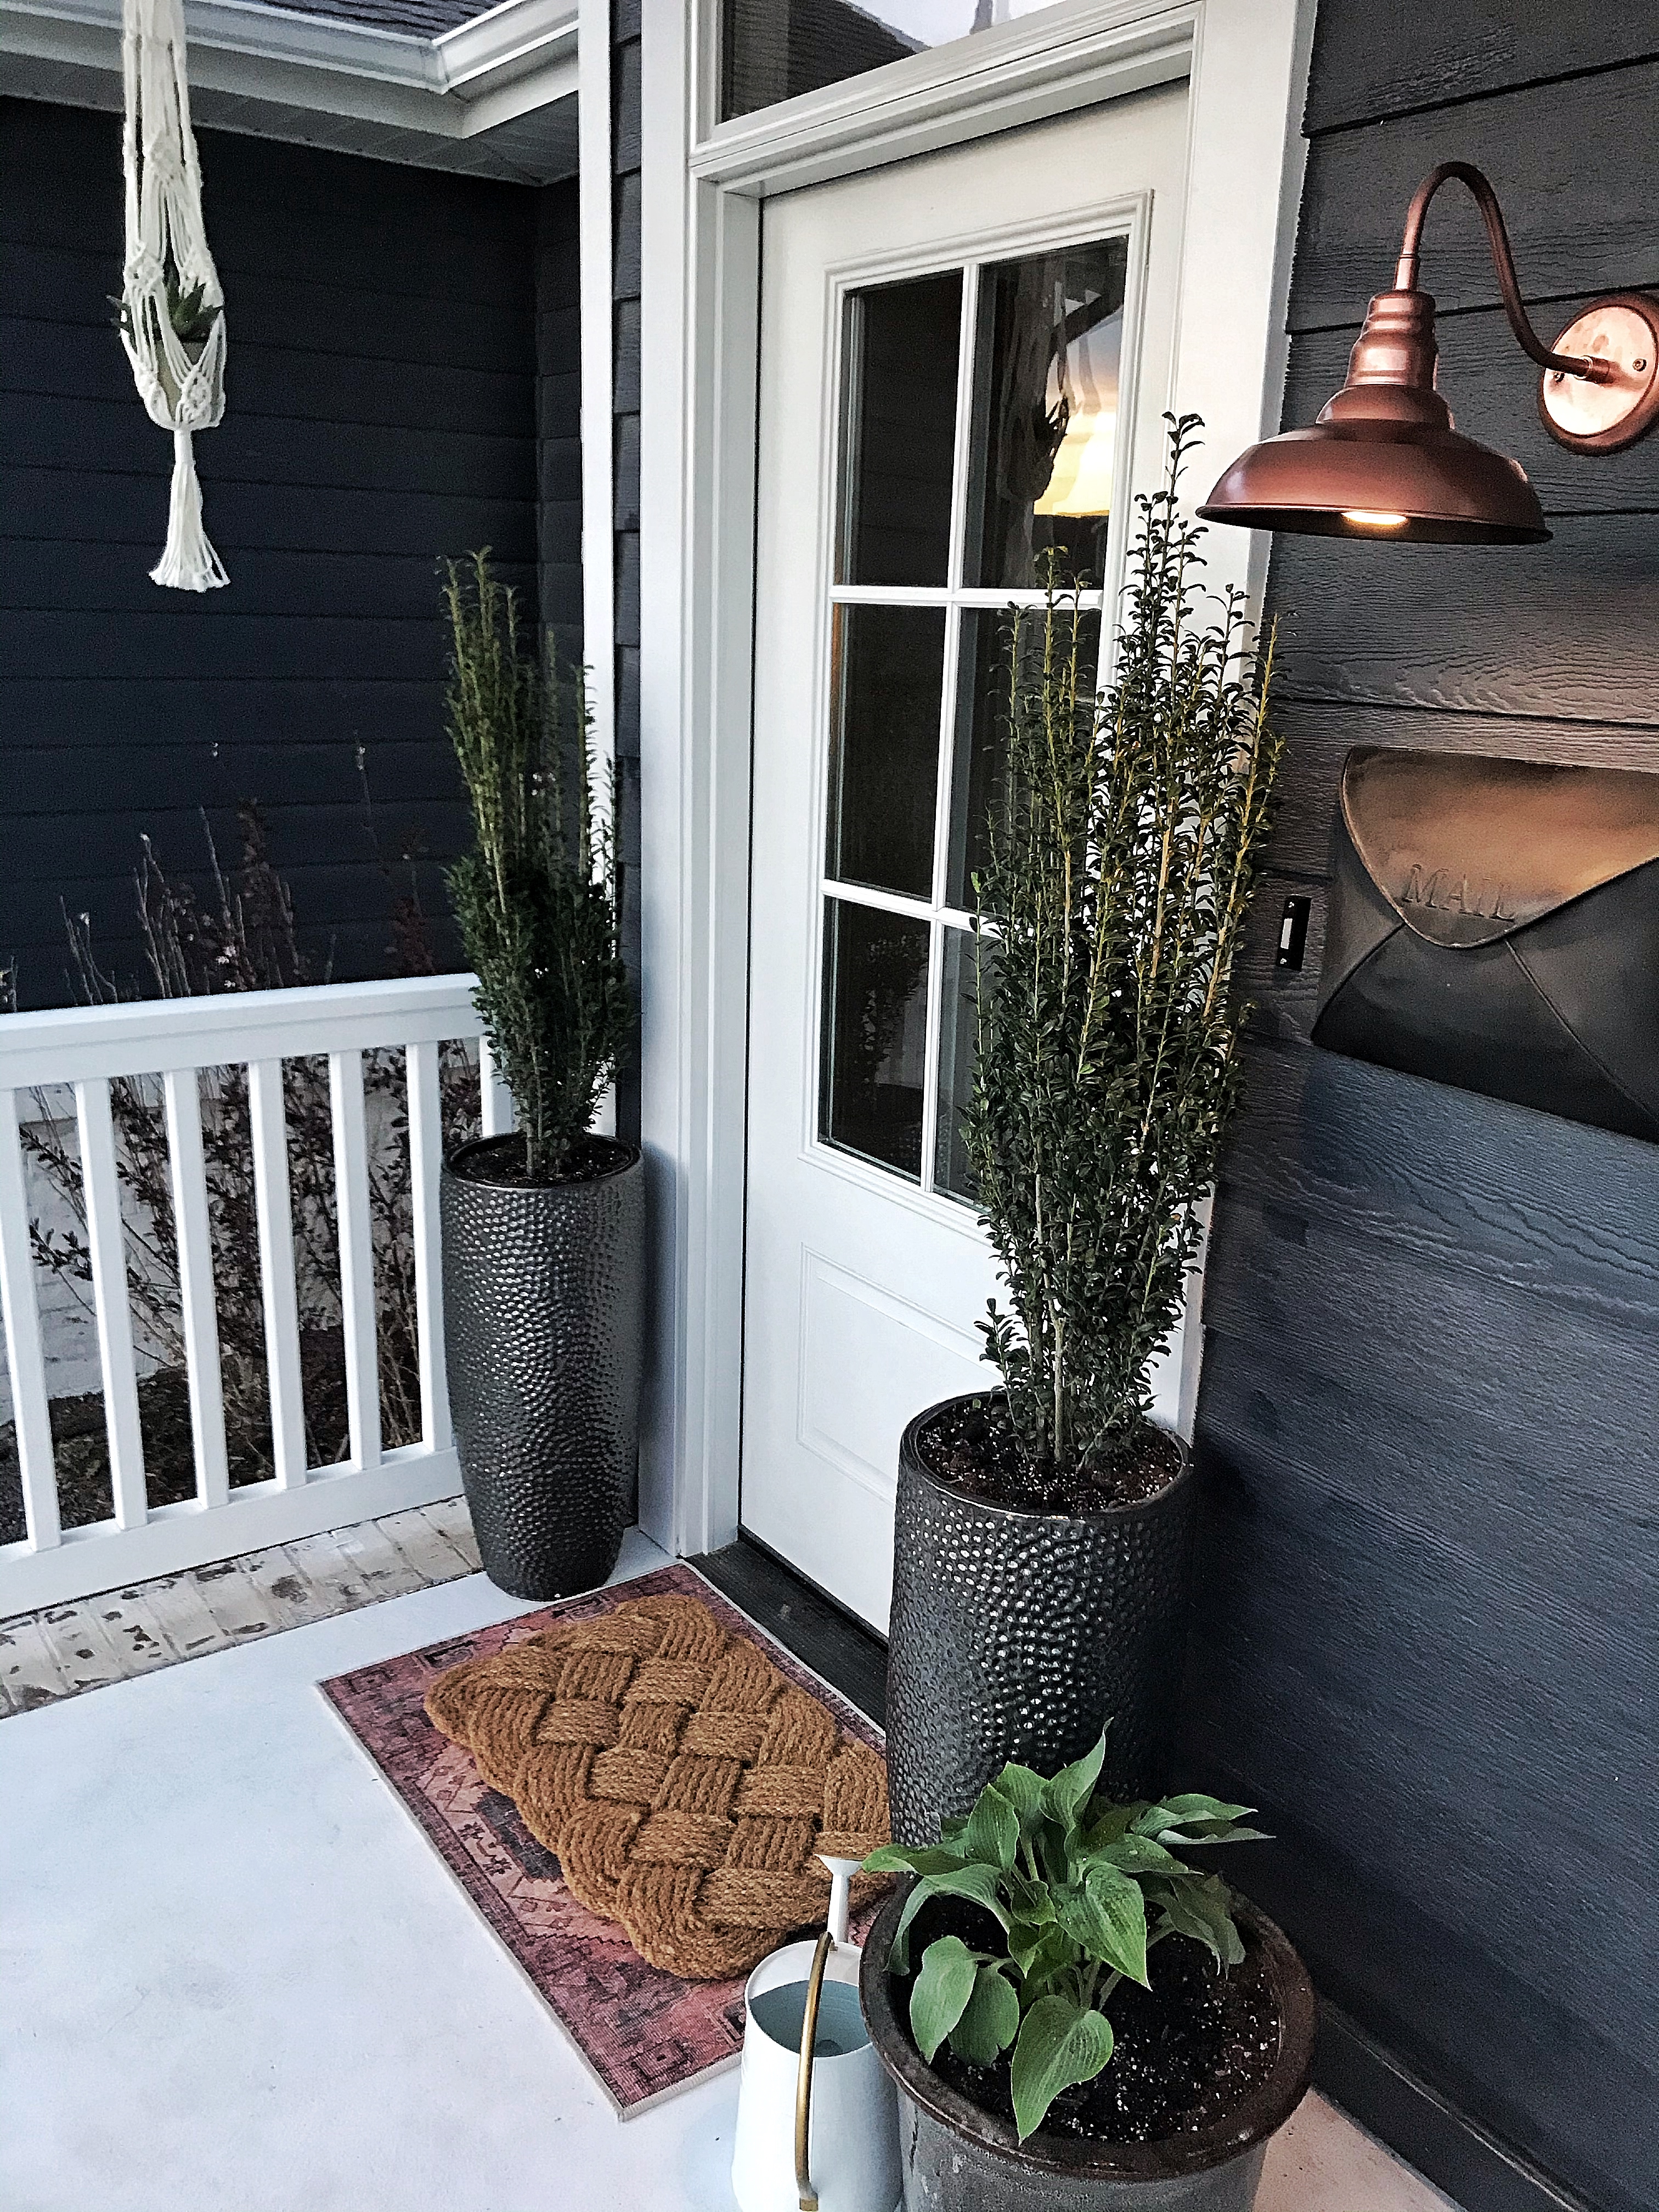
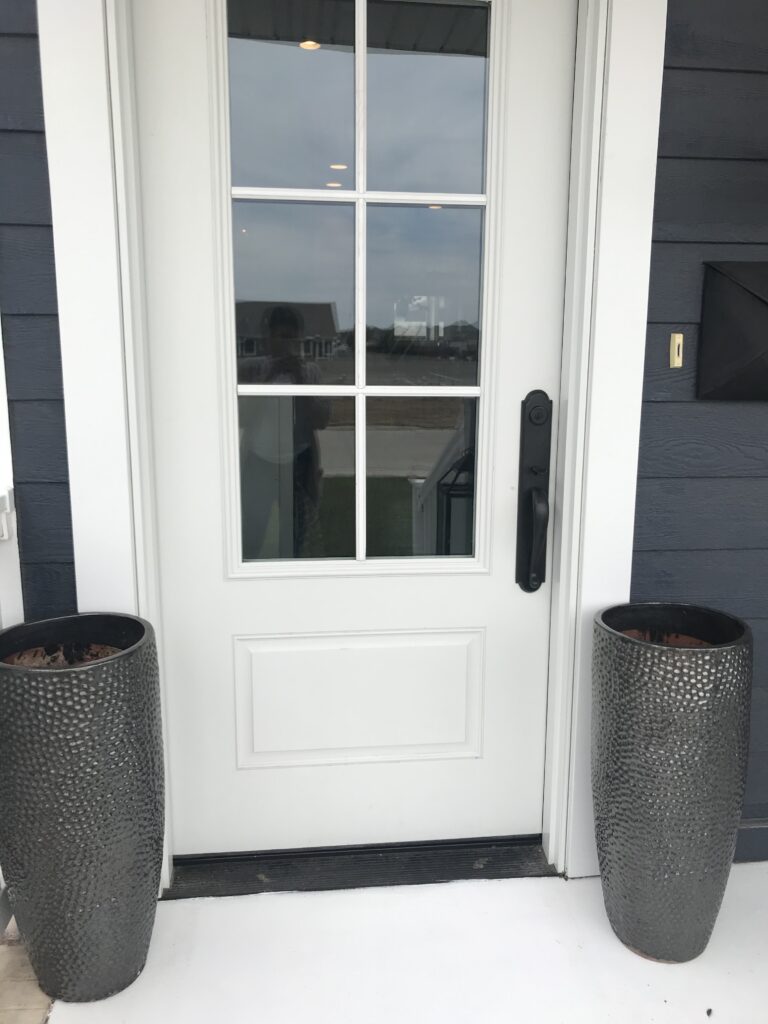
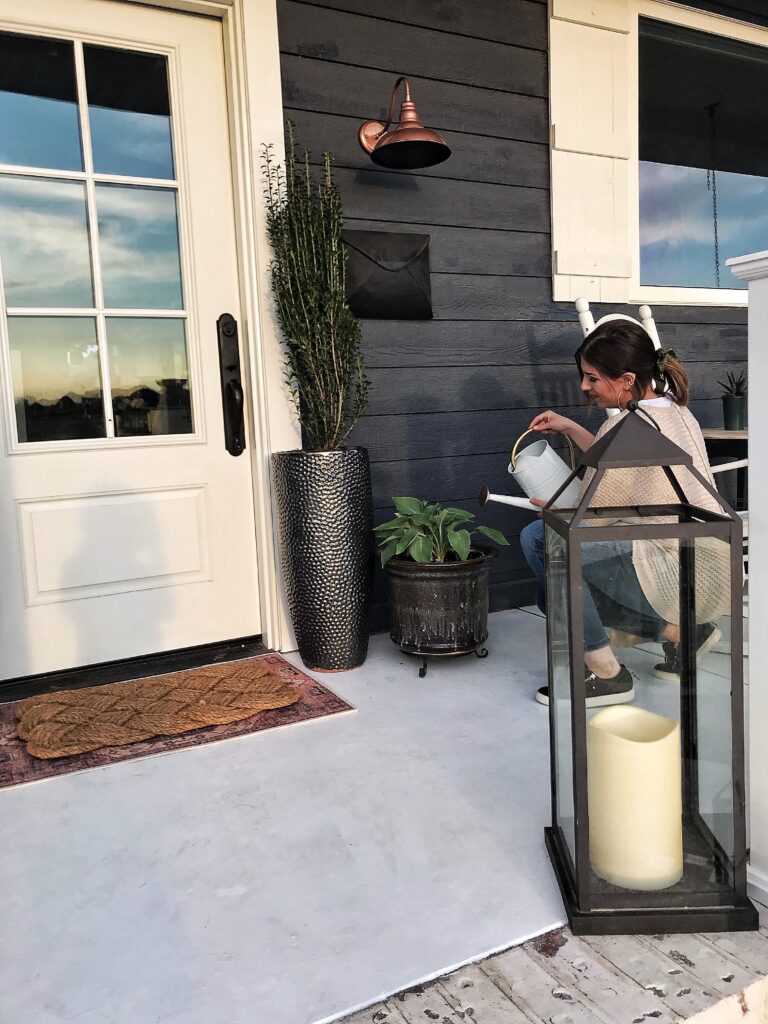
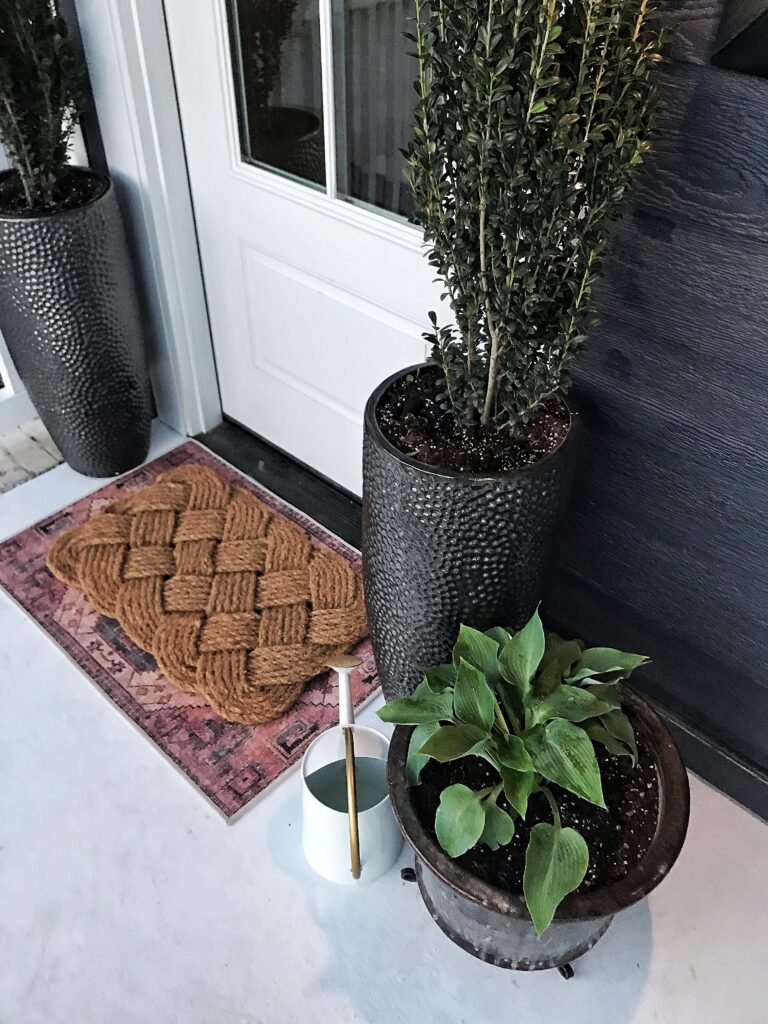
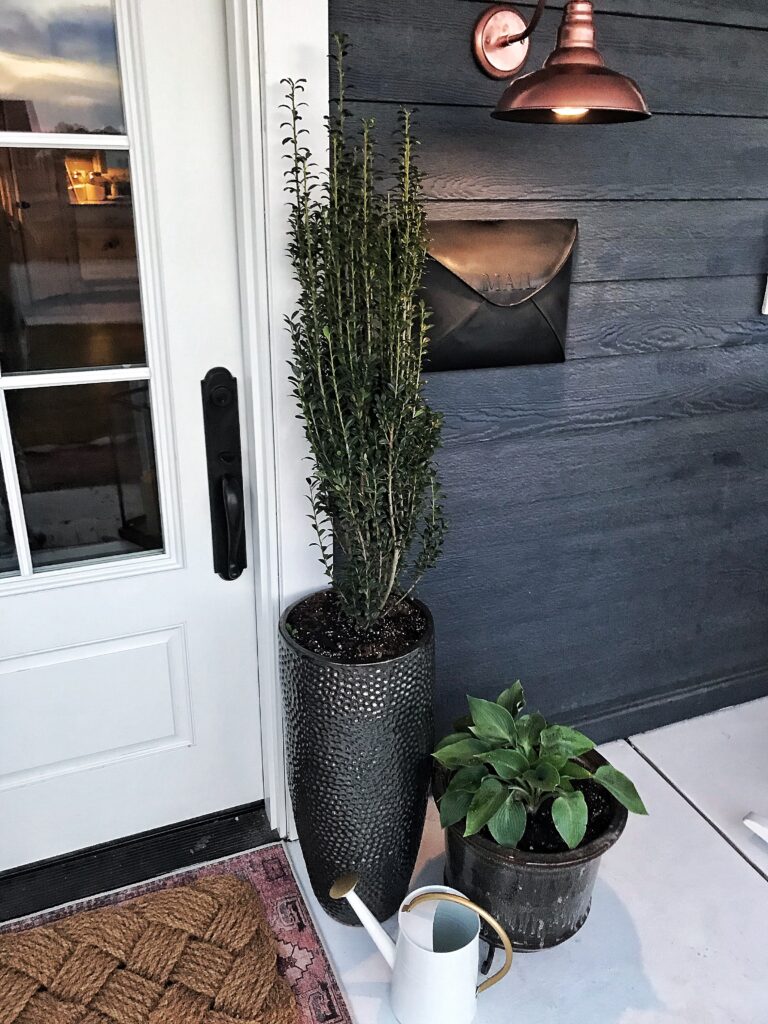
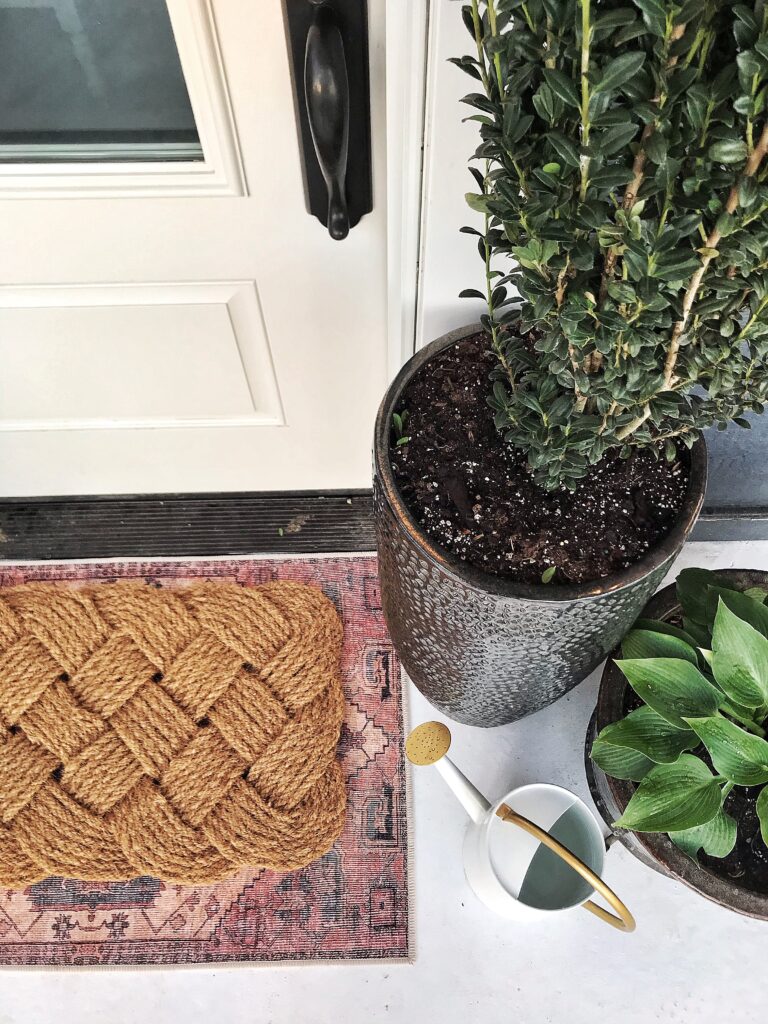
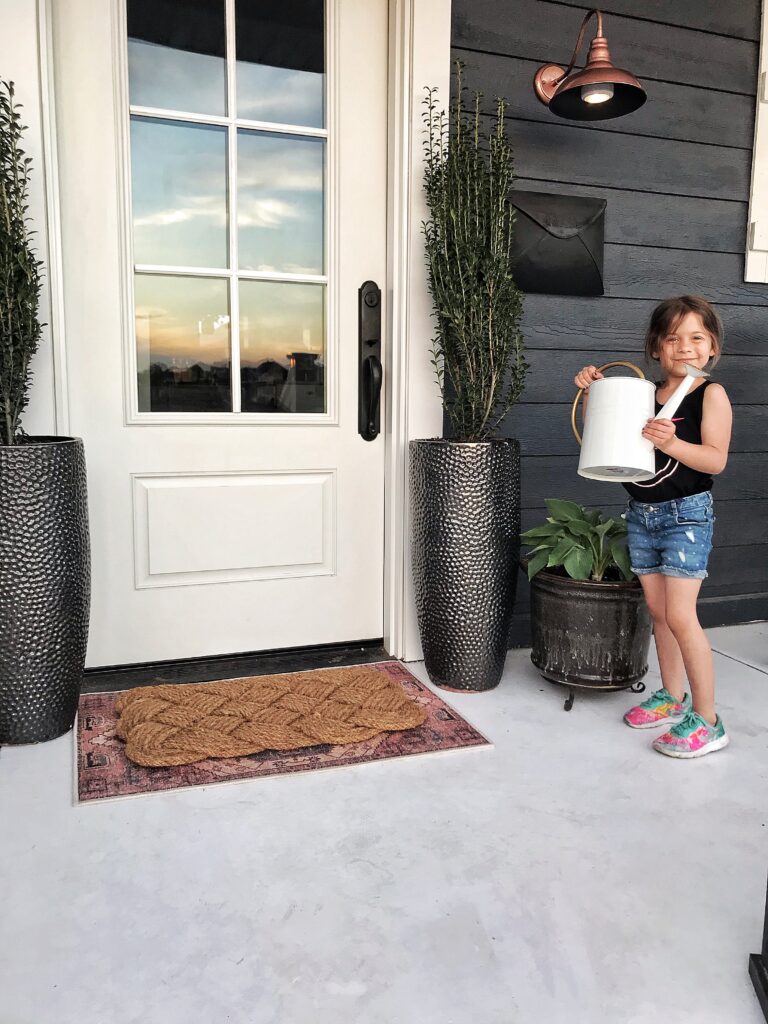
Matt bought me these tall planters for Mother’s Day a year or two ago. Well I bought them and told him this was going to be my gift from him. 🙂 They are really heavy and really good quality. I bought them at a pop up greenhouse here in our town.
This macrame hanger was a Target find. I bought it on sale for $10. You can purchase it HERE. I just stuck a little succulent in it in the same plastic planter it came in.

Since the planters are so tall, I wanted a plant that was pretty tall as well so it would look proportionate. I was SO happy to find these plants at my local Home Depot.
This jute rug was an Amazon find. I knew it was the perfect one right away for my space! I was so happy I came across it! I haven’t found it to shed at all and it seems to be made very well. It’s a thicker rug. Unfortunately the price has gone up almost $15 since I’ve purchased it. Boo. You can find it HERE.
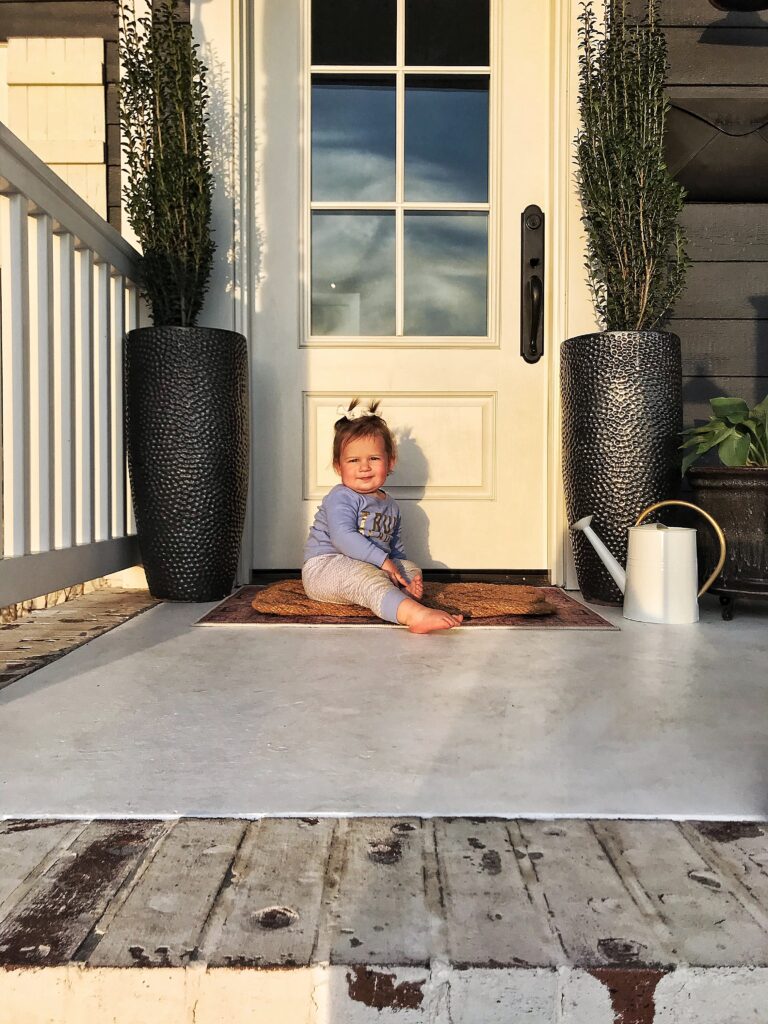
Somebody wanted to help mom water.
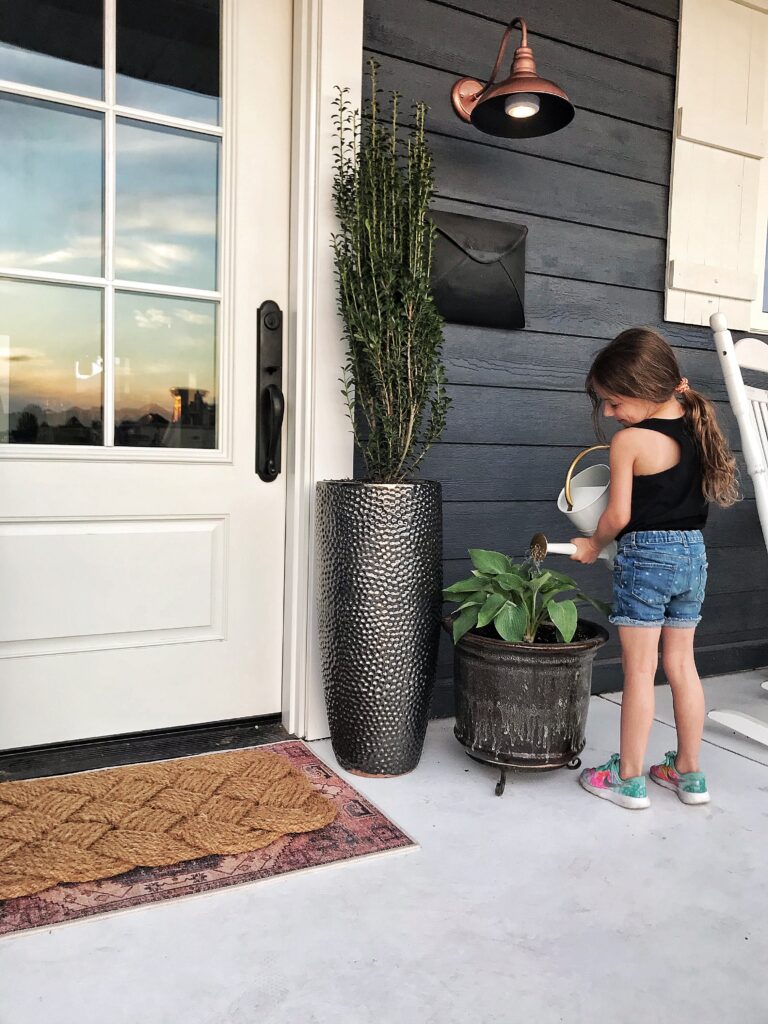
I found this watering can in the Dollar Spot at Target.This was back at the beginning of the year. I really like the gold handle on it.
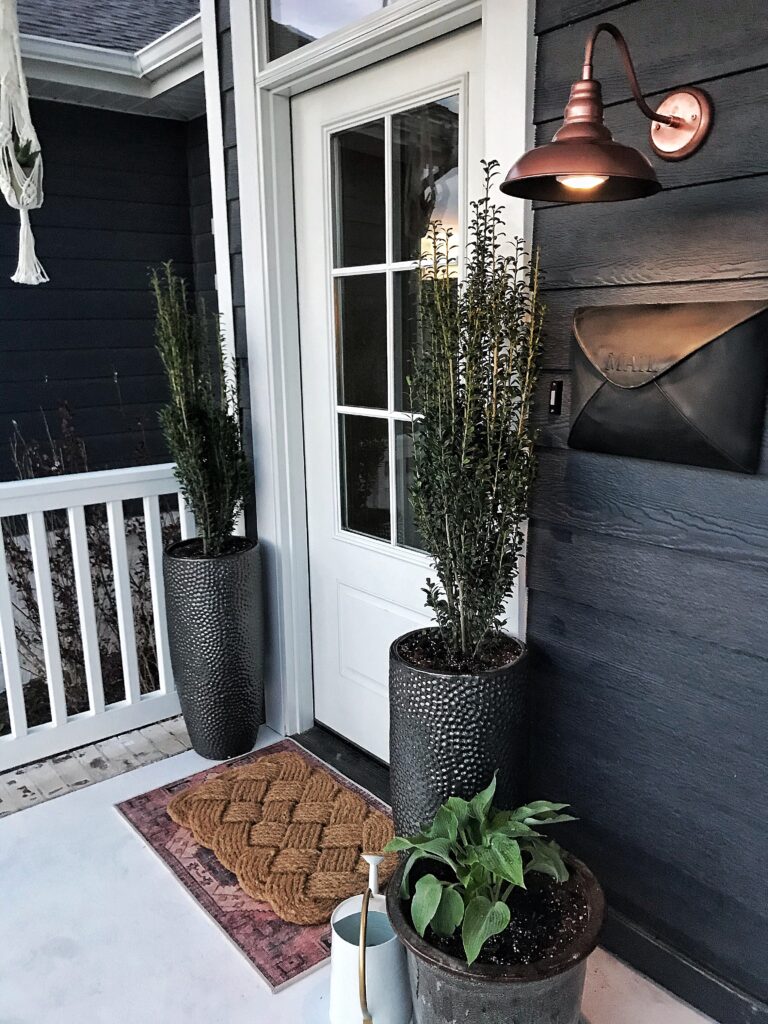
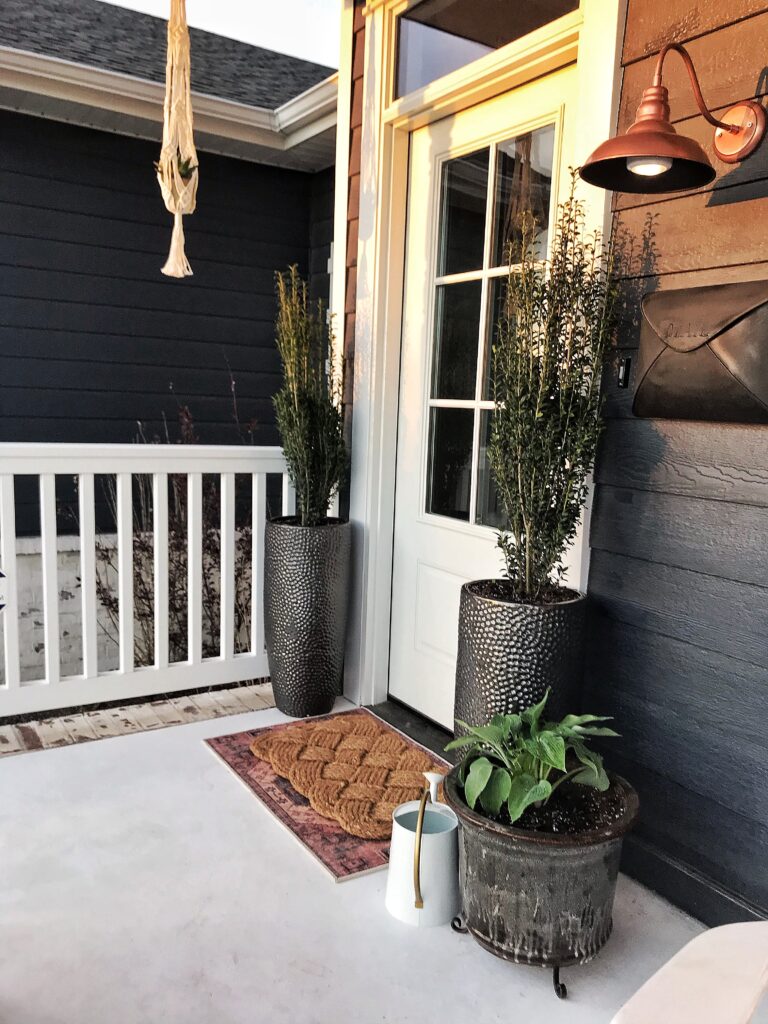

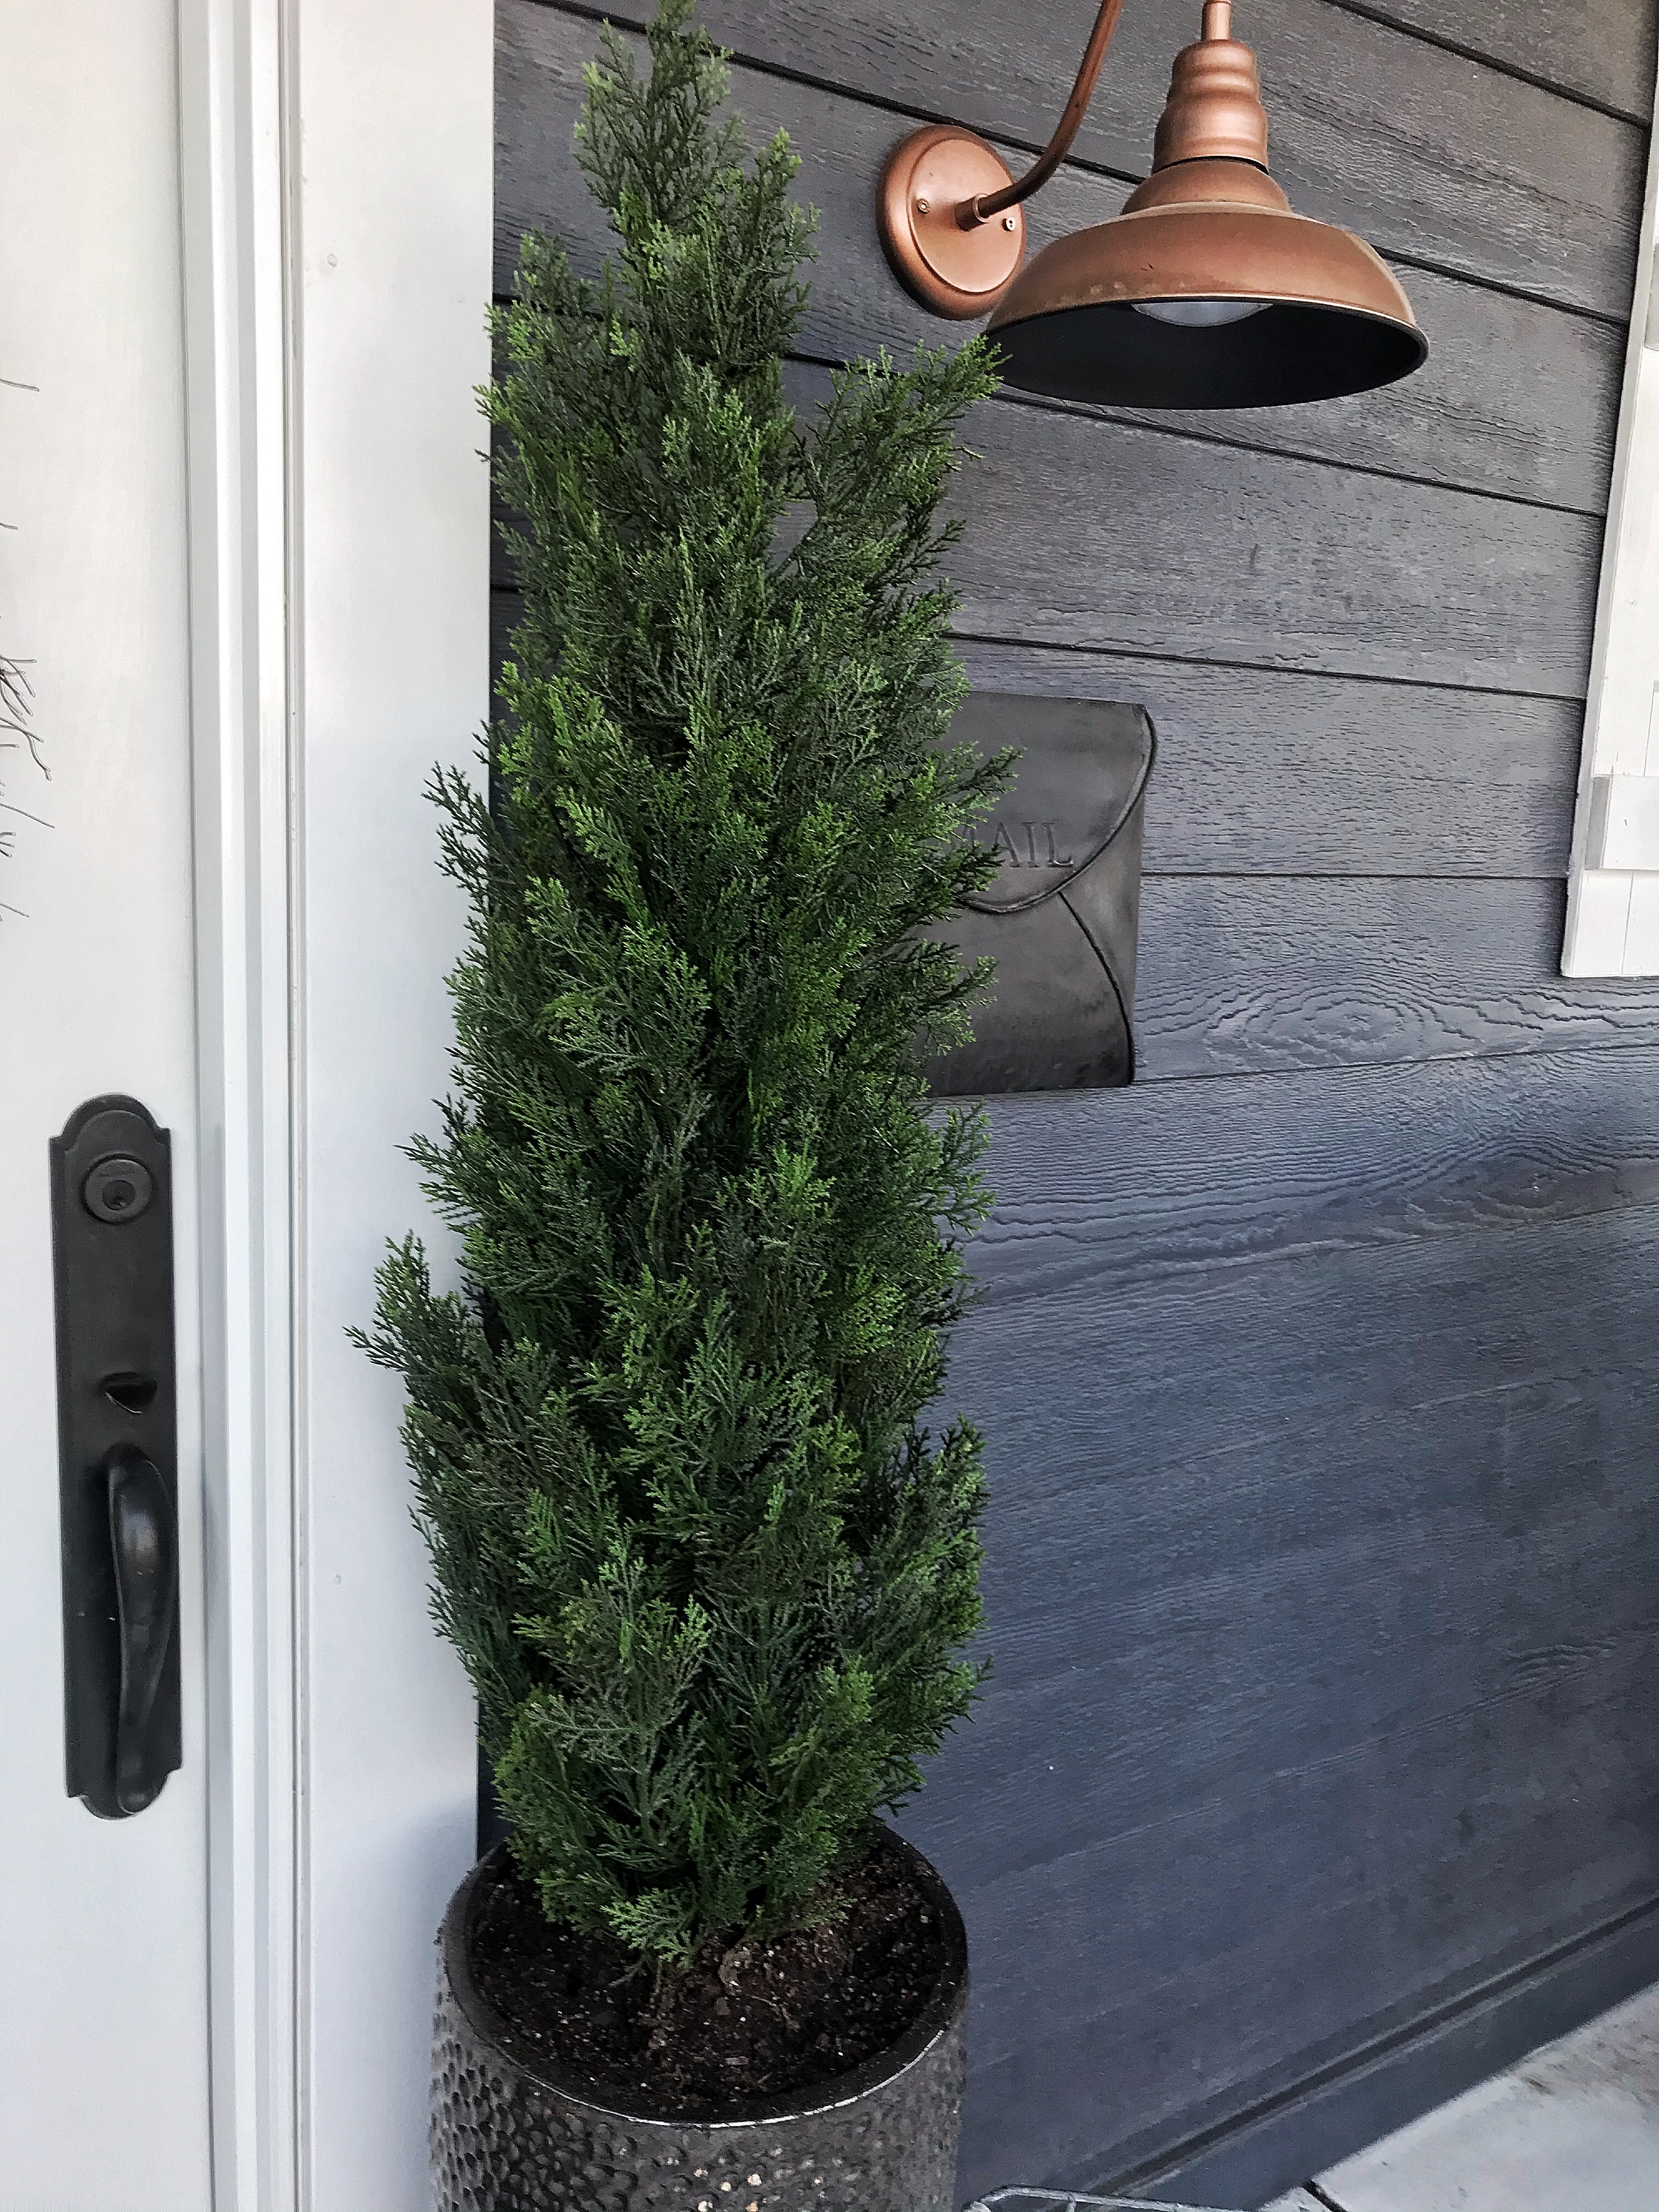
This faux copper light fixture was a diy and is not hardwired in.
We are still LOVING our newly painted cement porch steps and floor.
Sweet Emmy.
Thanks so much for stopping by!
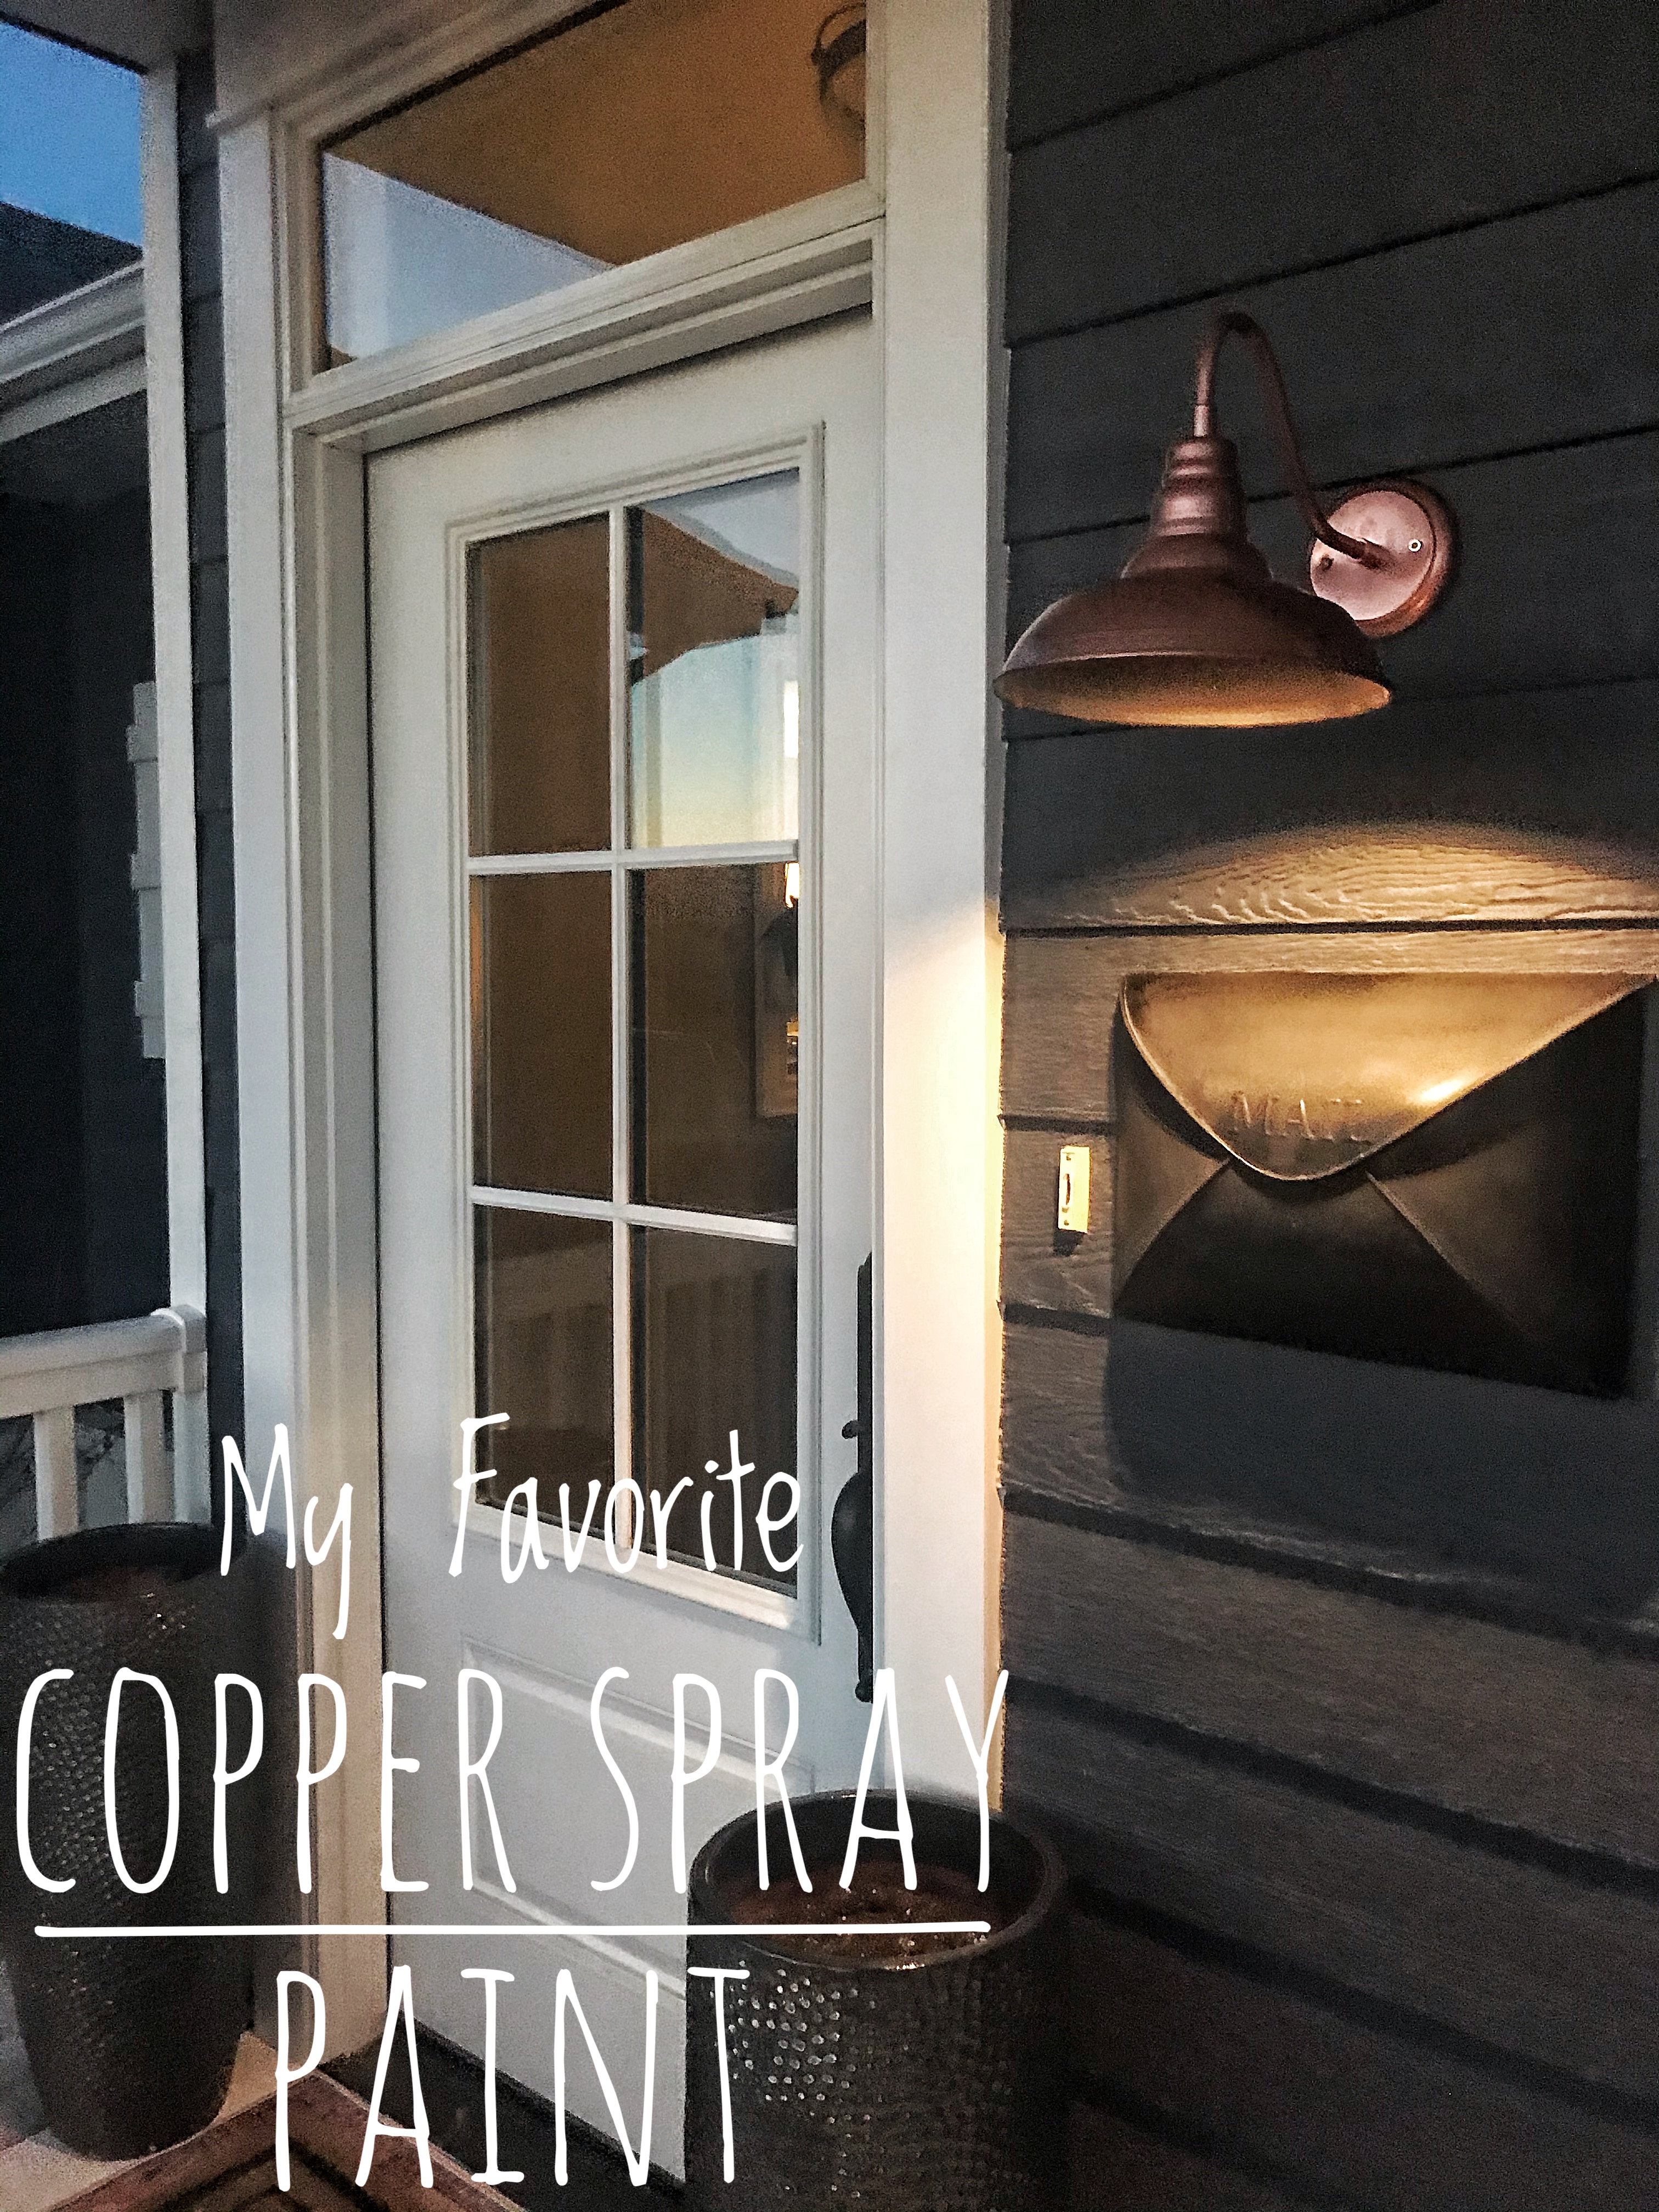

Hi guys! Today I want to talk about my favorite copper spray paint. Spray paint is the quickest, easiest way to change up an item. The trick with spray paint is to do very light coats and to always keep your can moving. Stay in one place too long and you’ll get too heavy of a coat and get drips. No one likes drips. And if you put too heavy of a coat on it wont dry properly. I’ve learned all of these tips the hard way!
I’ve always wanted a light fixture here on this side of our front door. I found a copper light fixture I loved but didn’t want to spend money on it at this time or pay to have a light hardwired in.

I remembered I had this old light fixture that I wasn’t using and decided to spray paint it!

After:

After lots of research I decided to go with this Rust-Oleum Bright Coat Metallic Finish Copper Spray paint. You can purchase it HERE.

To install the light I just drilled two pilot holes and then screwed the light fixture in. Easy peasy.

I glued a battery operated puck light into the light. The puck light I own has a remote control and timer to it. So I can set my light to come on in the evening and it will automatically turn off. You can purchase a puck light HERE. I first learned of this trick from Nesting With Grace. It’s brilliant! Someday we will actually have a light hardwired in but for now, this works!

This envelope mail box is from Pottery Barn.

So excited we have a cute light out here now! I have lots more ideas for this space! Can’t wait to bring some greenery onto our porch…. it has been hard for me to hold out but I know mid-west weather can be crazy and it could possibly snow next week. Or the week after that. And so on. 🙂 So I will wait a few more weeks.
Thanks so much for stopping by!

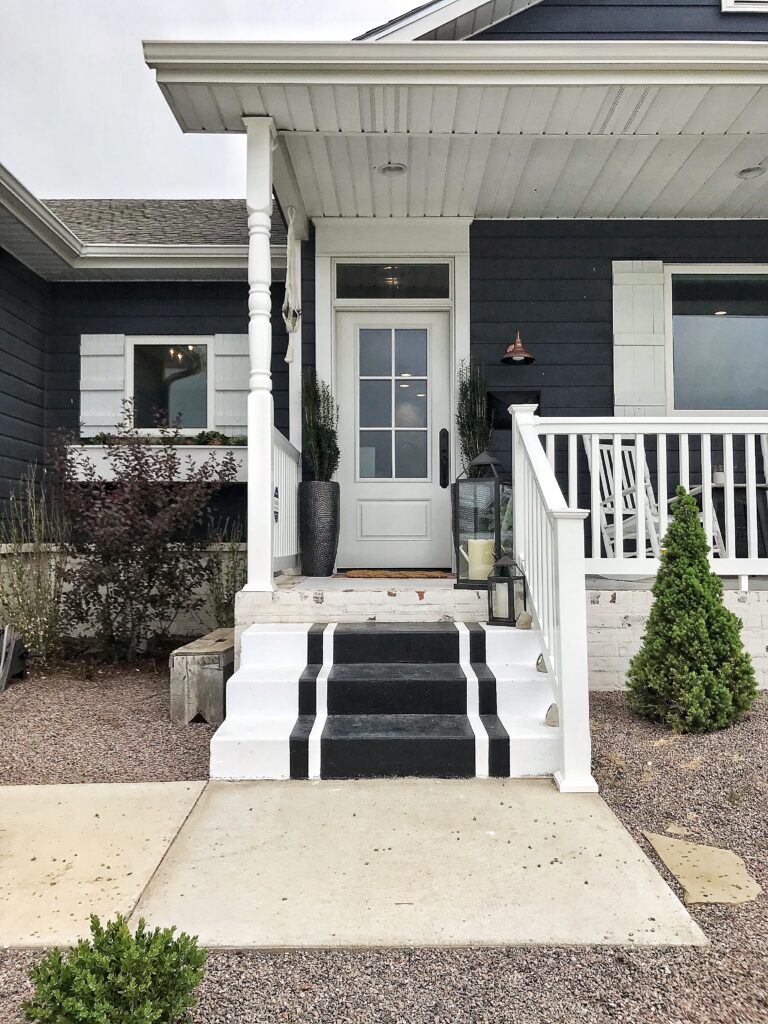
Hi friends! Today I want to share all the details on our painted front porch makeover!
Years ago I found out that you could paint your cement porch. I was super excited and did this striped pattern on our porch.
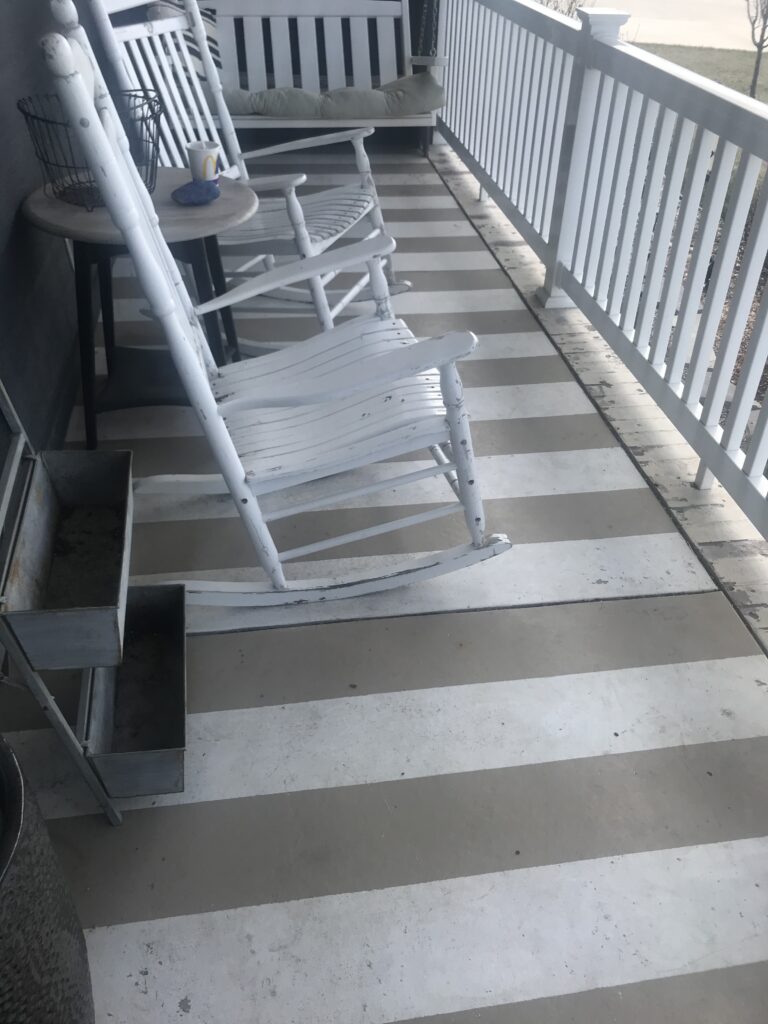
This is what our steps looked like. Because they are not covered, every Spring I would have to re-paint them. A little more high maintenance but I have never minded because I like the look so much and it literally takes me 15 minutes. I decided I was ready for a new look so grabbed my paint and paintbrush and got to work!
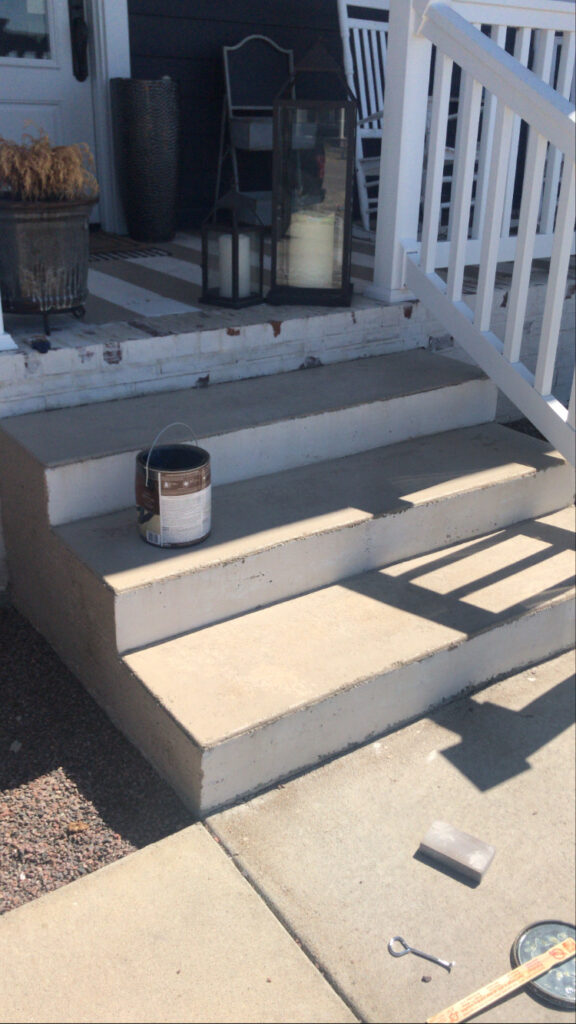
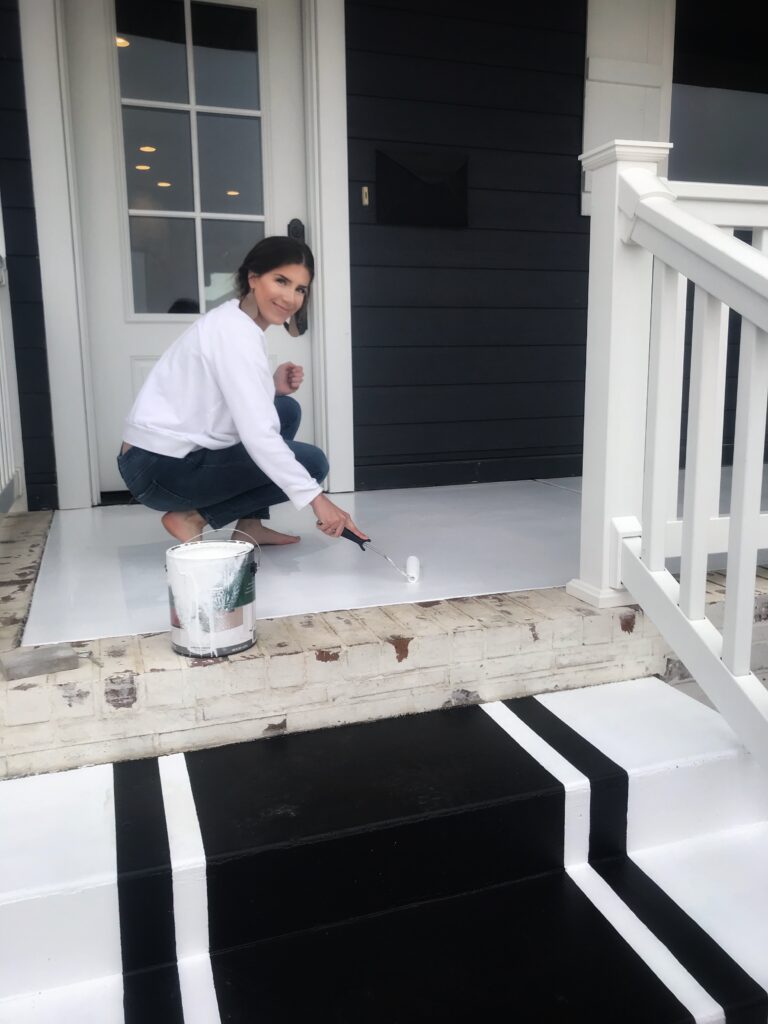
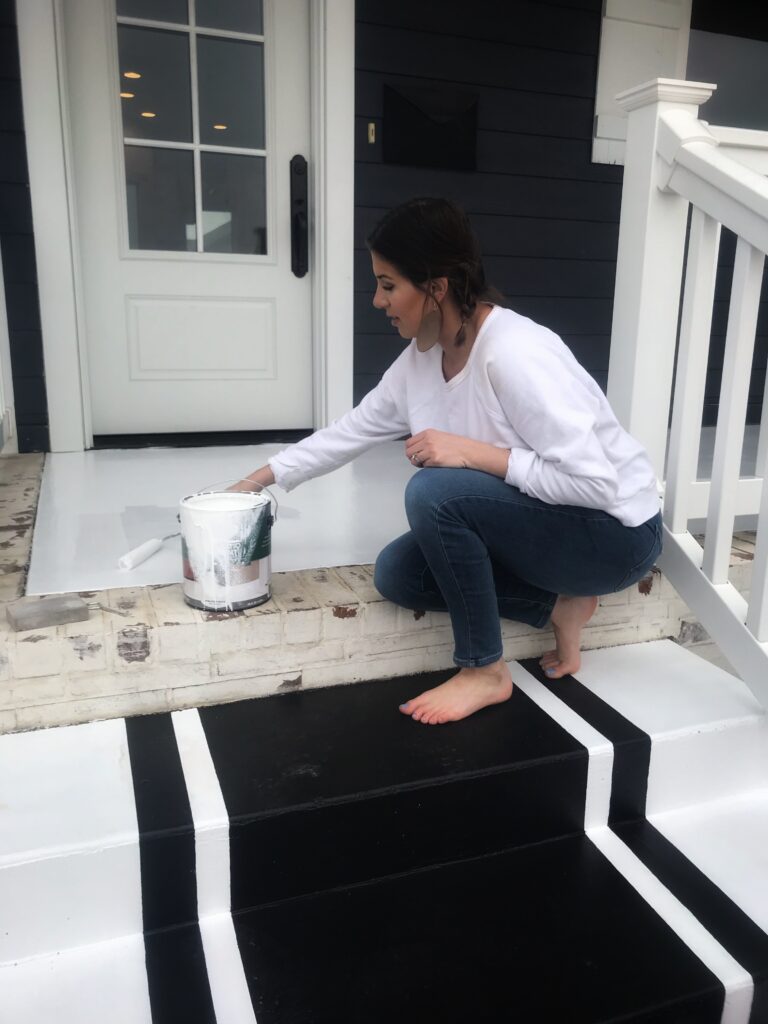
I will link all products used at the bottom of this post. First step was priming and then painting the steps white. I then taped out my pattern and painted it black. I wanted a stair runner type look. Make sure to measure so that your “runner” is centered!
Once that was done I decided to give my actual porch floor a fresh coat of white paint as well.
I love how much it brightened the area up!
The finished product!
To me, our porch is an extension of our indoor living space. We love spending time out here in the evenings or on a nice day.
I can’t wait to spruce this space up for Spring with lots of plants and I’m keeping my eye out for a mat to layer under this one.


Products used:

Thanks so much for stopping by!
Kayla