Easy Way to Update Your Tile Using Grout Stain
This last week I’ve been working on updating our guest bathroom. We’ve lived here for over 5 years now and I decided it was finally time to tackle it. I’ve never been a big fan of the green and maroon tile among other things but tried to work with what I had over the years. In the last few years we installed a diy sliding door that made much more sense in the space than a swinging one, painted the cabinets white, added a diy ladder basket and I’ve painted the walls a few different colors.
Over the weekend I added board and batten in here which you can see a portion of in the picture below. I will have a full tutorial on all the details of that coming soon. (Update: Click here for the full tutorial!) I can’t wait to show you guys! But lets get to today’s topic, updating the floors!
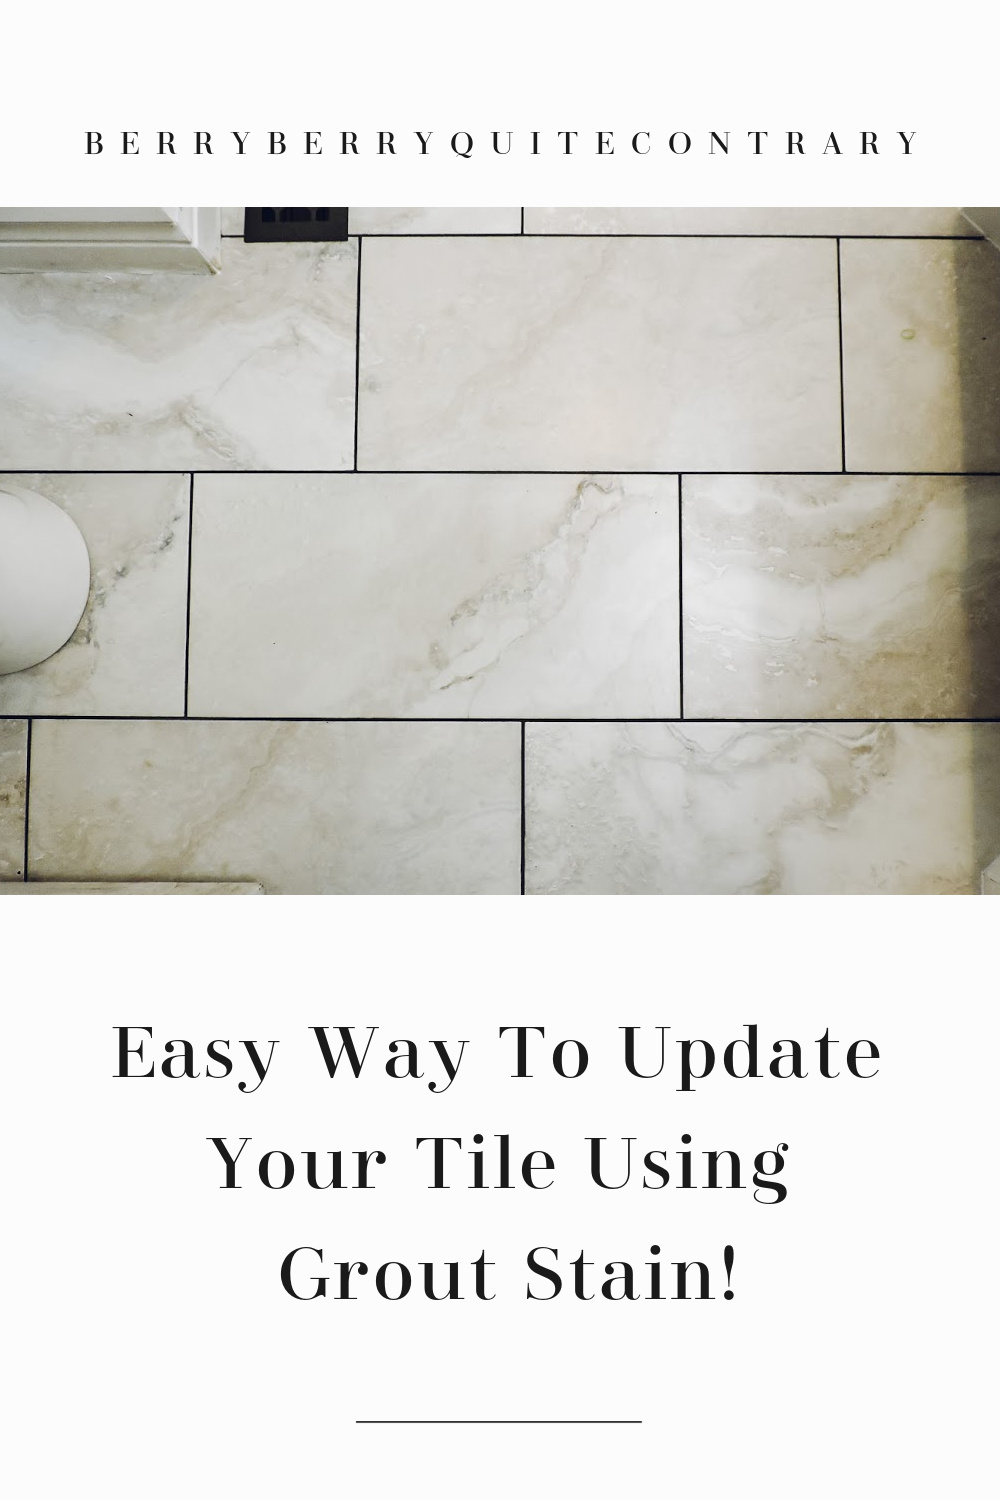
I really have never been a fan of the grout color and wanted to modernize the room a little bit so after doing a ton of research, I decided to stain the grout.
Before:

After

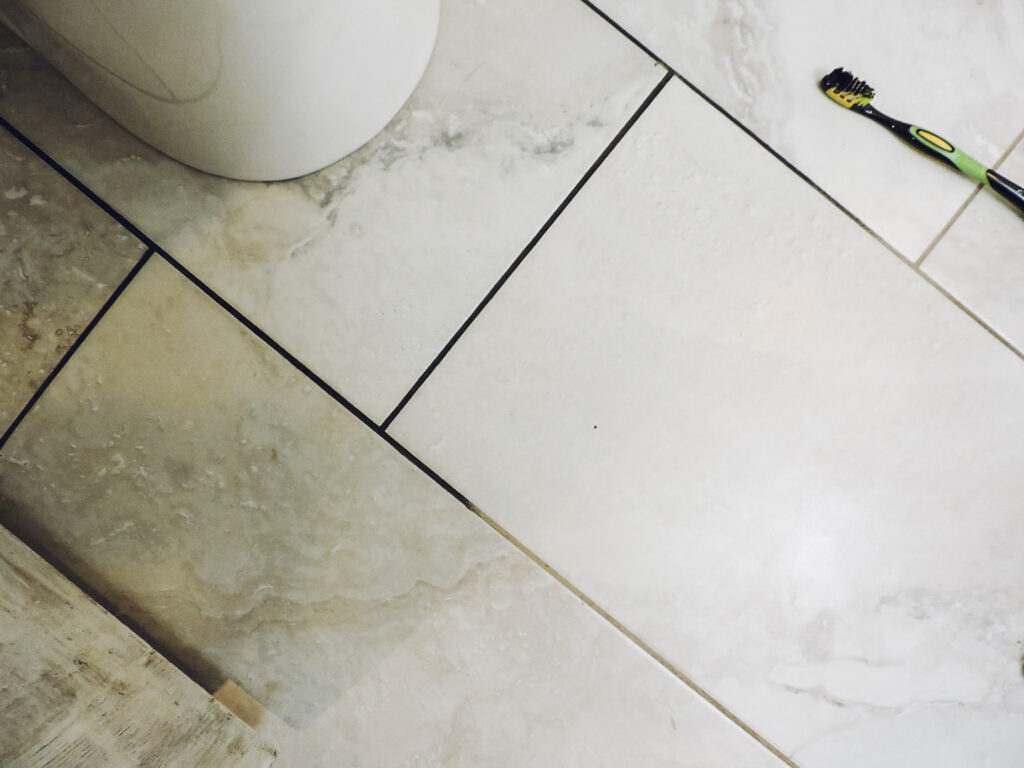
This turned out so good! I really do think it gives off a more modern vibe and helps the tiles pop a little more with the contrasting black grout. I am bringing in some black hardware to this space so it will tie in nicely with the floors.

After doing lots of research, I ended up going with this Modern Stone Technologies Grout Color Sealer. You can purchase it here.
How to Use Grout Stain
I used a toothbrush to rub the stain into the grout; simply wipe up the stain on the tile (you WILL get some on there) with a damp rag and you are done. Easy peasy!
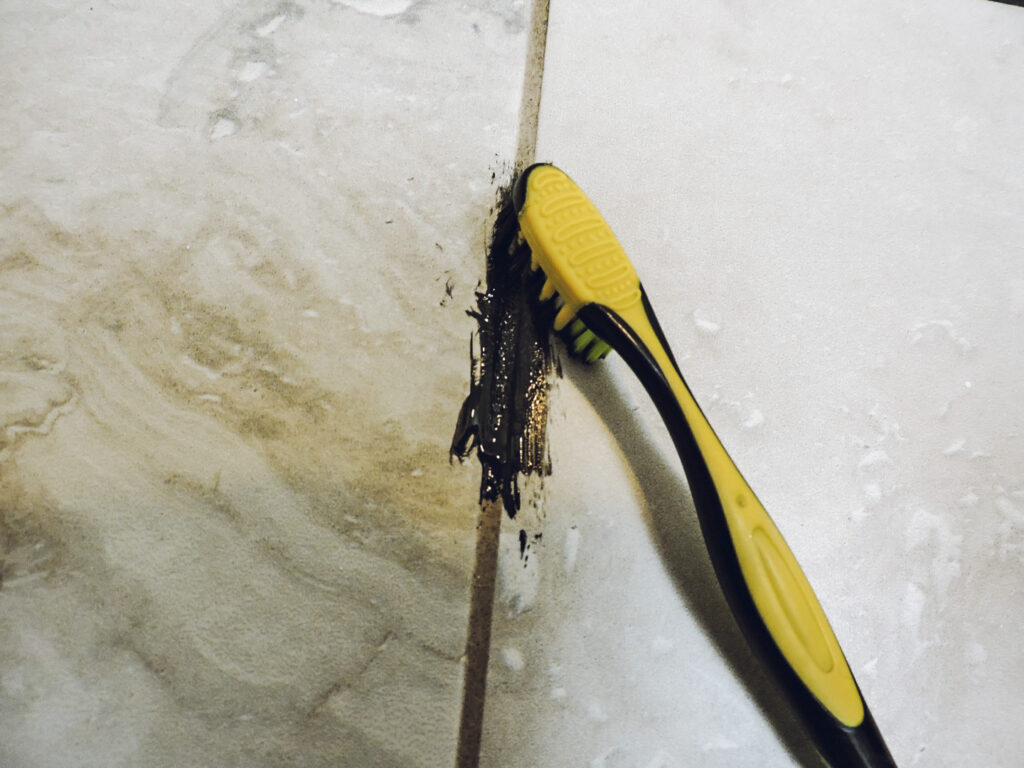
I started behind the toilet just in case I didn’t like it or it didn’t work.
Some tips: use a kids toothbrush if you can, the smaller the better. Also make sure you a have a firm brush-head because it is definitely easier to work with than a soft one. A damp towel worked good to clean up the stain on the tiles but just make sure you have a couple on hand.


This project took me about an hour tops. I did have to go over a few spots twice. Overall this was a super easy, quick change up and gave our floors a whole new look!
Thanks for stopping by!