
How I Laminate & Tint my Eyebrows at Home
“Eyebrows are the frame to your face”. I’ve heard this more than once in my life and it rings true for me in my experience. I’ve only had my eyebrows done professionally twice in my life (many, many years ago). For many years now I’ve been tweezing and tinting them myself, easier than you might think, and recently decided to laminate them. I LOVED how they turned out and wanted to share my experience with you all. Going to a salon and getting your eyebrows laminated is between $50 and $100 on average. I know for me I don’t always have the time or want to spend the money so I love when I can do something myself in the comfort of my own home. How I laminate and tint my eyebrows at home:

What is Eyebrow Lamination?
“Eyebrow lamination is a relatively new procedure that focuses on creating shiny, smooth brows. Also sometimes called an “eyebrow perm,” the high-shine effects tend to be sought after by those who may be experiencing thinning or unruly brows. Unlike microblading, needles and coloring are not involved." Source
"Brow lamination straightens and lifts your natural hairs to achieve a full and feathered look, with no tattooing involved." Source
For me I found that the brow lamination kit I used didn’t make them super shiny but did lift my brows- I brushed them up and after doing the solutions they have stayed that way and look fuller and more natural. I am a big fan!
Eyebrow Lamination Kit
After reading reviews on Amazon, I decided to purchase this eyebrow lamination kit for under $30.
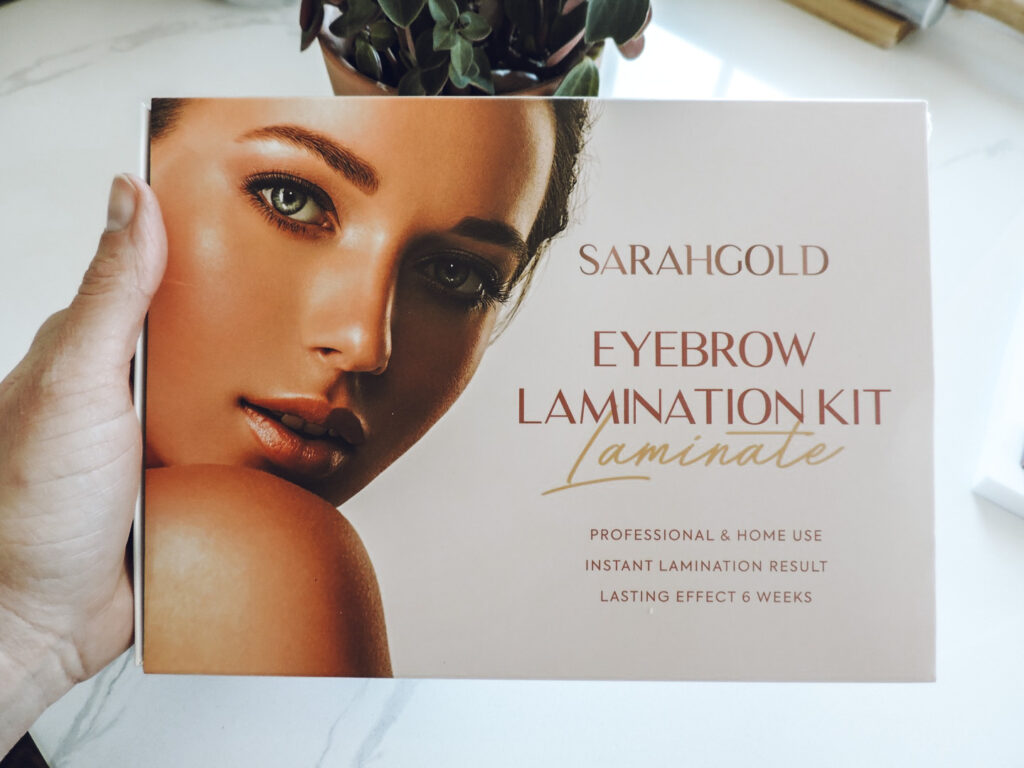
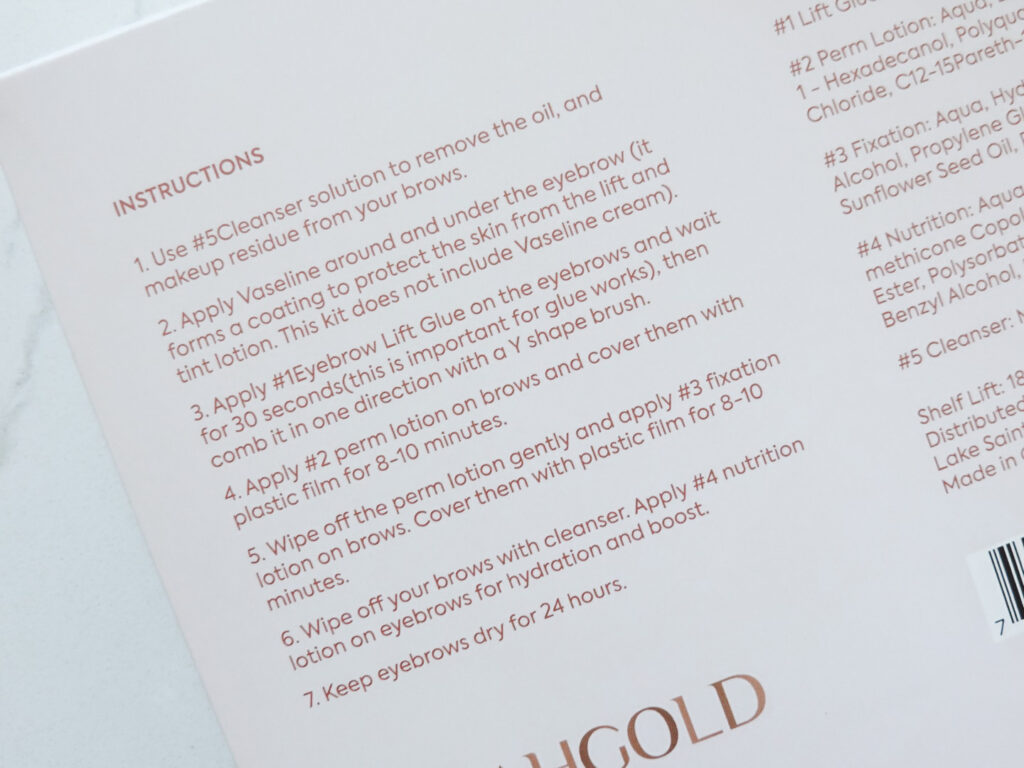
I thought the packaging was great – clean, easy to use and apply, along with plenty of tools to help do the process besides vaseline.
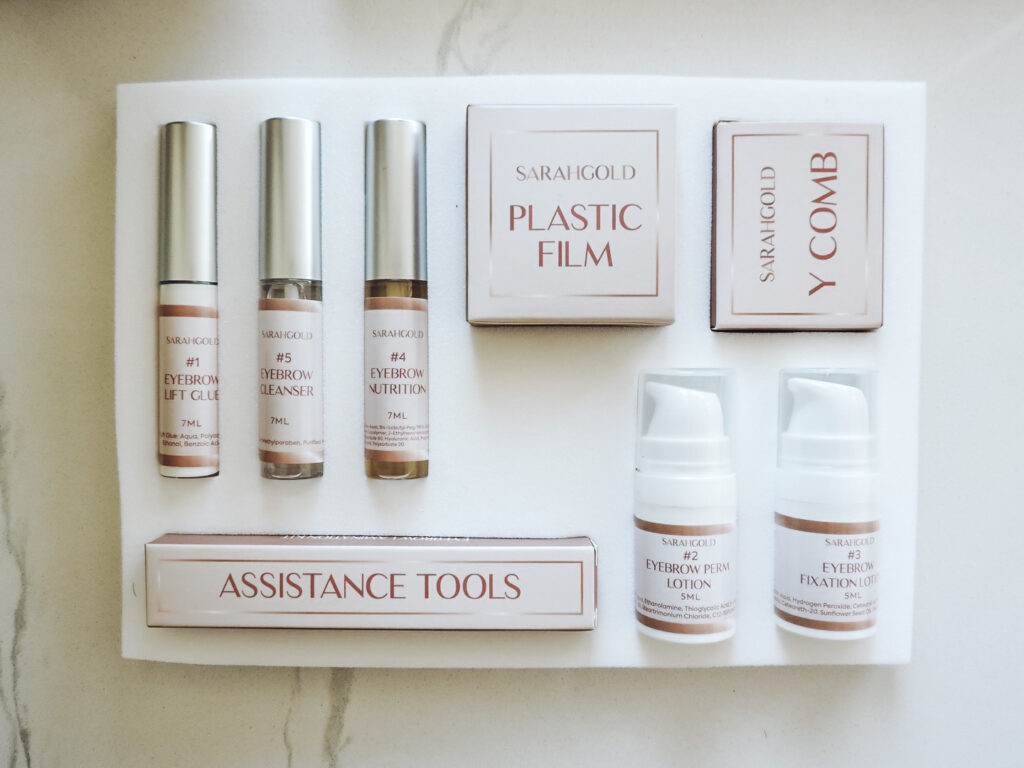
The instructions are on the back of the box and I found them very easy to follow. I followed the directions exactly and I was honestly kind of shocked with how good it worked!! The “perm solution” took me back to childhood days of my mom perming my hair at our brown kitchen table. One never forgets that smell.
Eyebrow Tinting
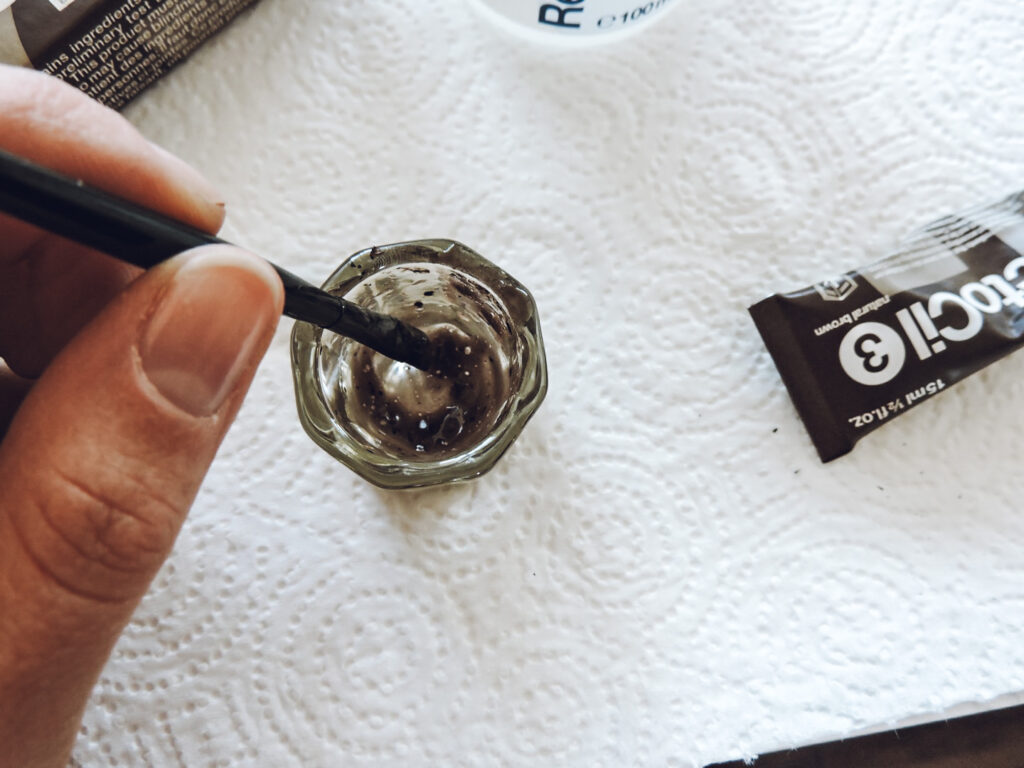
For years I have been tinting my own eyebrows and it is SO easy. I have been using this kit, it lasts me a very long time and I’ve only had to repurchase it once in like 3 years.
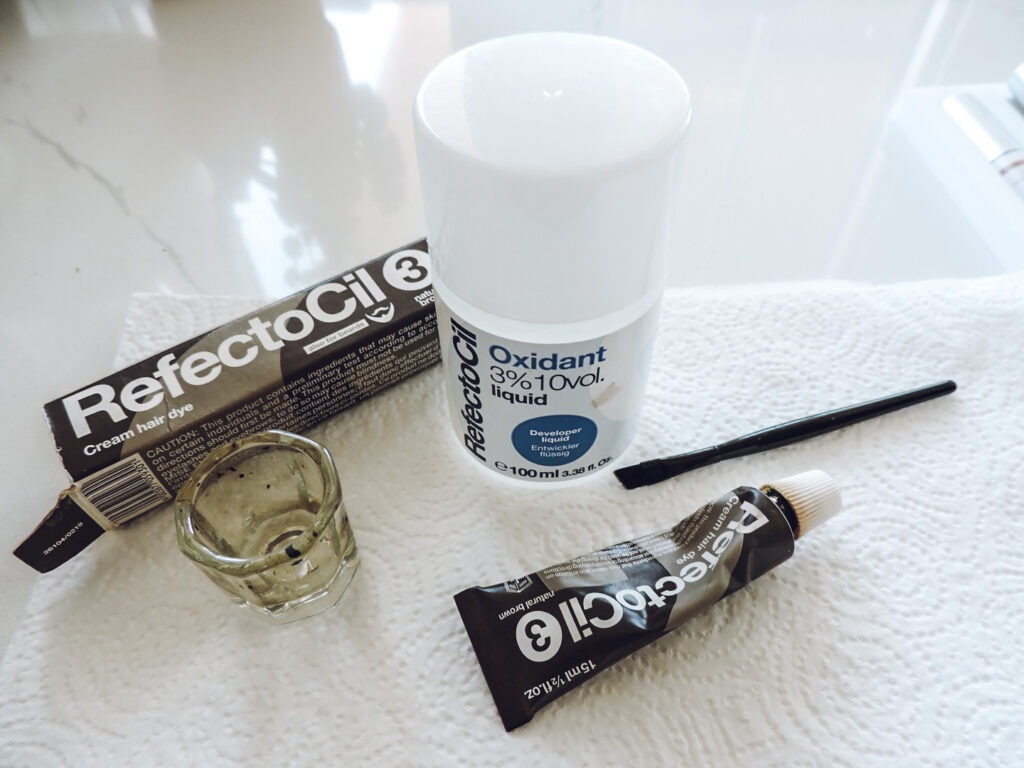
Follow the directions to mix- I simply do roughly a 1 tsp of the solution and a pea sized amount of the paste and mix together. IT IS DYE! SO IT WILL STAIN! (I know from experience.) I use the brush to apply it to my brows and leave it on for about 10 minutes. After 10 minutes I take a wet washcloth and clean off the dye and I’m good to go. (TIP: be sure to only get the dye on the parts of the brow you want- the first few times I suggest putting vaseline around your brows because it will dye your actual skin.)
When laminating and tinting at the same time, I chose to put on the tint after step 6. I did not use water to take off the dye but instead used the cleaner solution in the kit and then applied the nutrition lotion on after. It worked really good that way!
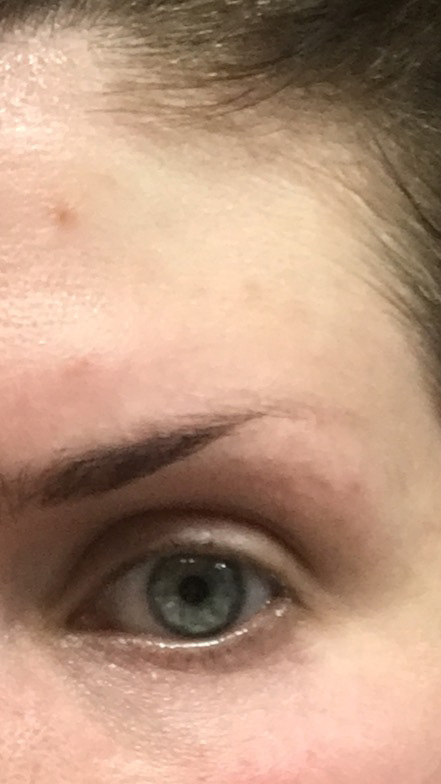
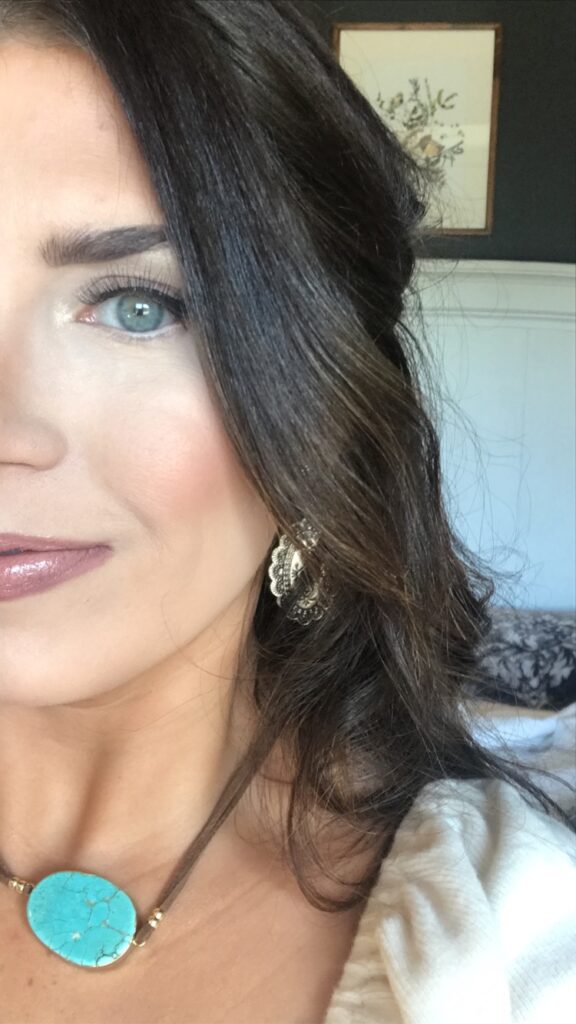
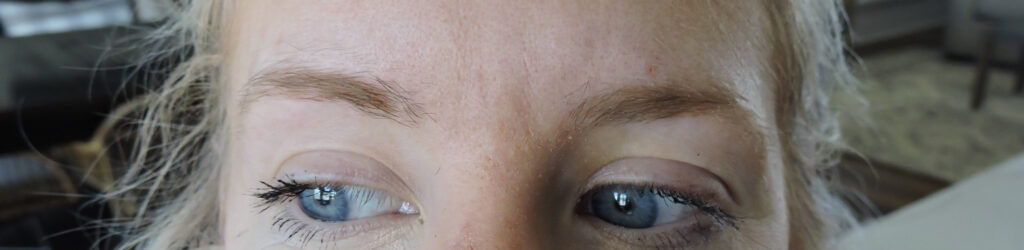
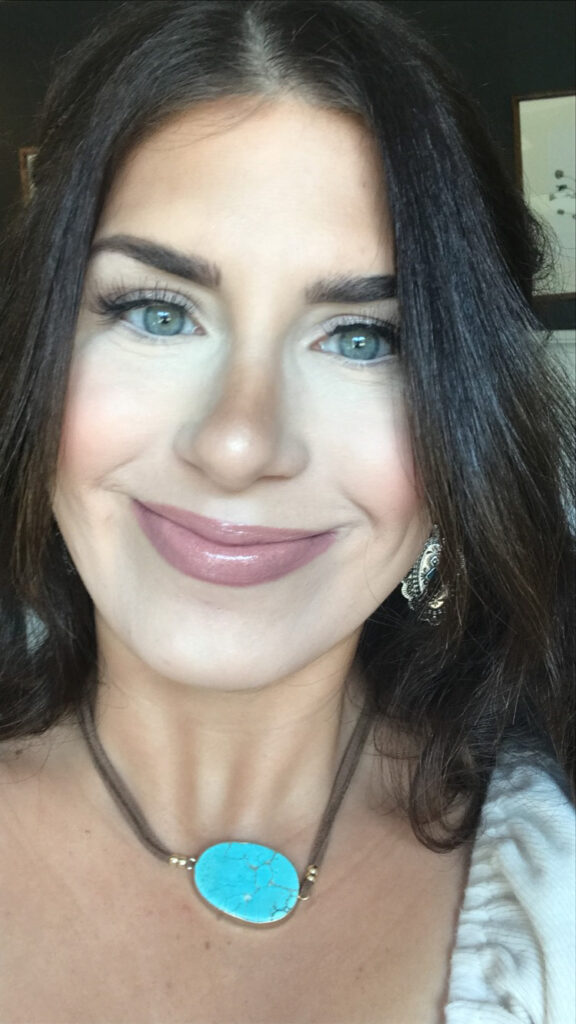
Lamination & Tinting Results
BEFORE
AFTER
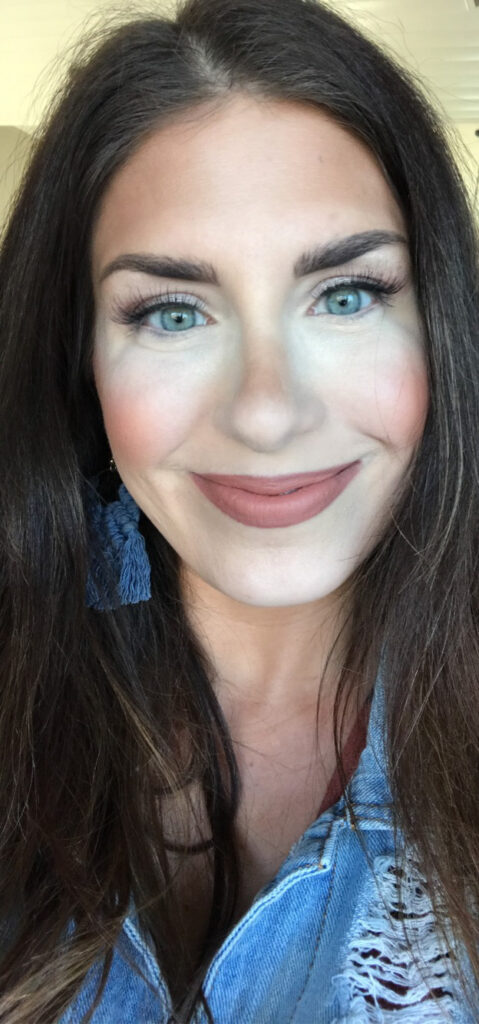
My brows look fluffier, bigger, more natural and I do not have to fill them in as much. I LOVE THEM!
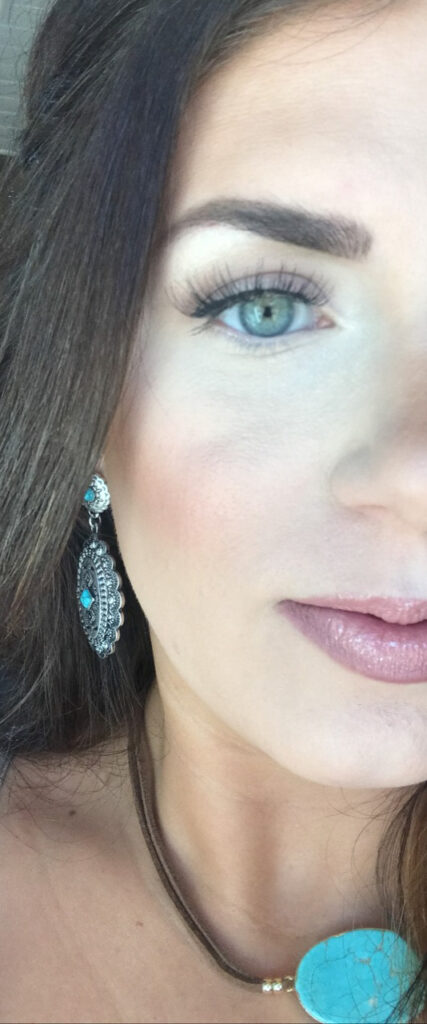
Can you see how the brow hairs “stay up” more than fall down?

I also did my sister’s brows and wanted to share her results as well!
BEFORE
AFTER
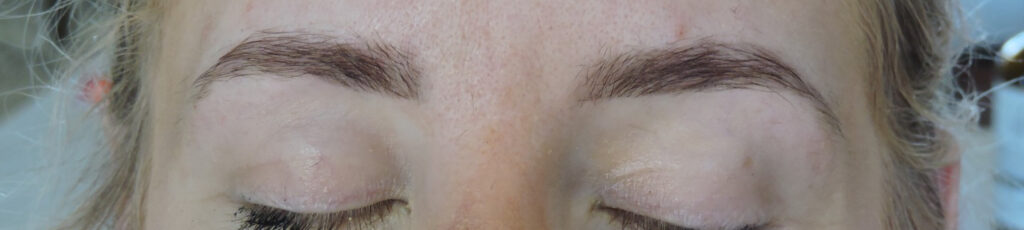
Again, I am in awe of how easy this was to do and how well it worked. I’ve always been too afraid to do microblading because that is so permanent and I just never wanted to go that route. This process took me about 30 minutes (20 of that is just processing) and is supposed to last up to 6 weeks. Will update my post and let you know how long it lasts!