
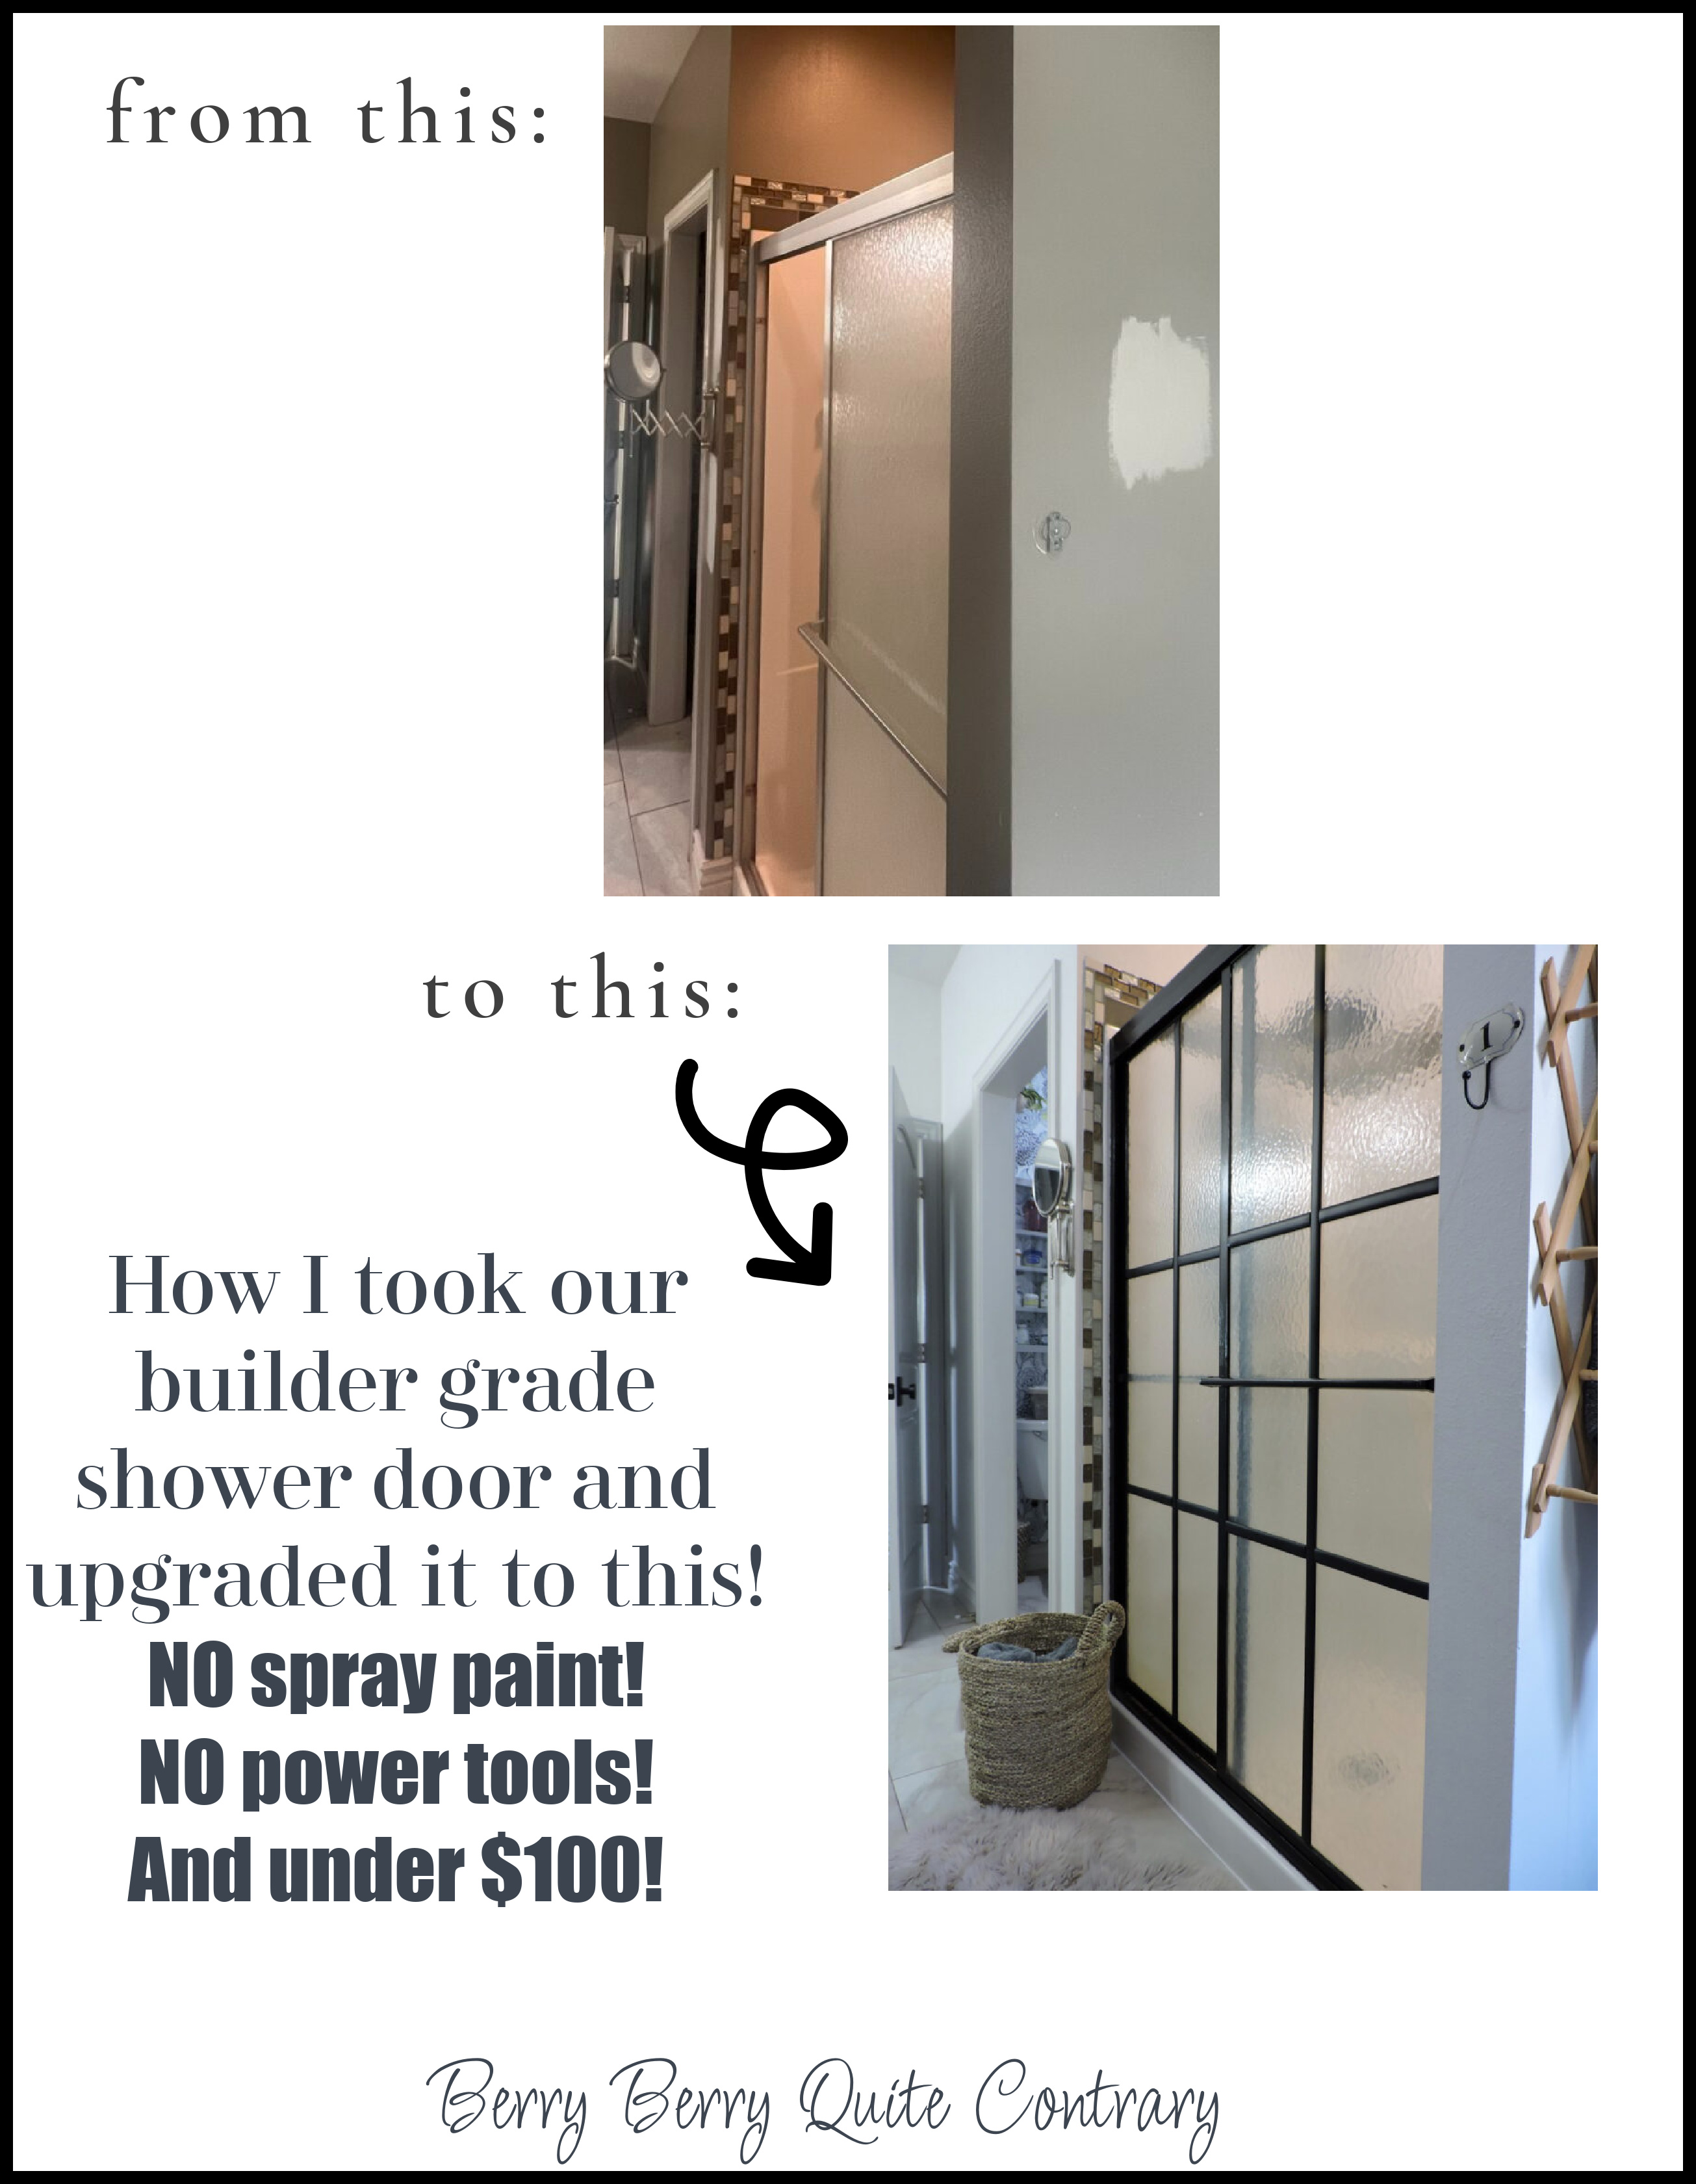
Shower Door Makeover – With NO Spray Paint Used
I’m pretty excited to be typing out this post!!! The main reason – the shower door and frame are D.O.N.E. Why do I feel like I’ve been working on this forever?!?! And secondly, because I found a way to paint a shower door frame and add a beautiful grid pattern on said frame using NO spray paint and NO power tools. Also- this project cost me right around $100- another reason I’m excited to be sharing this diy with you all! So lets get to it – shower door makeover reveal!!
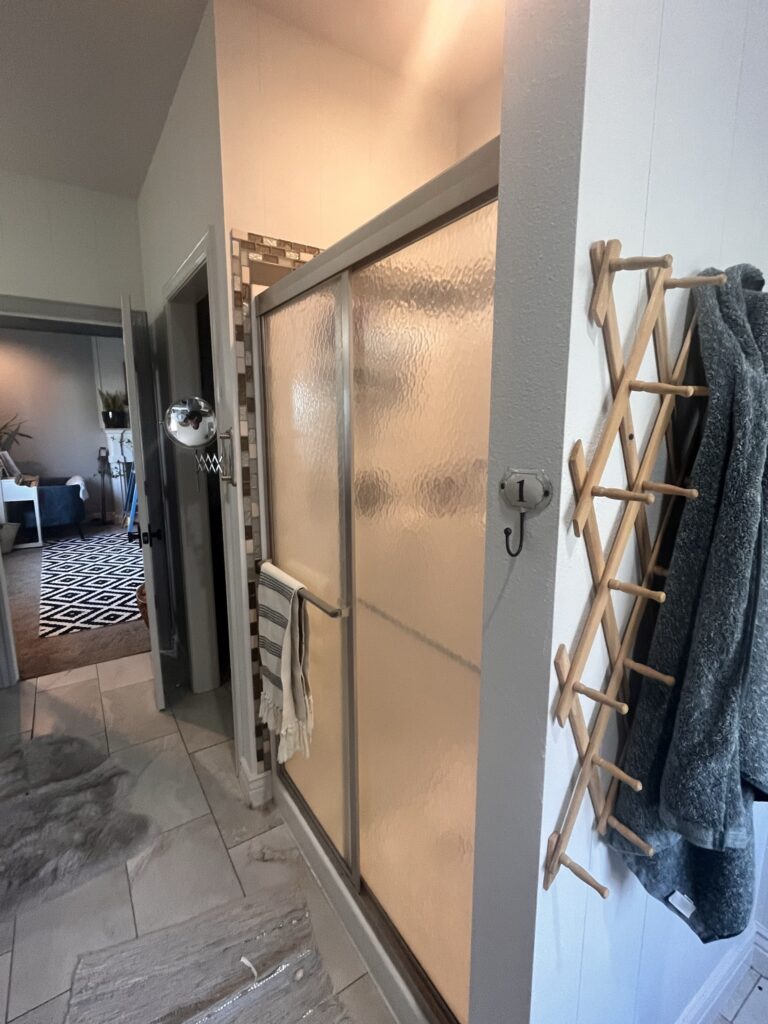
before
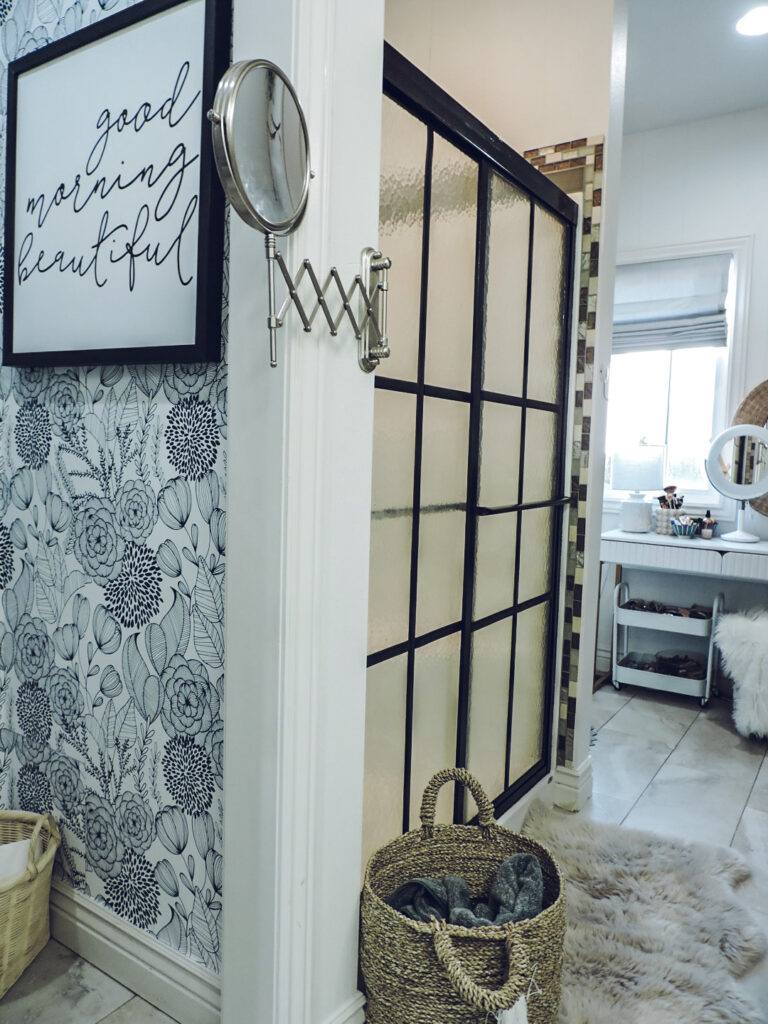
I’ve spent the last few months making over our master bathroom – to see the after you can go HERE. And here is what it all looked like before- your typical, standard, builder grade sliding shower door.
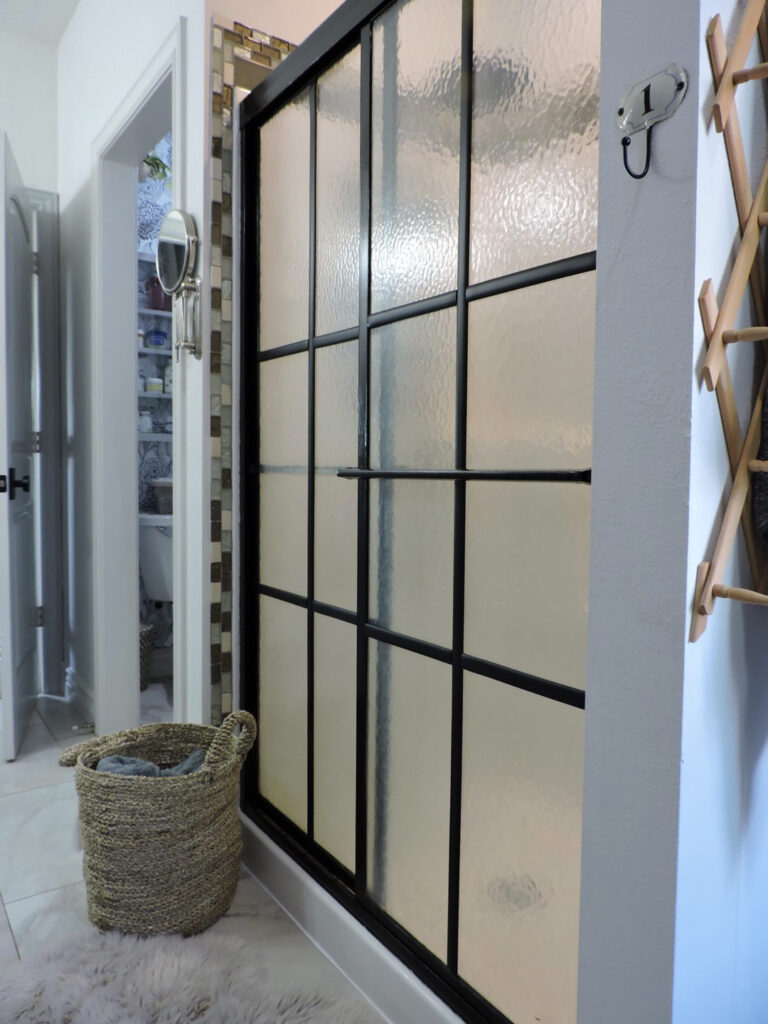
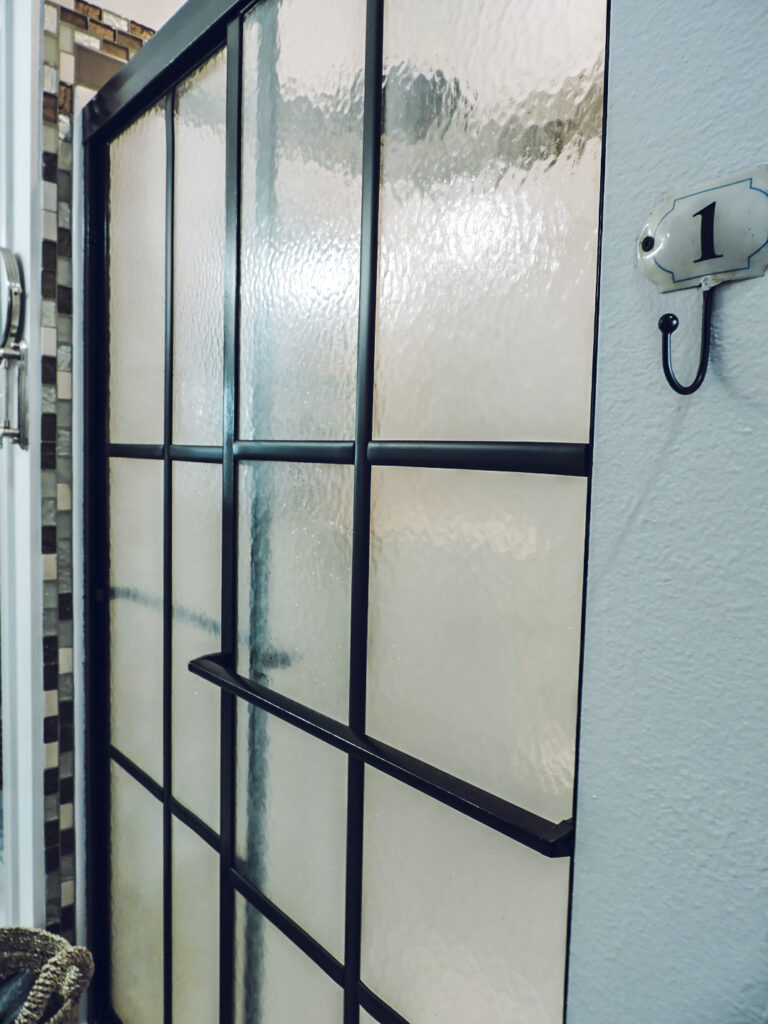
after
How To Paint a Metal Shower Door Frame
In the middle of doing the master bathroom makeover, I kept glancing at our blah shower door and repeatedly thought to myself that we really could use an upgraded door. But since I was doing the bathroom on a budget, no new shiny shower door was going to be in the plans. After doing TONS of research and looking through lots of photos and articles, it seemed to me the only way to give our metal door frame a new look was by using spray paint. And I just wasn’t interested in that at all. After more research, I decided I would take a risk and try to paint the door frame another way.
step 1
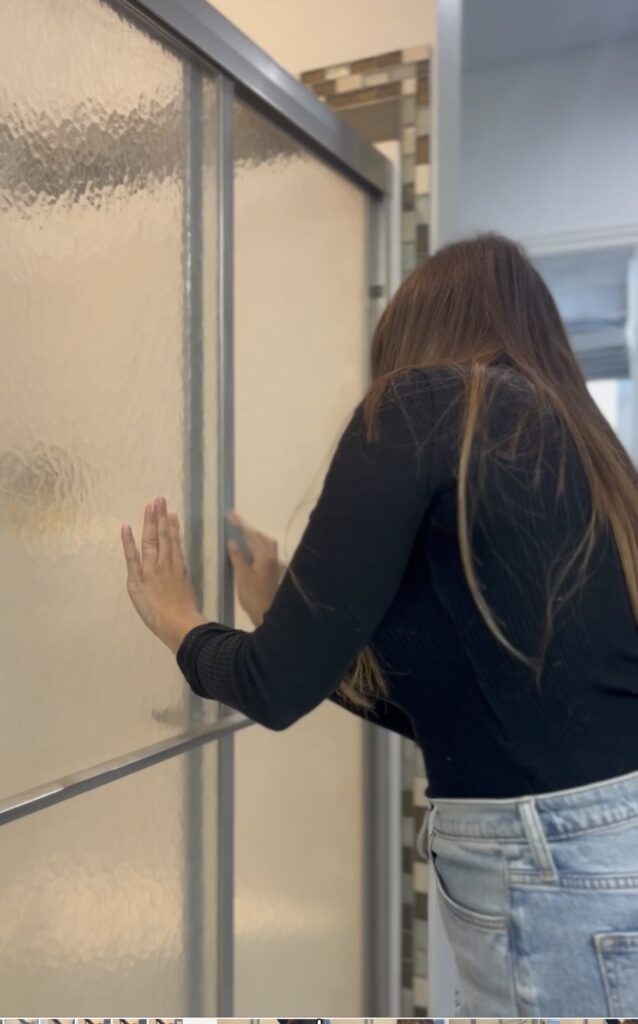
Clean your door frame very well. I used Thieves dish soap but you can use whatever you have on hand. I then lightly sanded the door frame using a sheet of fine sand paper.
step 2
Tape around the metal frame and use a water based acrylic exterior/interior paint to paint the frame.
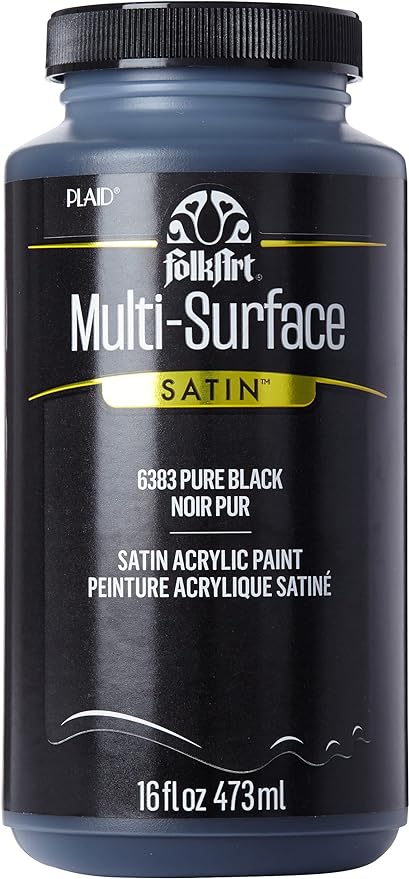
This is the paint I chose. There honestly might be a better option out there, but if there is- I don’t know what that would be! I ended up doing 3 coats of paint.

step 3
This is the part where you all get to learn from my mistakes. Lucky you! The paint seemed to adhere quite nicely to the metal so I did not do a sealer. After about 2 weeks, I noticed the inside part of the door frame was starting to flake off in a few places. After trying a few different sealers, I finally found one that has worked very well! DEFT Clear Wood Finish, Semi Gloss Brushing Lacquer is what you need to seal your paint! Be warned – you definitely need to have some windows open while using this stuff, it is potent.
If you are painting around an interior window or door, somewhere that is not going to get wet – then I feel like you can totally skip the sealer. The paint on the outer part of the door was fine, it was just the inside part that was getting wet.
step 4
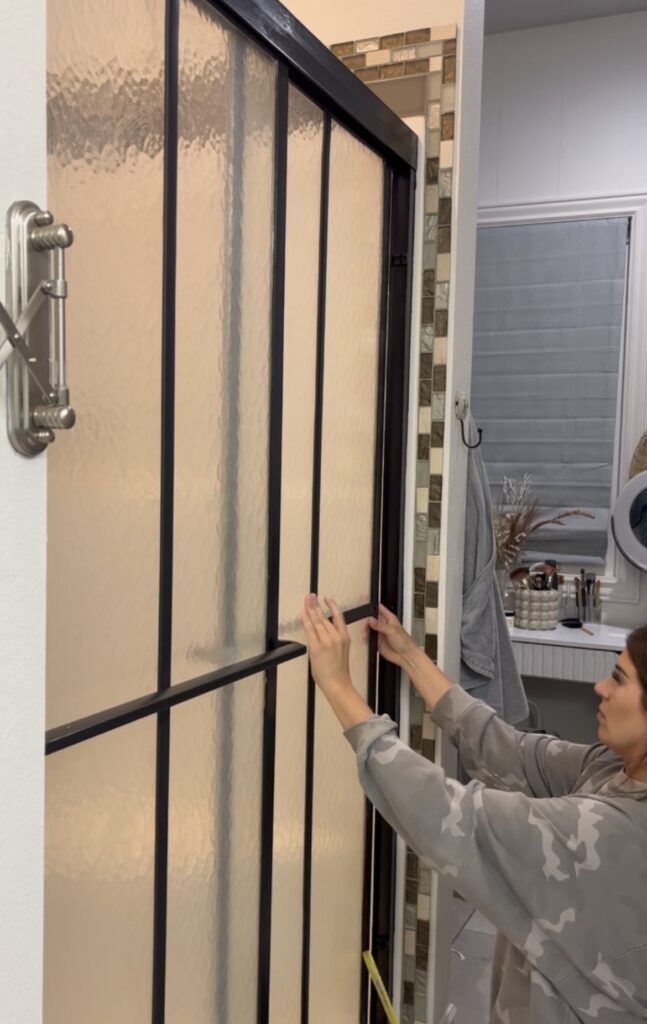
My most favorite and easiest part of this project was using automotive trim to create a grid pattern on the shower door. That’s right- automotive trim. Who would’ve thought?! I saw someone use this on a window in their home and light bulb moment – I knew it would probably work on the shower door as well. I purchased this trim from Amazon and had just enough for the door.

I measured the door and used a pair of good scissors to cut the trim. What is great about the trim, is it has an adhesive back, you just pull off the tape and stick it on. It is very strong and has not budged since I’ve installed it.
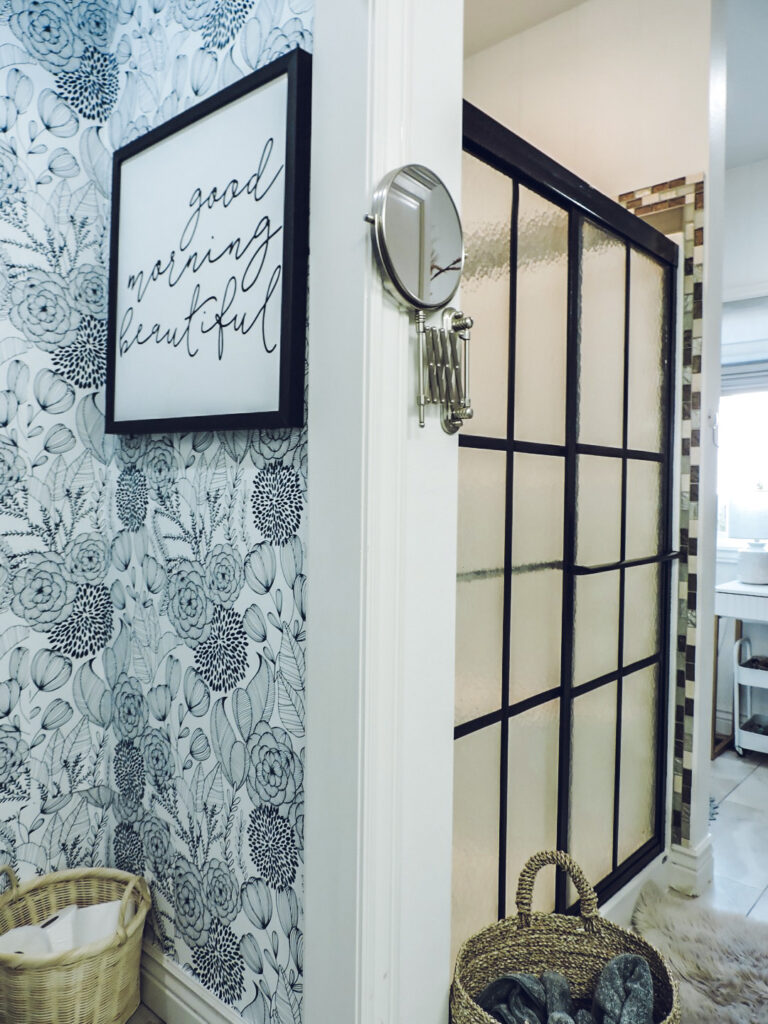
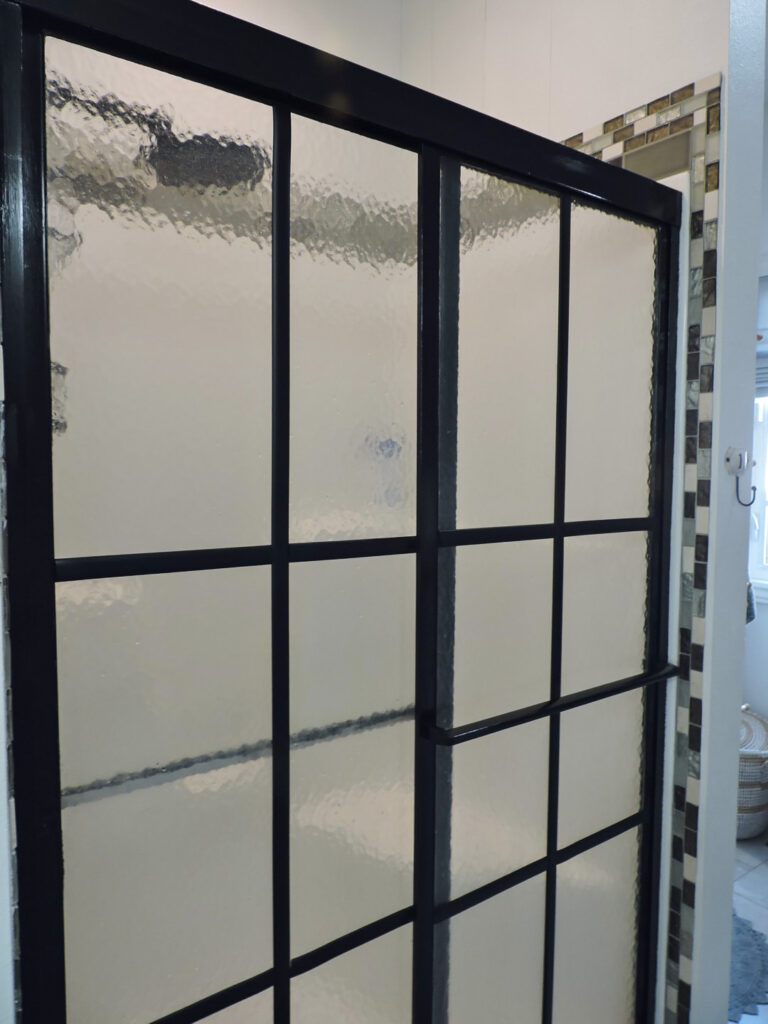
I can’t get over how good this is! Such a big transformation!

There are still things I want to do in here someday – replace the floors, tile and countertops. All of that will come in time but I’m really proud of myself for being creative and not giving up when it came to this door. (There were a few times I might of wanted to google “new shower sliding doors”.)
Would love to hear if any of you end up trying this diy!!
xoxo
Kayla