
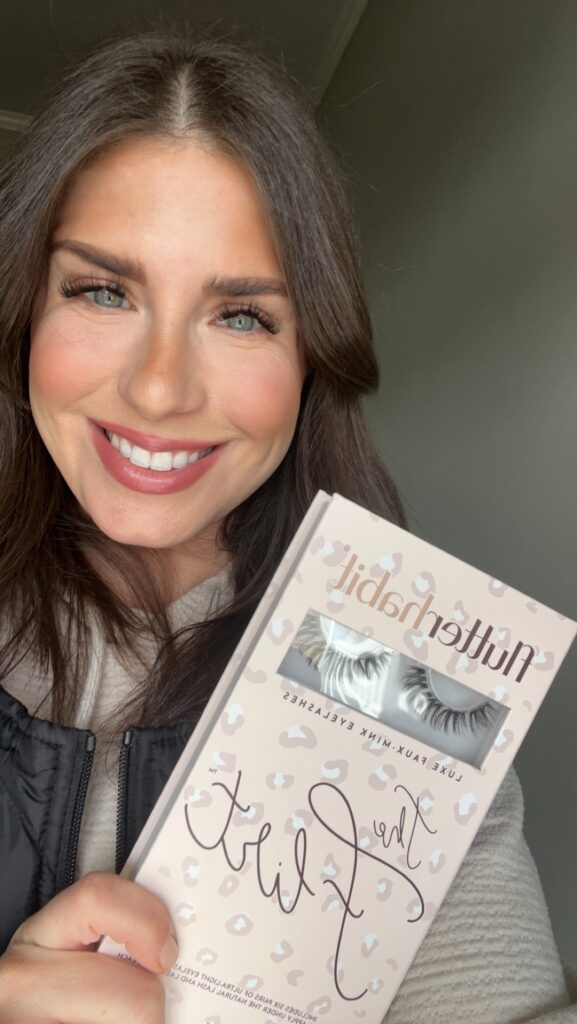
My Must Have Beauty Item – Flutterhabit Lashes
For the last at least 5 years I’ve worn false lashes. Once you start wearing them, it’s really hard to quit. Compare it to trying to quit coffee or pop that you are in a habit of drinking everyday – same thing (kind of). Years ago, I tried getting lash extensions which did not go well – an allergic reaction, missing eyelashes and a heavy dose of Benadryl later- I swore to never try that ever again. Over on Instagram I started seeing these Flutterhabit lashes keep popping up on my feed and then a few people I followed started wearing them. I was intrigued but hesitant. Lashes that you glued to the underside of your eyelashes?? Lashes that lasted 5 days?? Last fall I decided to give them a whirl and now I am legit addicted. (Sidenote- this post is NOT sponsored. I would totally love to be but just an fyi!)
Why I Love Them

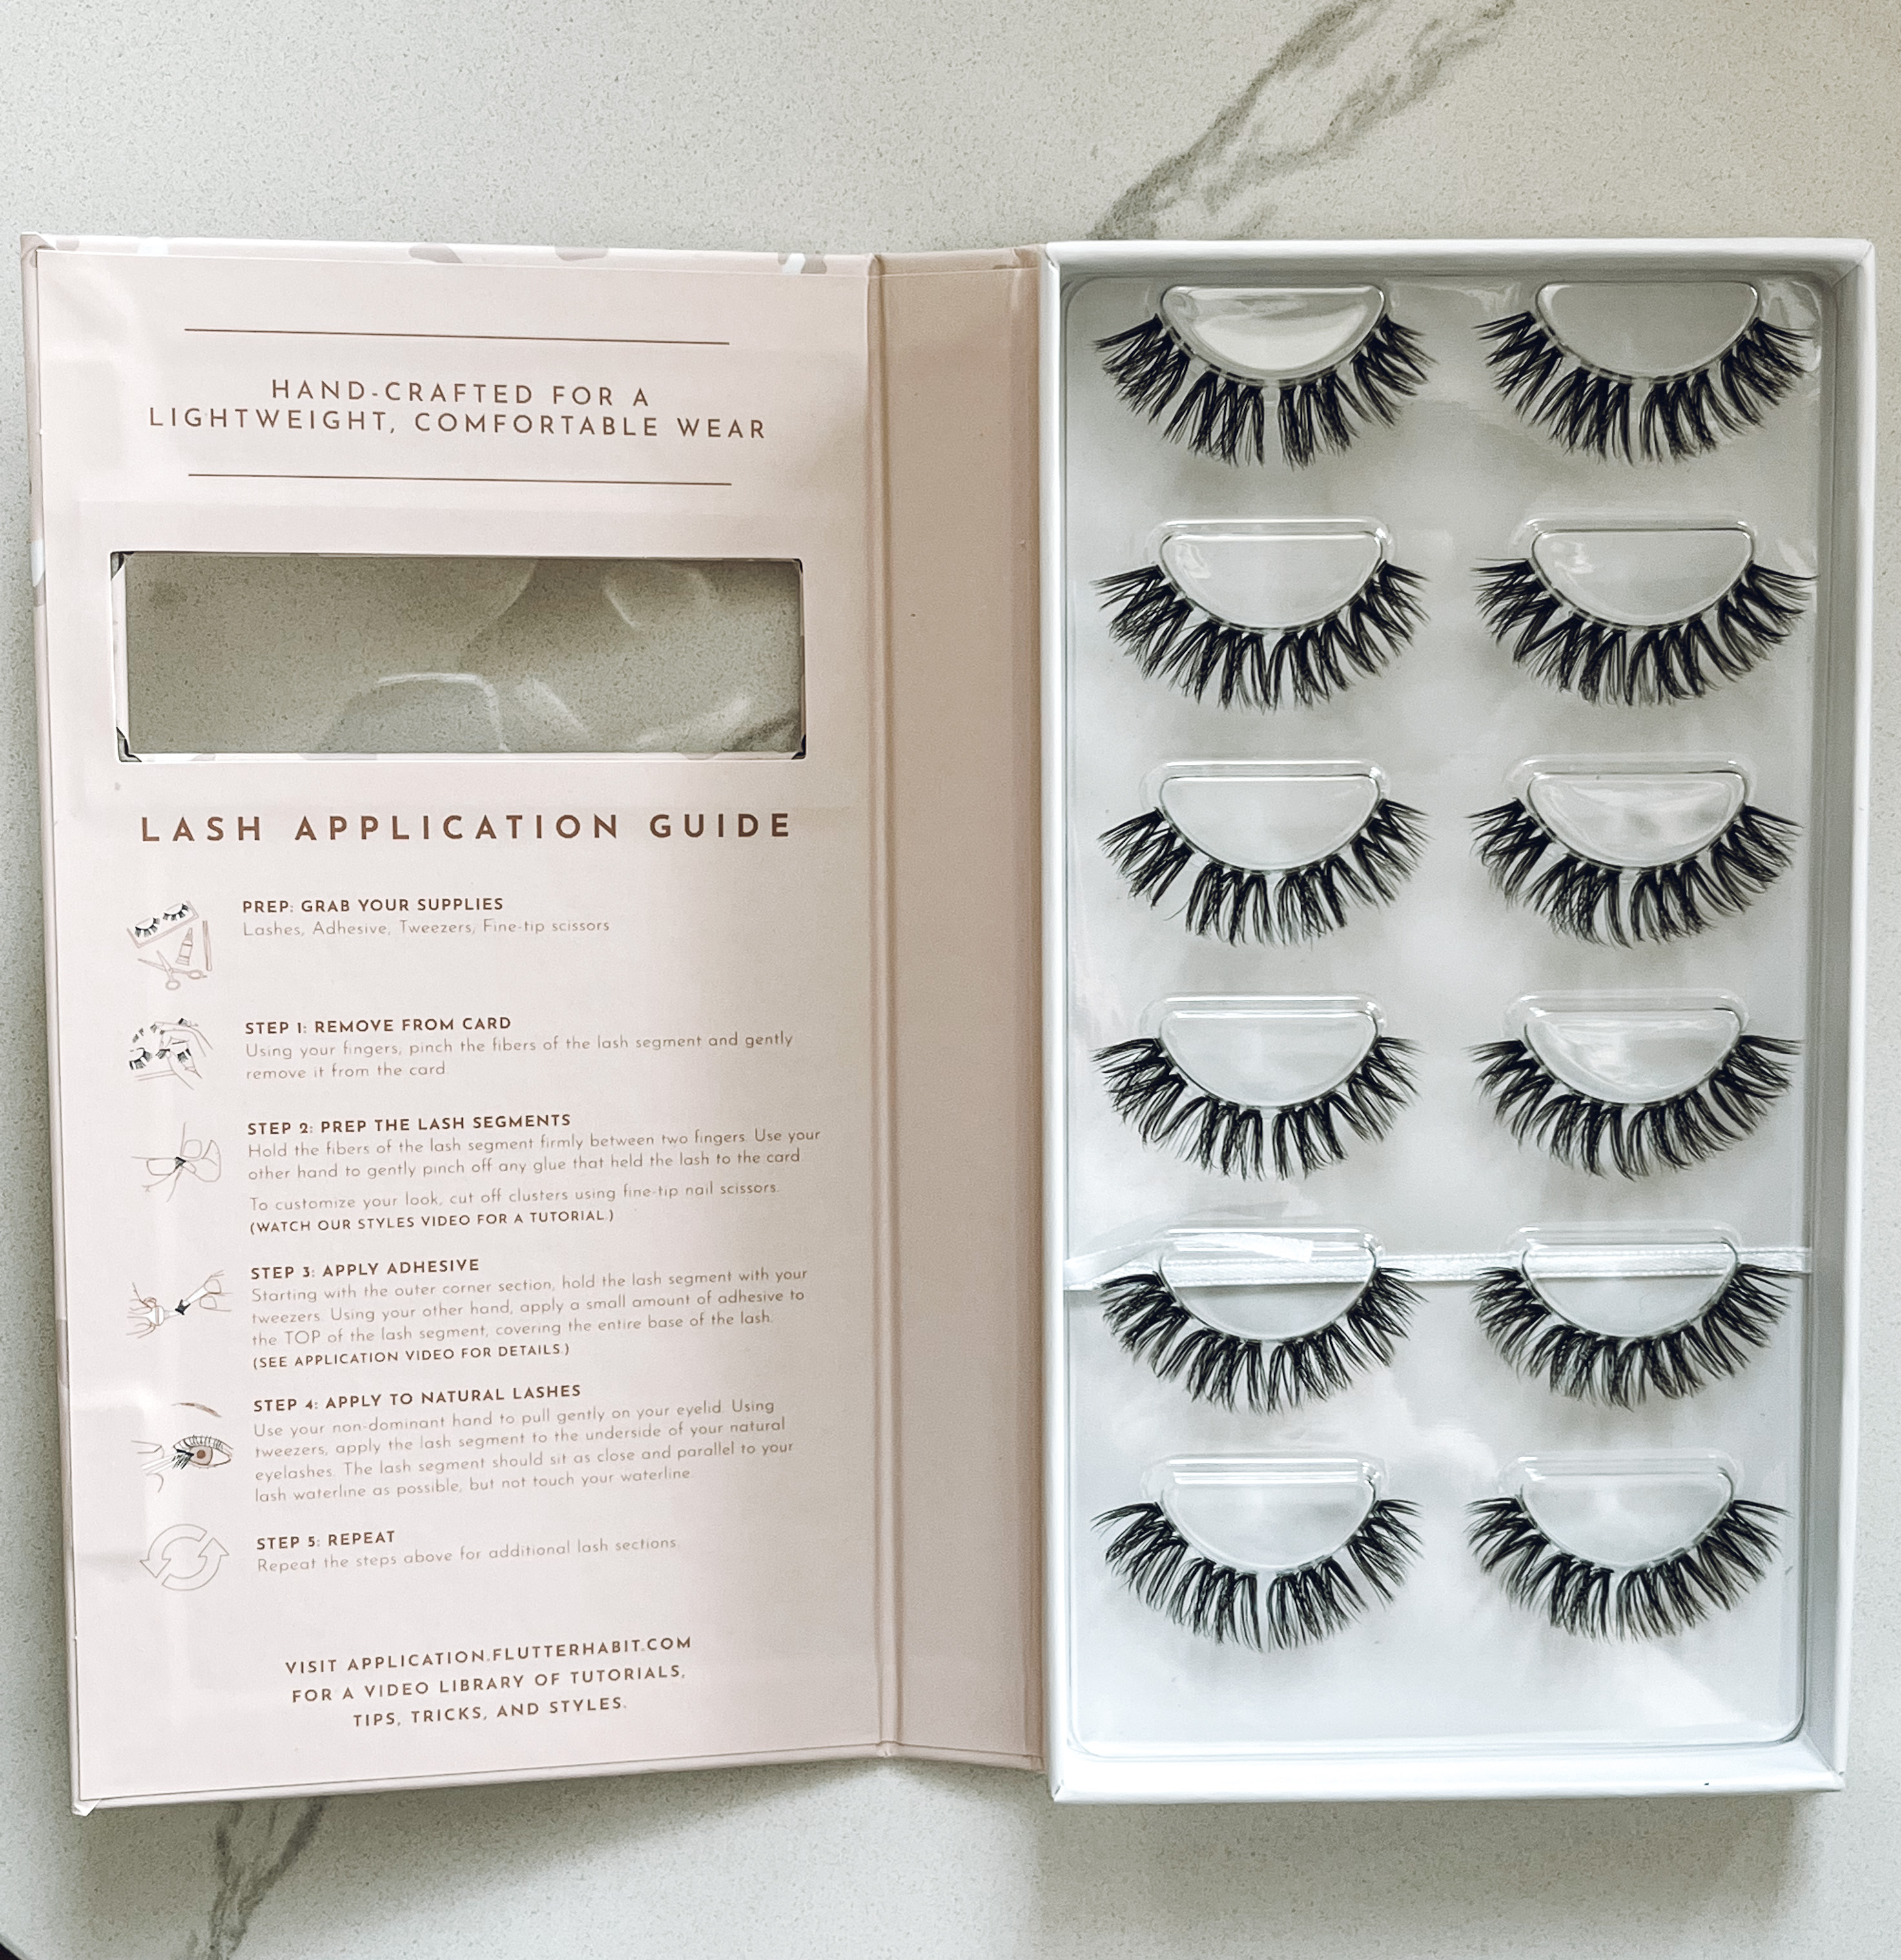
- Easy to Apply! It takes some practice getting the hang of putting these on, like anything in life. The first few times I tried applying these I was quite frustrated. And after having lashes fall off after just 1 day, I decided pretty quickly they weren’t for me. It wasn’t until I saw someone give a tip on applying these that I decided to give them a second chance. And now- I have them applied in 5-10 minutes.
- Saves Me Time! I might be rare when it comes to this but I love getting ready in the morning. Sitting down at my makeshift vanity and applying my makeup for the day always makes me happy. But, I’m a busy mom and don’t always have tons of time to sit down and do my makeup like I’d like. Having my lashes on when I wake up saves me at least 5-10 minutes. I can do my makeup so much quicker with these on.
- Love the Look! These look so similar to girls who go and get professional eyelash extensions (in my opinion). I like how these look more than my strip lashes; look more natural to me!
- Affordable! These are much cheaper than eyelash extensions and much less time consuming.
- Lasts me 5-7 days! Once applied, these typically last me 5-7 days.
Tips On Applying

- Give It A Minute!! After putting glue on the eyelash segments, I let them sit for at least a minute before applying them to the underside of my eyelashes. This way the glue is a little bit tacky so they apply easier and don’t slide around as much.
- Leave Them Alone! Once you apply these to your eyelashes, LEAVE THEM ALONE! This is my biggest and most important tip. I leave them alone for at least 15 minutes, unlike strip lashes where you have a limited time to get them put in place, this type of glue takes much longer to set. I will use the bottom side of my tweezers to carefully push them up (not touching the base where the glue is) a few times throughout the fifteen minutes but don’t do anything else.
- Customize it to Your Shape! Most people have to trim at least 1 tiny segment of the lashes. For me- I have smaller eyes so I find with most styles, I only need 3 of the segments, not 4. You might need all 4, but don’t feel like you have to use that much if it doesn’t fit your eye.
- Use Tweezers! To apply these, you should use tweezers. I don’t think just using your fingers would work very well.
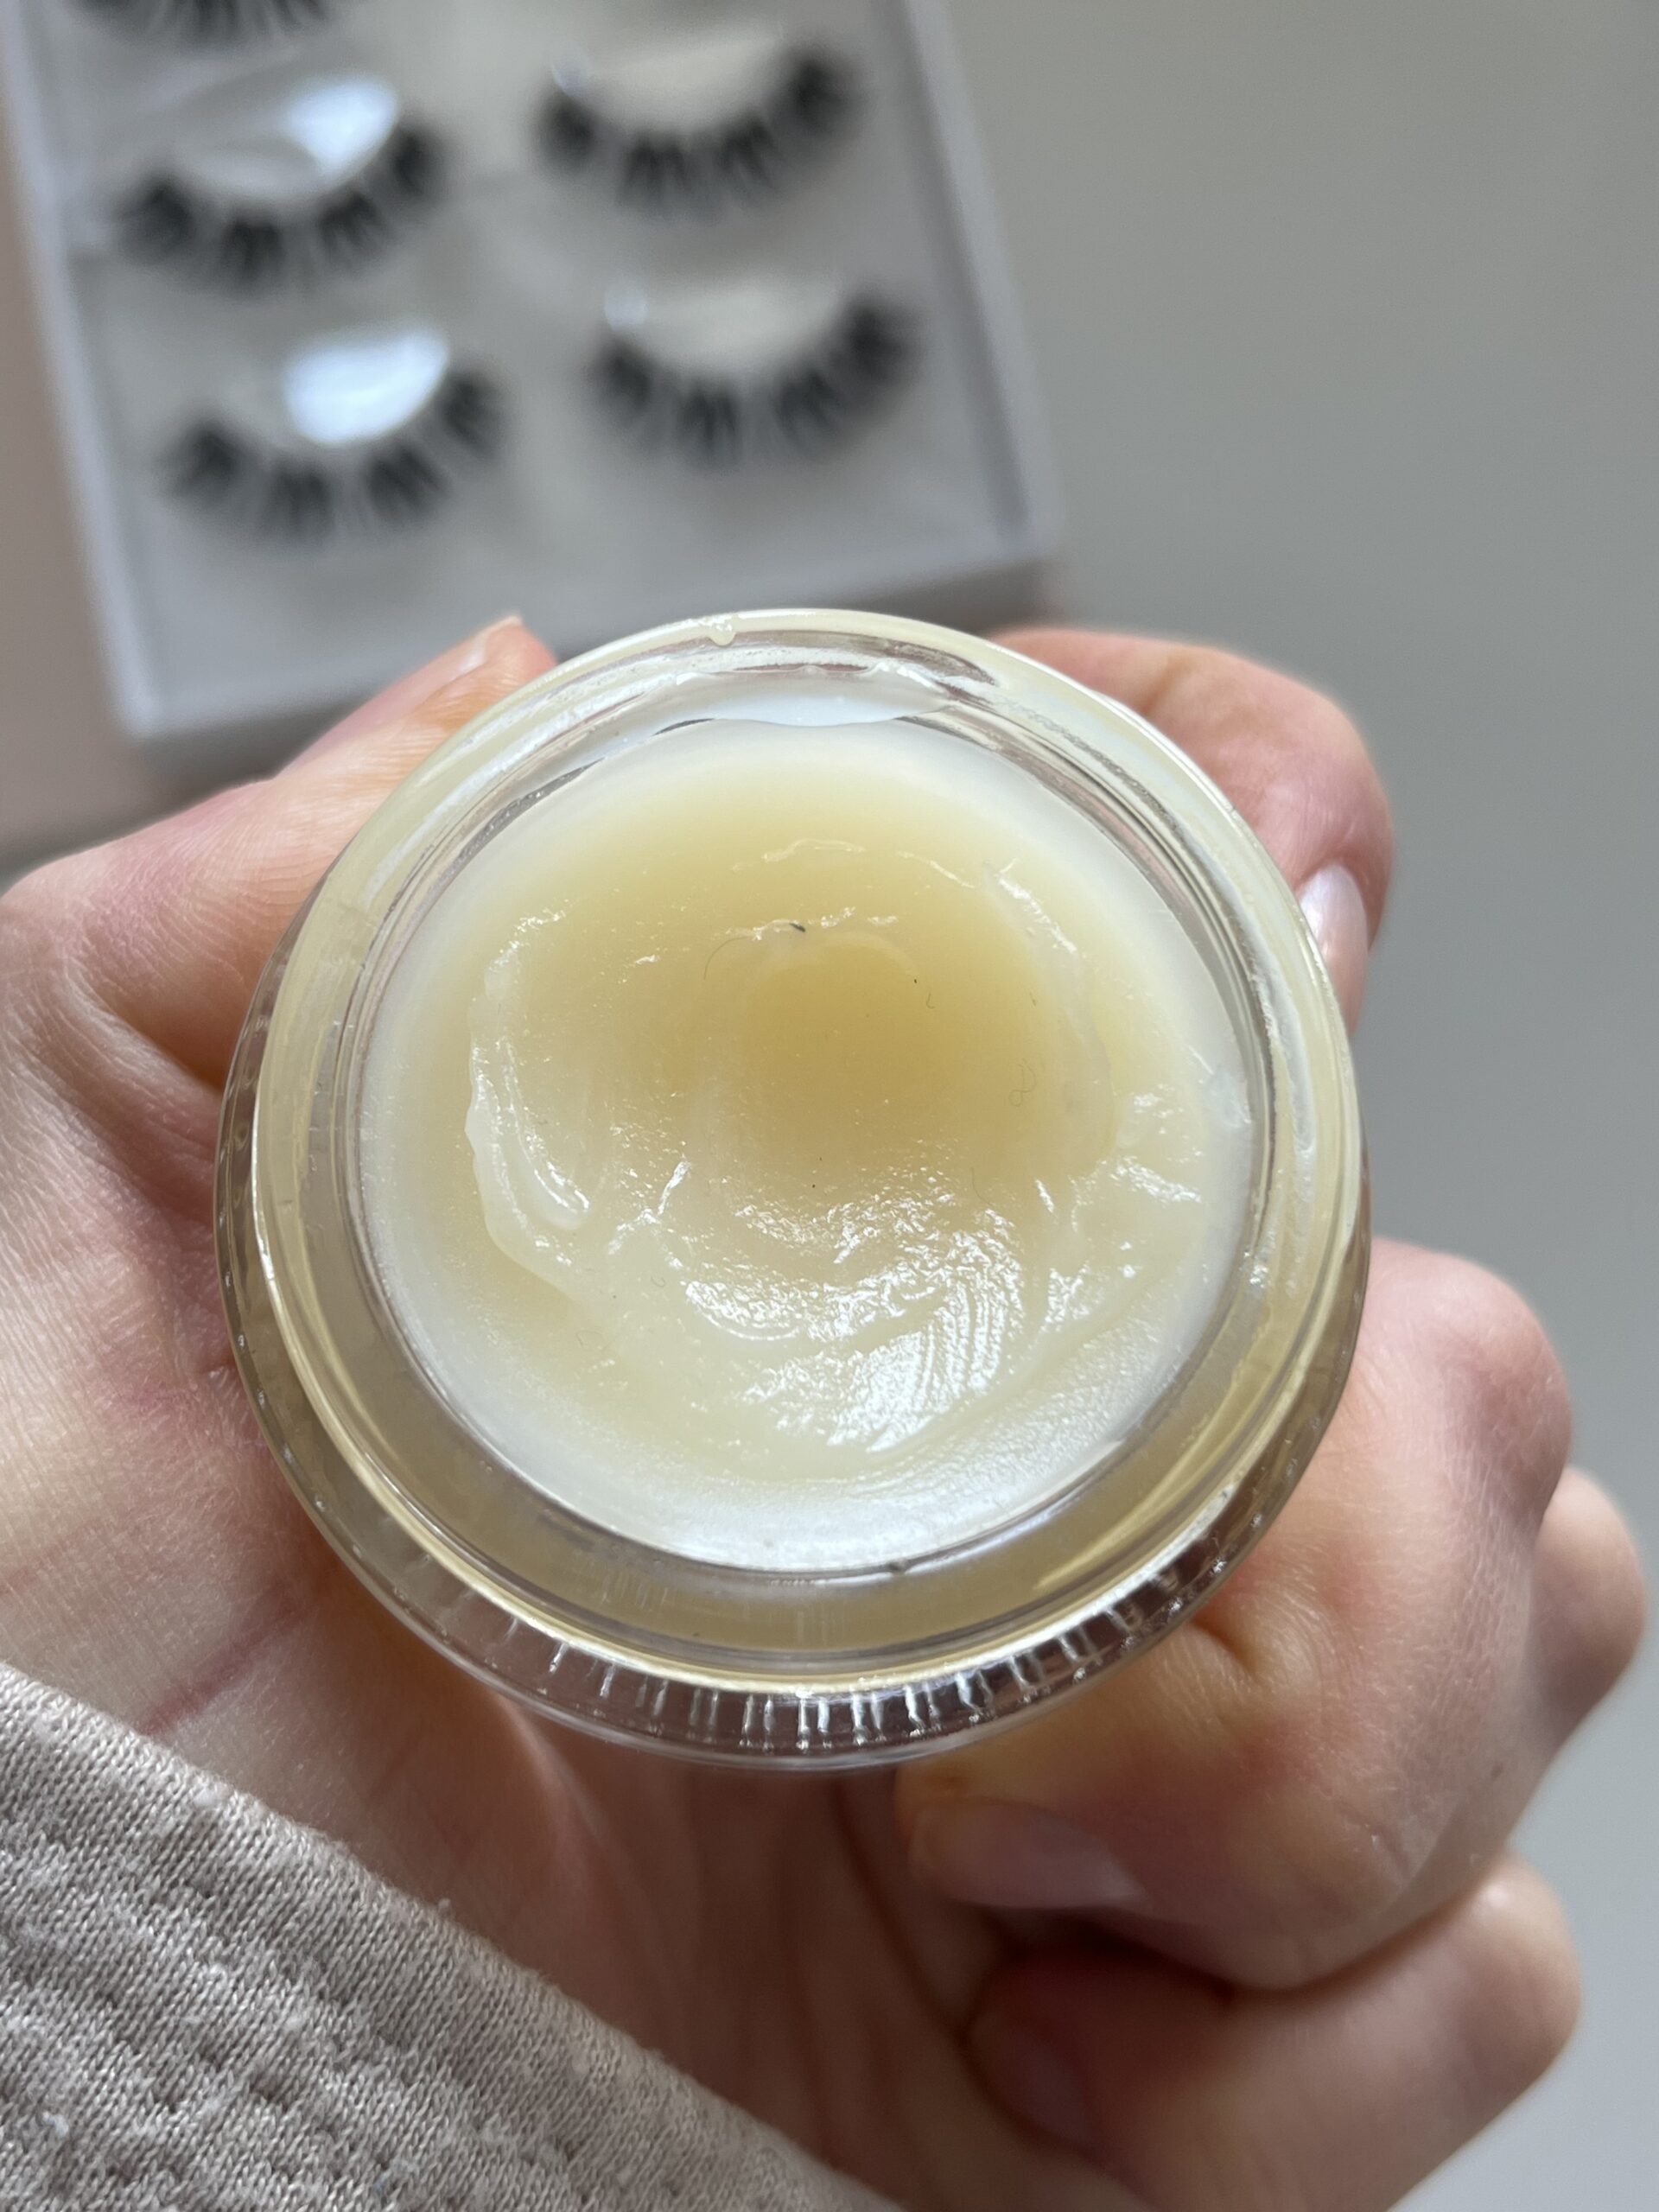
- The Remover Balm is a Must! The company just came out with a new balm to help you remove your lashes. I’ve used this twice and it works like a charm. You don’t want to pull these off or you’ll pull your natural lashes out with them. I take a small amount of balm and rub it all over my eyelid and within a minute or two they slide right off.
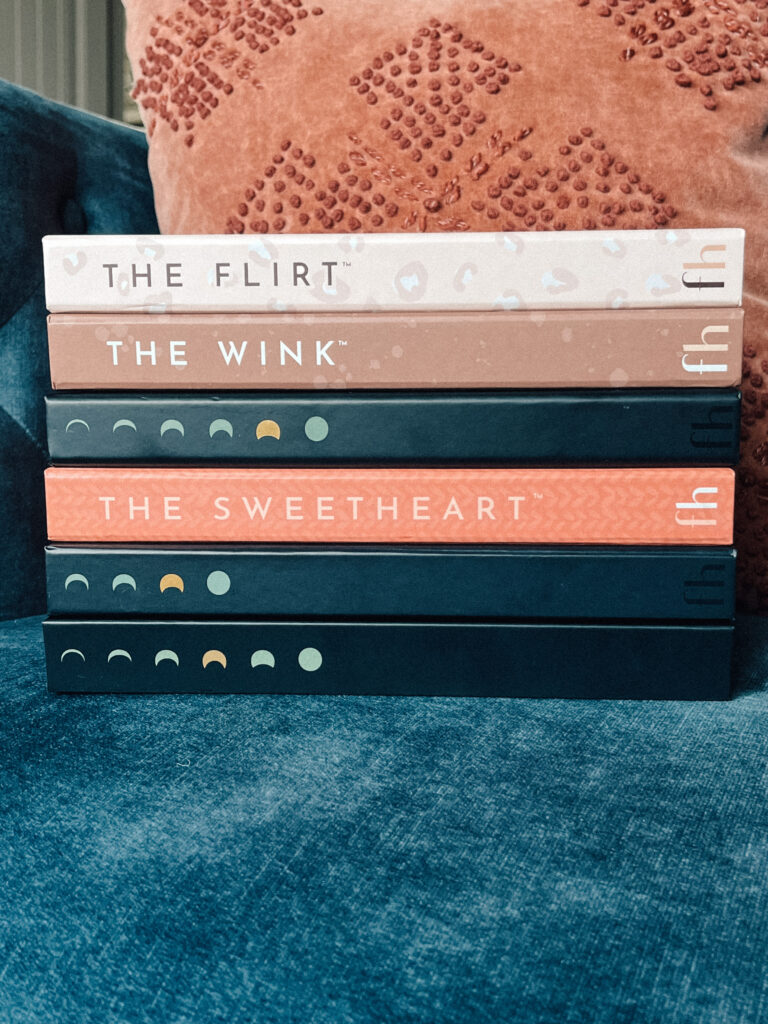
My Favorite Styles
- The Flirt. This is hands down my favorite style!! I only use three of these segments. Full looking and very curly- I also find these the easiest to apply.
- The Wink. With this style, I use all 4 segments. If you have smaller eyes, these are a great choice!
- The Sweetheart. These are a great middle of the road lash, not too “va-voom” but not too “natural”. Just the right in-between.
You can purchase your flutterhabit lashes HERE.