Stenciled Tile For Faux Fireplace in Master Bedroom
In my experience the master bedroom is always last on the list when it comes to decorating. We’ve lived in our house now for almost 8 years and I haven’t done much to it in that time- other areas of our home like our kitchen makeover, living room, dining room, etc. have all taken precedence over the master bedroom. Last year one of my goals for the year, 2022, was to re-vamp our bedroom into a relaxing oasis; which did not happen. So therefore I have deemed 2023, the year of the master bedroom. It has been declared. 🙂
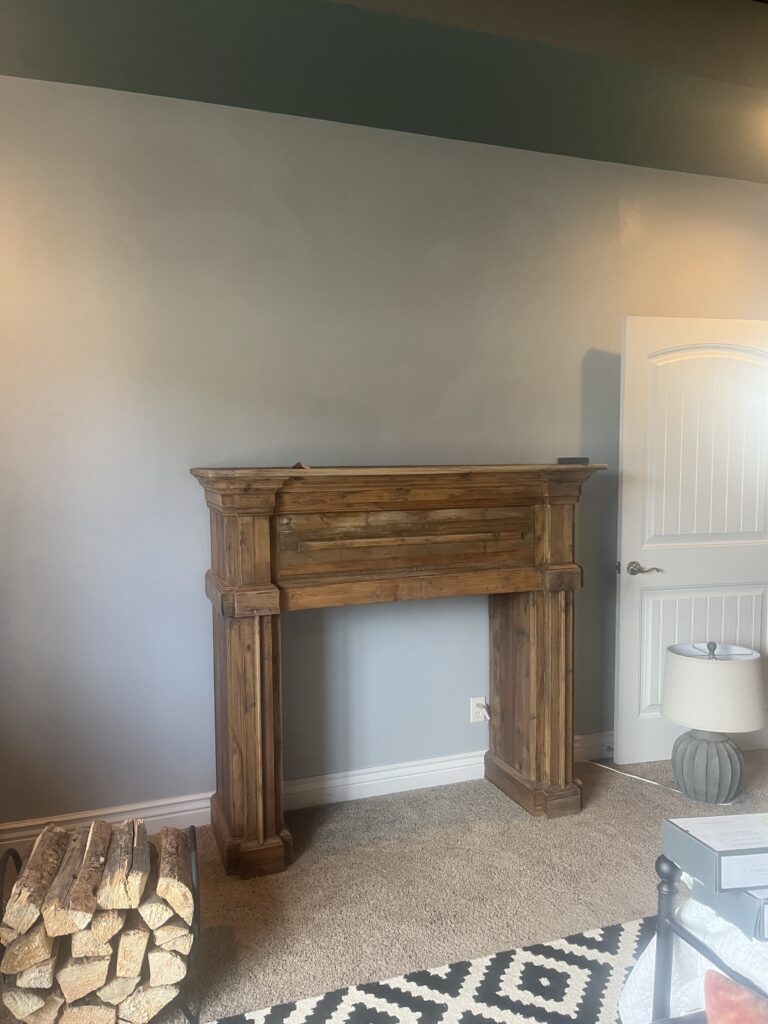
I couldn’t believe when I found this fireplace surround on Facebook marketplace for only $100. In my brain, I had the idea of doing a faux fireplace in our room to cozy it up and add some character so had been searching for an antique fireplace surround for over 6 months. Literally- hit the jackpot when it came to finding this item. Matt brought it home for me and that’s when the real fun started taking place.
Our piano used to sit right where we placed this fireplace; I actually had someone on Instagram suggest swapping them around and I knew that was the right call. This way the fireplace becomes more of a focal point. And down the road I hope to move the piano somewhere else in our home but for now it is here to stay.
Stenciled Tile
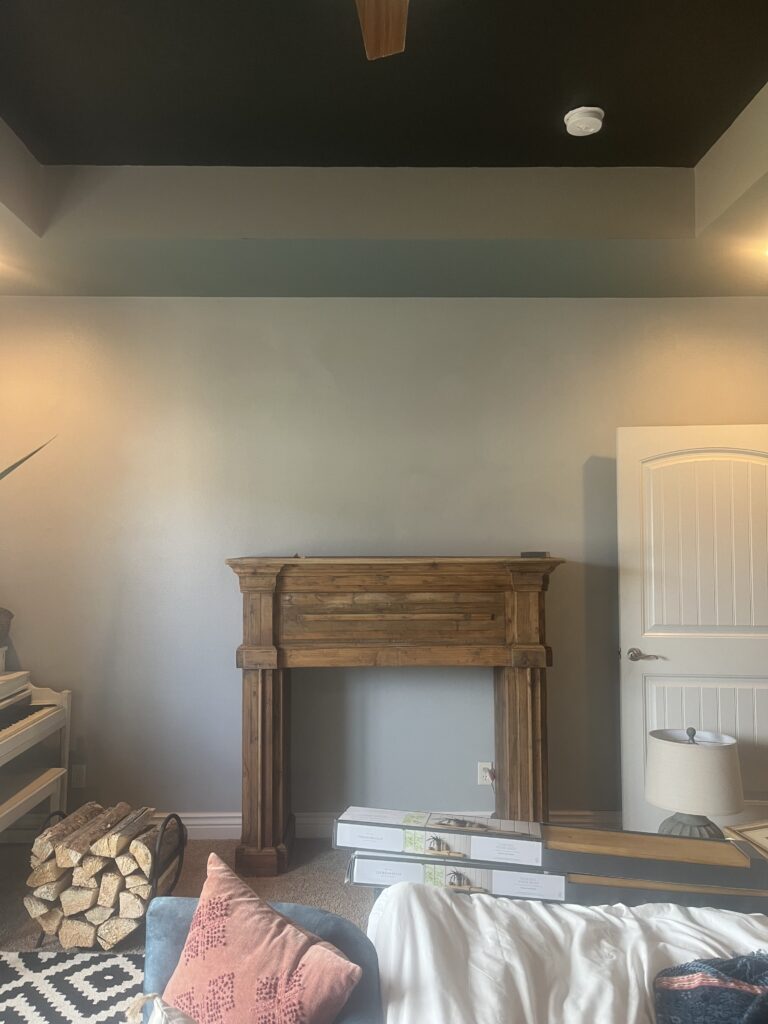
The options were endless for what I could do to this thing- my overall goal was to make it look like it’s always been a part of the room and not something that was just placed in here. The kicker- I had to do it on a budget and a tight one at that. But I like a challenge and I know the power of a stencil and some paint- our front porch is a prime example.
First Step
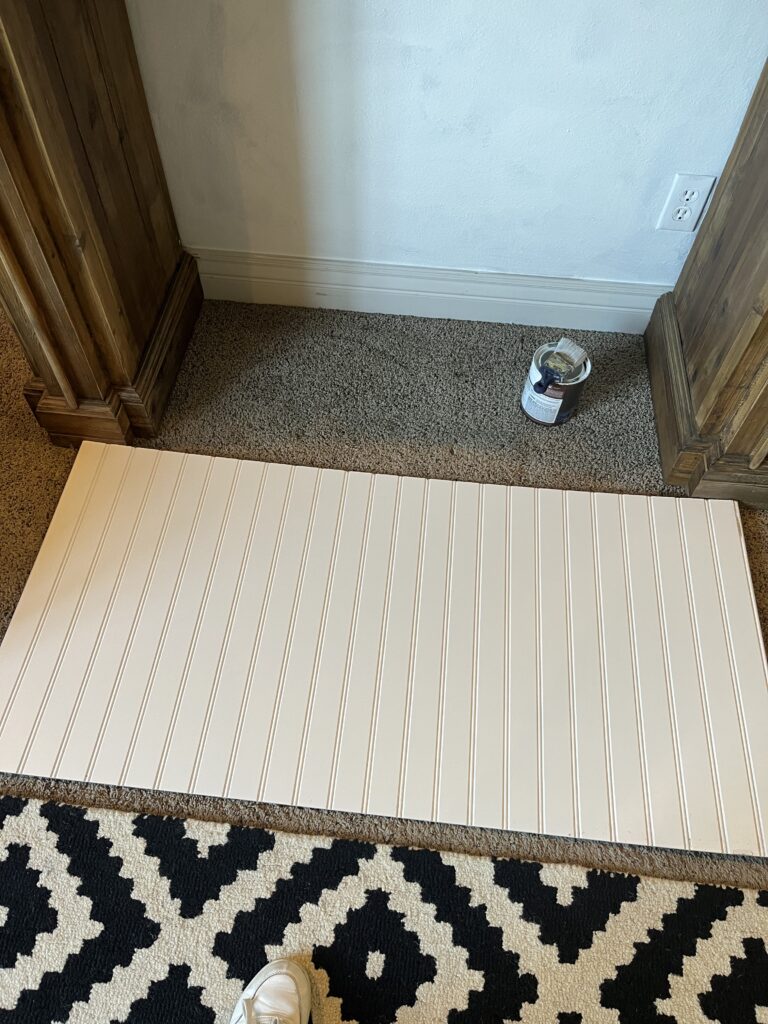
The first step was to paint the background of the wall white. You could totally grab a piece of plywood, paint it white and stick it behind the actual frame. If you are in a rental or aren’t sure if you’ll always want a fireplace in this exact spot, that would make it easily removeable. I am not planning on going anywhere and I LOVE this fireplace so much that I just went ahead and painted the wall. I slid a piece of beadboard underneath the surround; this helps make it look more built-in. And a bonus for me- this had just been collecting dust in our garage.
Second Step

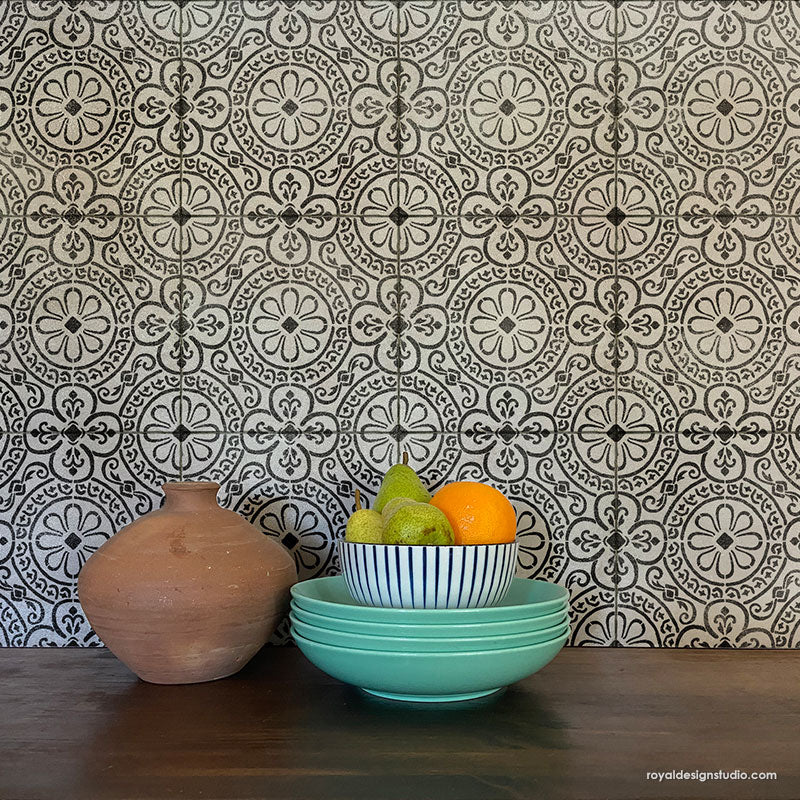
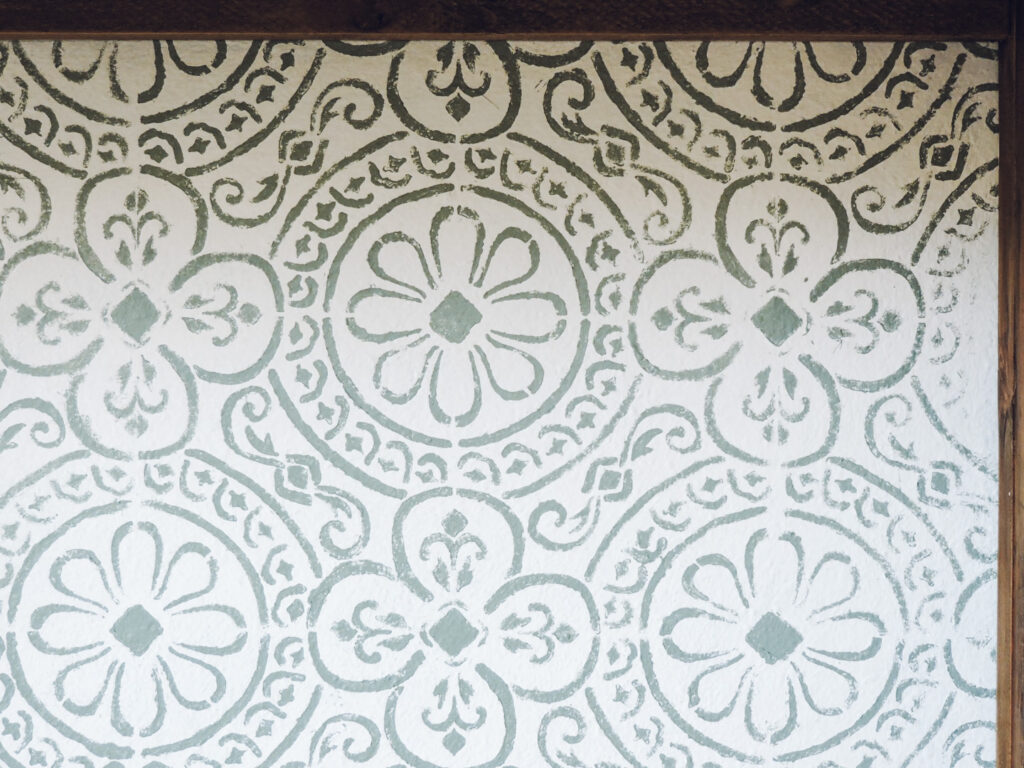
After a few more coats of white paint I was ready to stencil! I typically buy my stencils from Royal Design Studio; they have endless options and the quality is great. Picking one was not easy but in the end I chose the “Bixby Style Stencil” in small for under $30.
There are a few ways you can apply your paint to the stencil- my favorite way is a brush. I find I have more control that way over using a roller or a sponge. Be sure to have a couple paper towels on hand-you want a very little amount of paint on your brush. Here is a video of me applying the paint:
Step Three
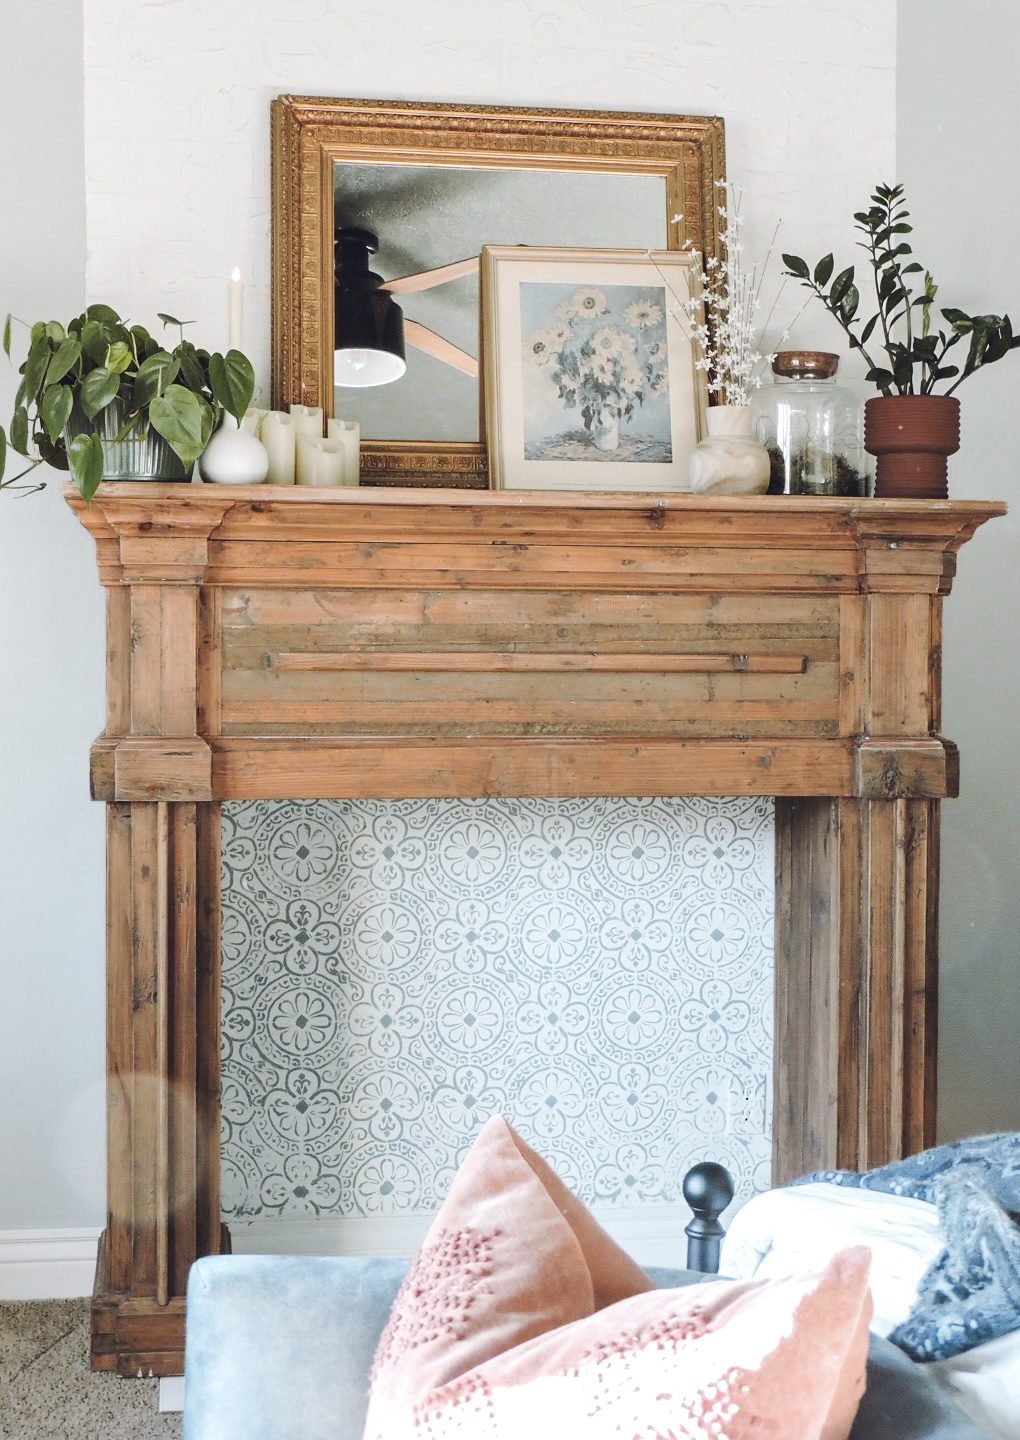
Stand back and admire the finished result!
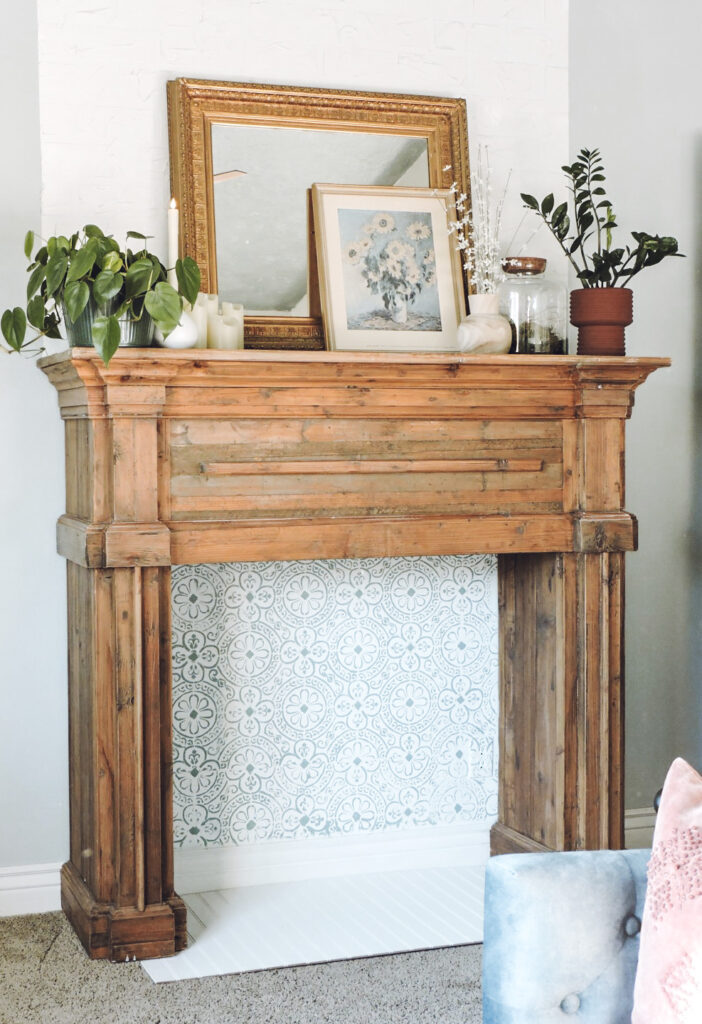
This stenciled tile project turned out SO good in my opinion! I LOVE the character and charm it adds to this space. I still have tons of more ideas for our bedroom but this is a great start!